

Adventures in Bag making - A lollipop flower tote
/
With the football World Cup on our TV screens day and night, I have been surprised how the pictures from Moscow have stirred so many happy memories. We lived there with our three young children from 2002 - 2006 on an overseas posting and it was time of extraordinary experiences for us all. I have been so happy to see the images of Moscow and hardly dare hope that England will do do well.... but maybe.....
Anyway, to the matter in hand. Recently I bought a couple of beautiful little Japanese embroidery books on Etsy and was totally inspired by them to make an embroidered bag. I knew before I began that the embroidery would be the easy bit for me....the bag making...not so much, but I also wanted to challenge myself to make something a bit more upmarket than the few patchwork boho type bags I have made before. I am not a big bag maker at all, but I do love handmade fabric bags and have made a few simple ones before. For a few months I have been sitting on Anna Graham's Caravan Tote pattern, after seeing so many fantastic images on instagram of it. It seemed well out of my comfort zone and a couple of times I have pulled it out and put it back for another day. Meanwhile, I also have a lovely, very easy tote pattern from 'Sotakhandmade' on Etsy and have made it recently to use my 'hashtag explorer' embroidery design. On trying to decide what to do this time, I wasn't brave enough to tackle the Caravan Tote full on, but thought I might try and incorporate a new element from it and combine the two patterns. As I wanted to use some embroidery as well, I figured this was the way forward...baby steps and well, okay, a bit chicken on my part. I have been gathering the supplies for this project for a while and just a quick word about tools - having the right tools does make life easier. I found my hole punch to be invaluable and this little popper kit from amazon is perfect for putting the poppers in - well almost - hence the pliers (I had to wrench one out as I did it wrong!).

For the materials, this time I decided on Denim (I'm a jeans girl) and some of my very favourite aqua yarn dyed essex linen for the top section. I thought that I would try a more structured embroidery design and decided on lollipop flowers evenly spaced in rows. The centre of the flowers are colonial knots and then lots of lazy daisy petals. A stem of satin stitch and simple twig like stitches for the leaves. In a pretty mixture of pastel pinks and blues and gold and a dash of forest green it looked so charming when it was done, I was a little apprehensive about constructing the bag and indeed it was not without it's problems.

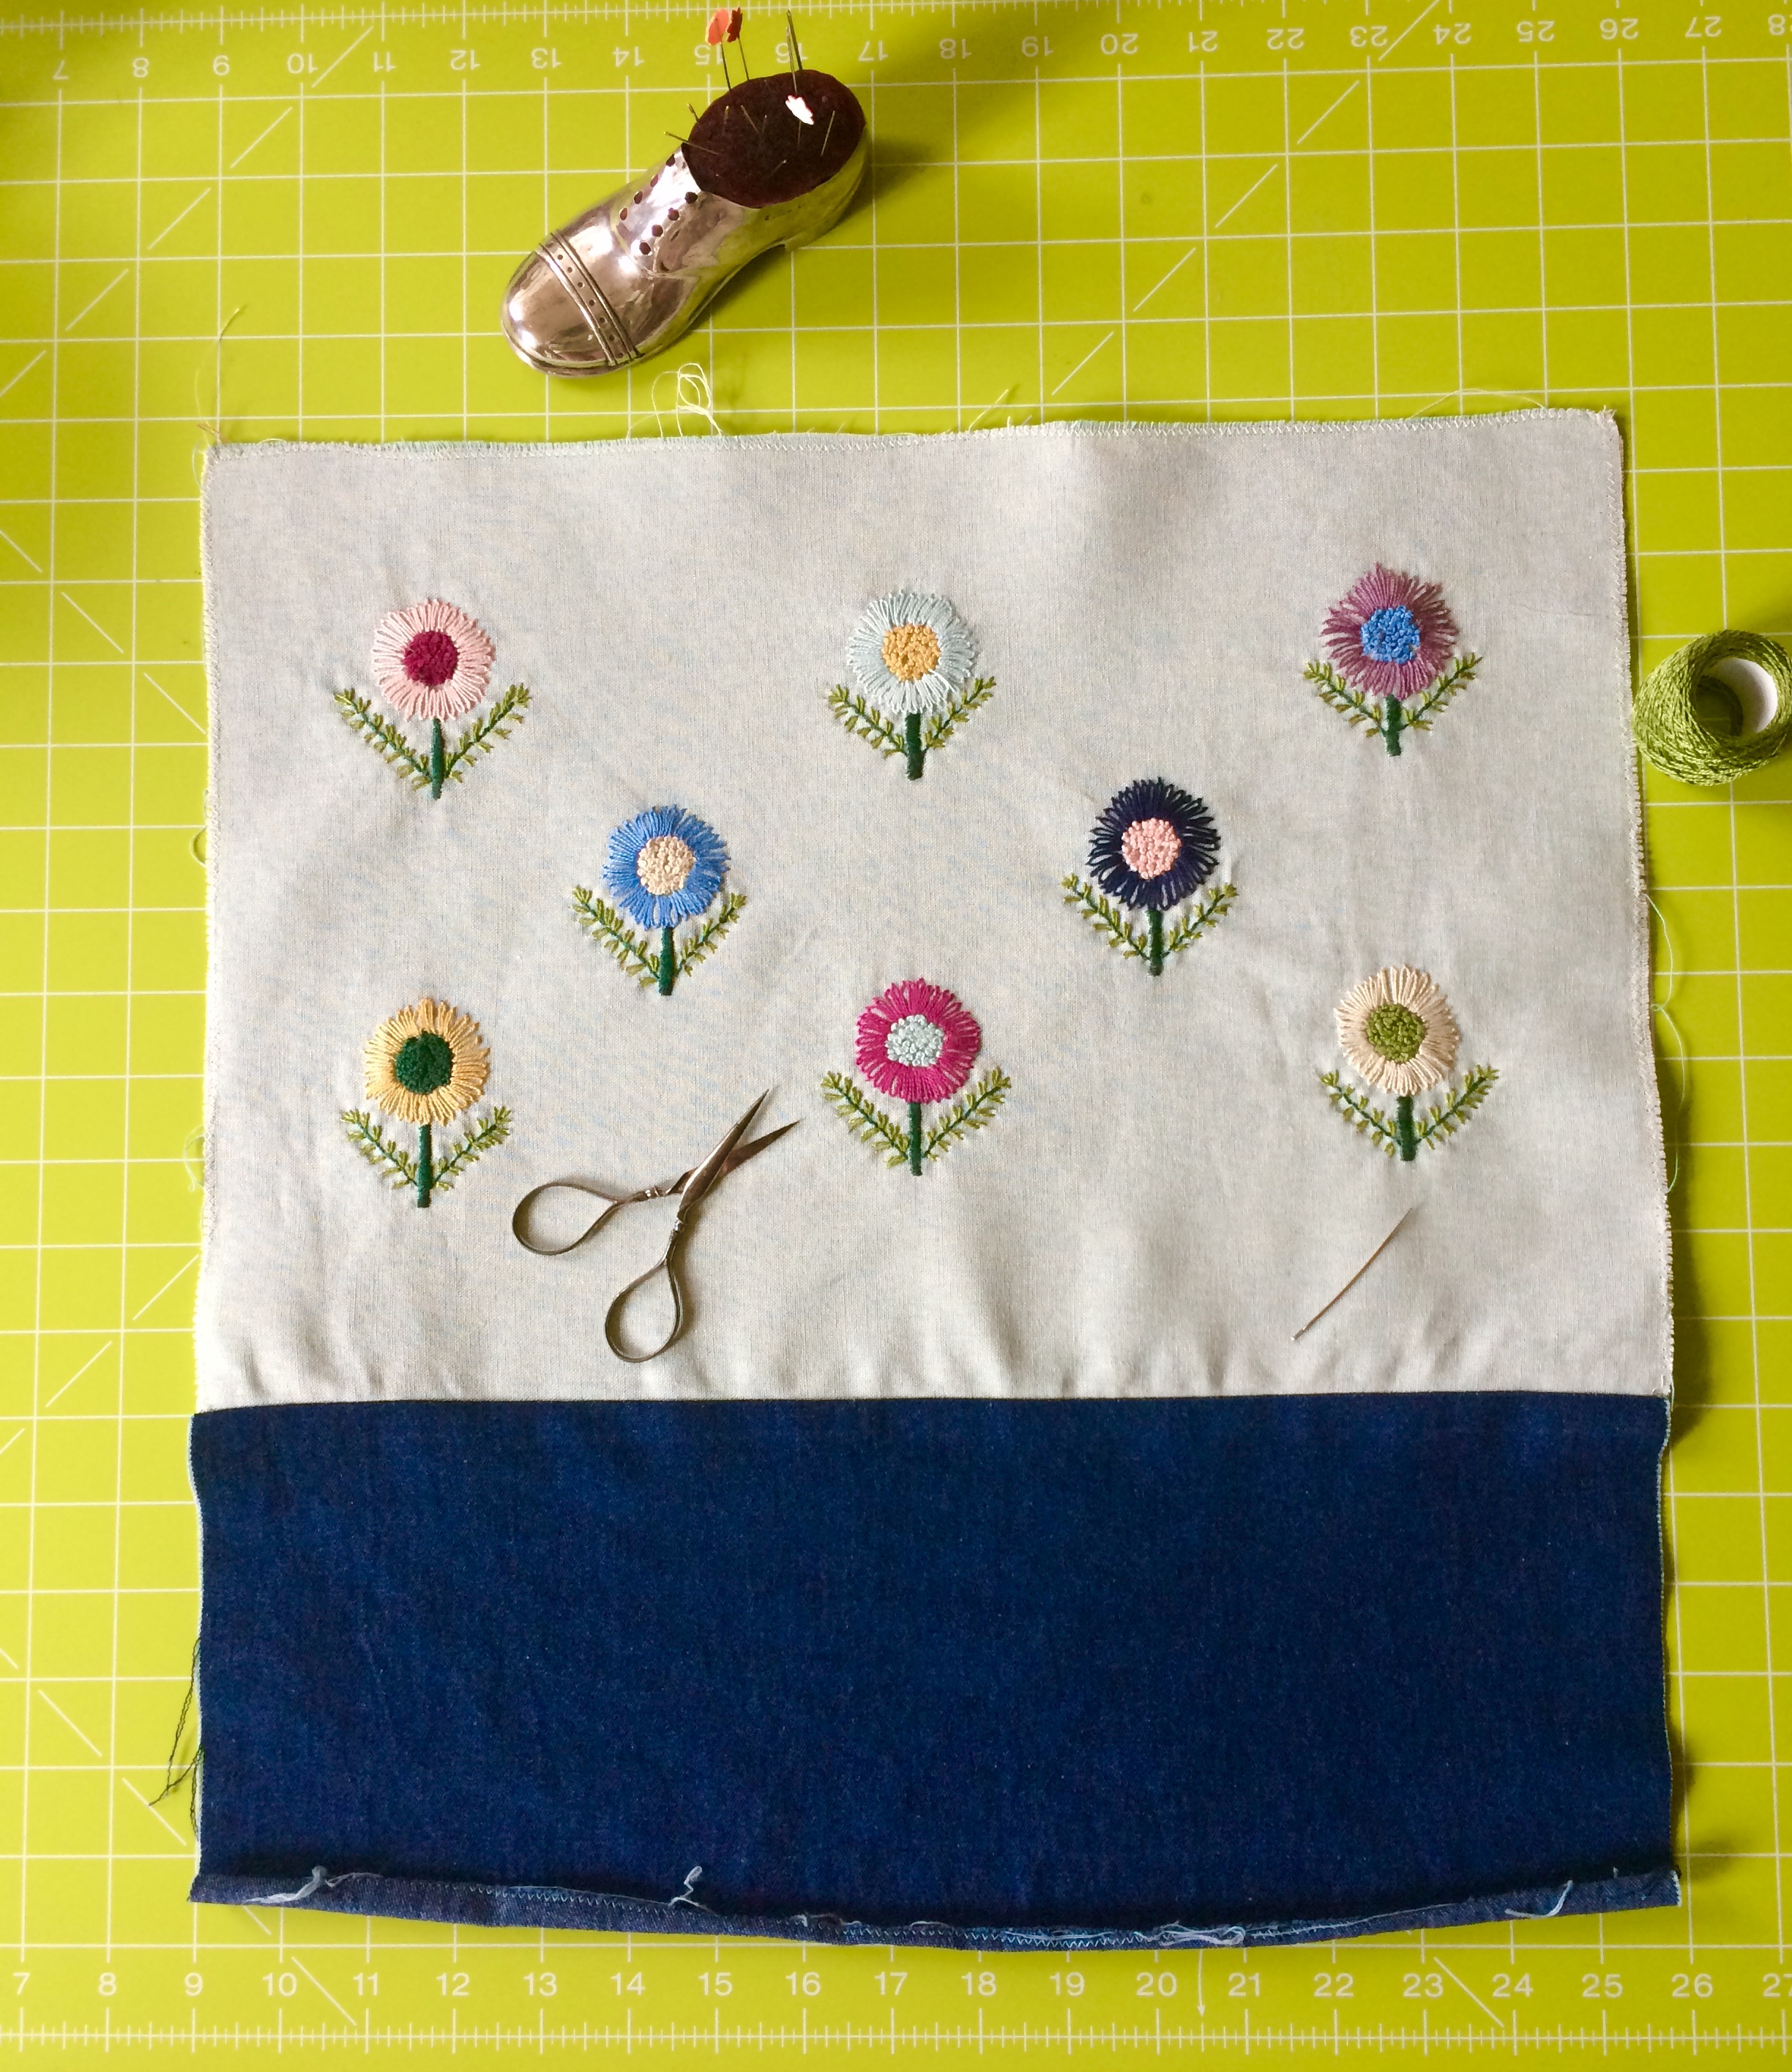
First of all stabilisers are a bit of a minefield for me. I backed the linen with a fusible woven interfacing before embroidering and this was fine, but for the bag itself I wanted something fairly firm as linen and lightweight denim are not going to support themselves. I hadn't actually intended to buy such lightweight denim (the internet might be wonderful, but it can't really help you with the feel of a fabric) and wouldn't recommend it as the edges kept curling over no matter how many times I pressed them. I watched some youtube videos about this subject and took the plunge and bought some Peltex 71F fusible on one side. It seemed to iron on just fine at the beginning and everything looked smooth and firm, but as I manhandled the bag to construct it, some bubbles and creases started to emerge. I felt this was probably due to the lightweight fabric I was using in the first place - I think in future, heavier weight upholstery fabrics are probably a better choice for bags in general. Anyhow, still I could iron it all out along the way and it is definitely a flexible but firm stabiliser.
So time to have a go at making an external pocket with a flap and popper fastenings. I meticulously followed Noodlehead's instructions - it worked well enough. I did have a bit of problem with keeping my machine stitching straight though and had to correct one bit. I think this was due to the curly seam allowances, despite my attempts with spray starch.

It was worth testing out thread weights and stitch sizes on a piece of scrap first and I ended up using YLI quilting thread in my machine to give a heavier stitch and it looks ok. Whenever I am sewing with a contrasting thread, I hold my breath and this was no exception. As you can see, there are issues, but when the bag was finally finished, they seemed much more inconsequential than they did at this point.

For the handles, I had ordered a couple of sets of leather handles from Anna Graham's Noodlehead website. Having waited a while for them to come from the US and had to pay customs duty on these, I was not sure if they would be worth the hassle, but they are really gorgeous and having bought a light and a darker pair, I chose the lighter coloured ones for this project. My sewing machine had no problem with stitching through them at all.

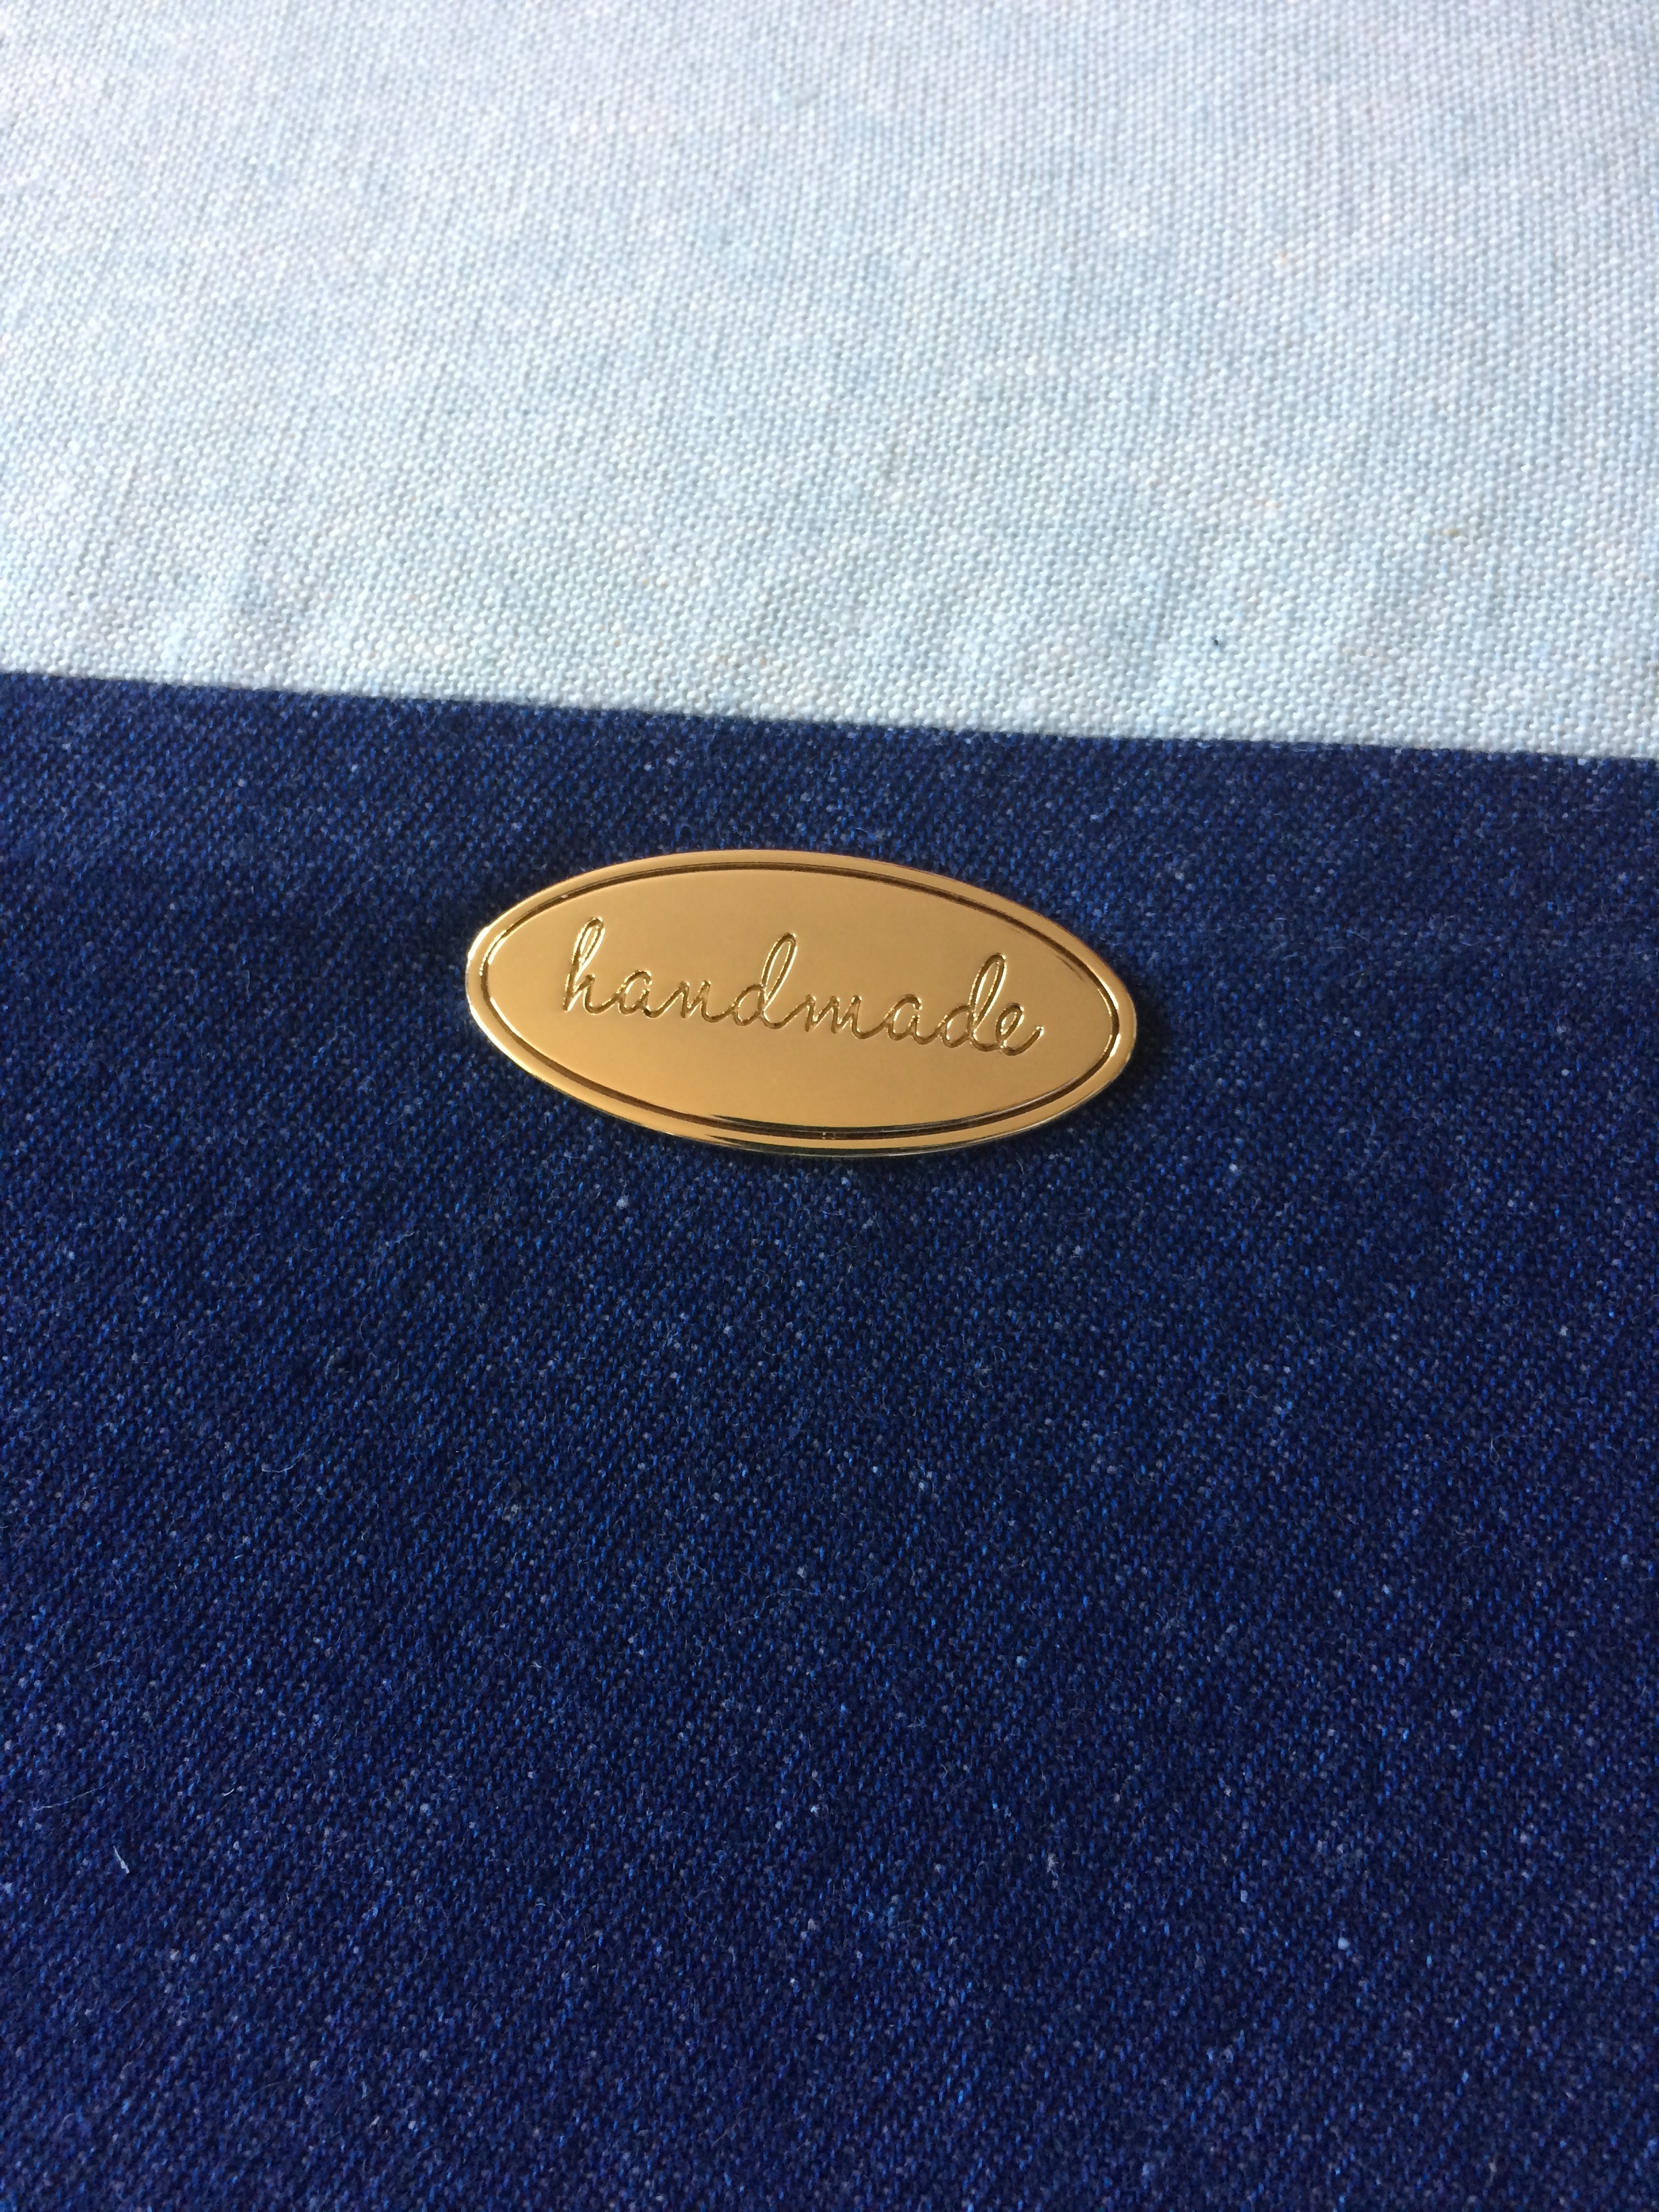
I had also splashed out on some Emmaline bag hardware. This is available from sewhot.co.uk and is really a worthwhile purchase to make your bag look pro. I added feet on the bottom of the bag and a lovely oval metal tag to the front of the bag.

Finally I put a little denim tag on the rim of the bag, because.... well you know.... a girl has got to have a tassel on her bag.....

The lining is Tilda fabric, overflowing with shabby chic roses and with a very vintage feel - it sort of blends in with my lollipop flowers. I had another problem at this last hurdle though, the Peltex in the seam allowance around the rim was too bulky and made pressing the top edge difficult and top stitching it even more difficult. I was really not at all happy with the final piece of stitching as the bulkiness made the needle swerve and the stitching line wiggle. On reflection it would be better to have the final edge of the Peltex on the turn, instead of somehow having to fold it over a little. Another lesson learned. Actually I learned quite alot in this process: probably to use heavier weight fabrics in bag making in future and to leave all the seam allowances clear of stabiliser as this adds a lot of bulk. Having the right tools makes a difference and adding some good quality bag hardware makes the project look really professional. Also I think I should have added another row of flowers so that the embroidery went down closer to the join with the denim. Don't wear nail polish - it will get ruined and drink lots of herbal tea to steady the nerves. In the end, the fact that this bag isn't either perfect or too precious means I can be relaxed about using it and I like that idea.


Despite it's flaws (and perhaps no one else will really notice them so much) it is a very pretty bag indeed. I'm off to Copenhagen and Stockholm for a few days now, so travel posting coming up next time.
Enjoy the sunshine, Ruby x
useful links:
https://www.etsy.com/uk/shop/sotakhandmade
https://www.sewhot.co.uk
