

Making a freestyle garden needlepoint box cover
/This is a lockdown project if ever there was one!!! I actually can’t believe it is finished and I can’t believe how pretty it is either. It has been a real journey over the past few months and it has kept me company in the kitchen beside the Aga on chilly autumn days and opened up a whole new world of possibilities to me. My whimsical…free style… garden needlepoint box …. I am just so proud of this and feel a new heirloom has been born.

A while ago, when lockdown started way back in March, I felt immediately it was going to be a time to try some new things in the sewing room and I knew that I had one thing just dying to jump out of the cupboard at me. I had bought some tapestry supplies with the idea of making the needle point pincushion in Anna Maria Horner’s needleworks notebook. I made this and fell totally in love with an age old craft that I had thought boring and tired, but discovered that it was anything but. You can read about this here….

Spurred on by the success of this, I turned my attention to a charming wooden sewing box that has long been in need of a cover. My hubby bought me this in the Cotswolds about 20 years ago and for a long time it had a patchwork cover on, which I soon outgrew. I always knew that a box as lovely as this needed something all together more spectacular, almost certainly in needlepoint, but for years, I shunned this craft as boring and repetitive and the box stood in the corner rather sad and neglected (to my shame). Anyhow, having realised that in fact there is no restriction on colour or texture with needlepoint, I decided to have a go at a free style garden sampler and see where it led and if it could be a possibility for the box cover.

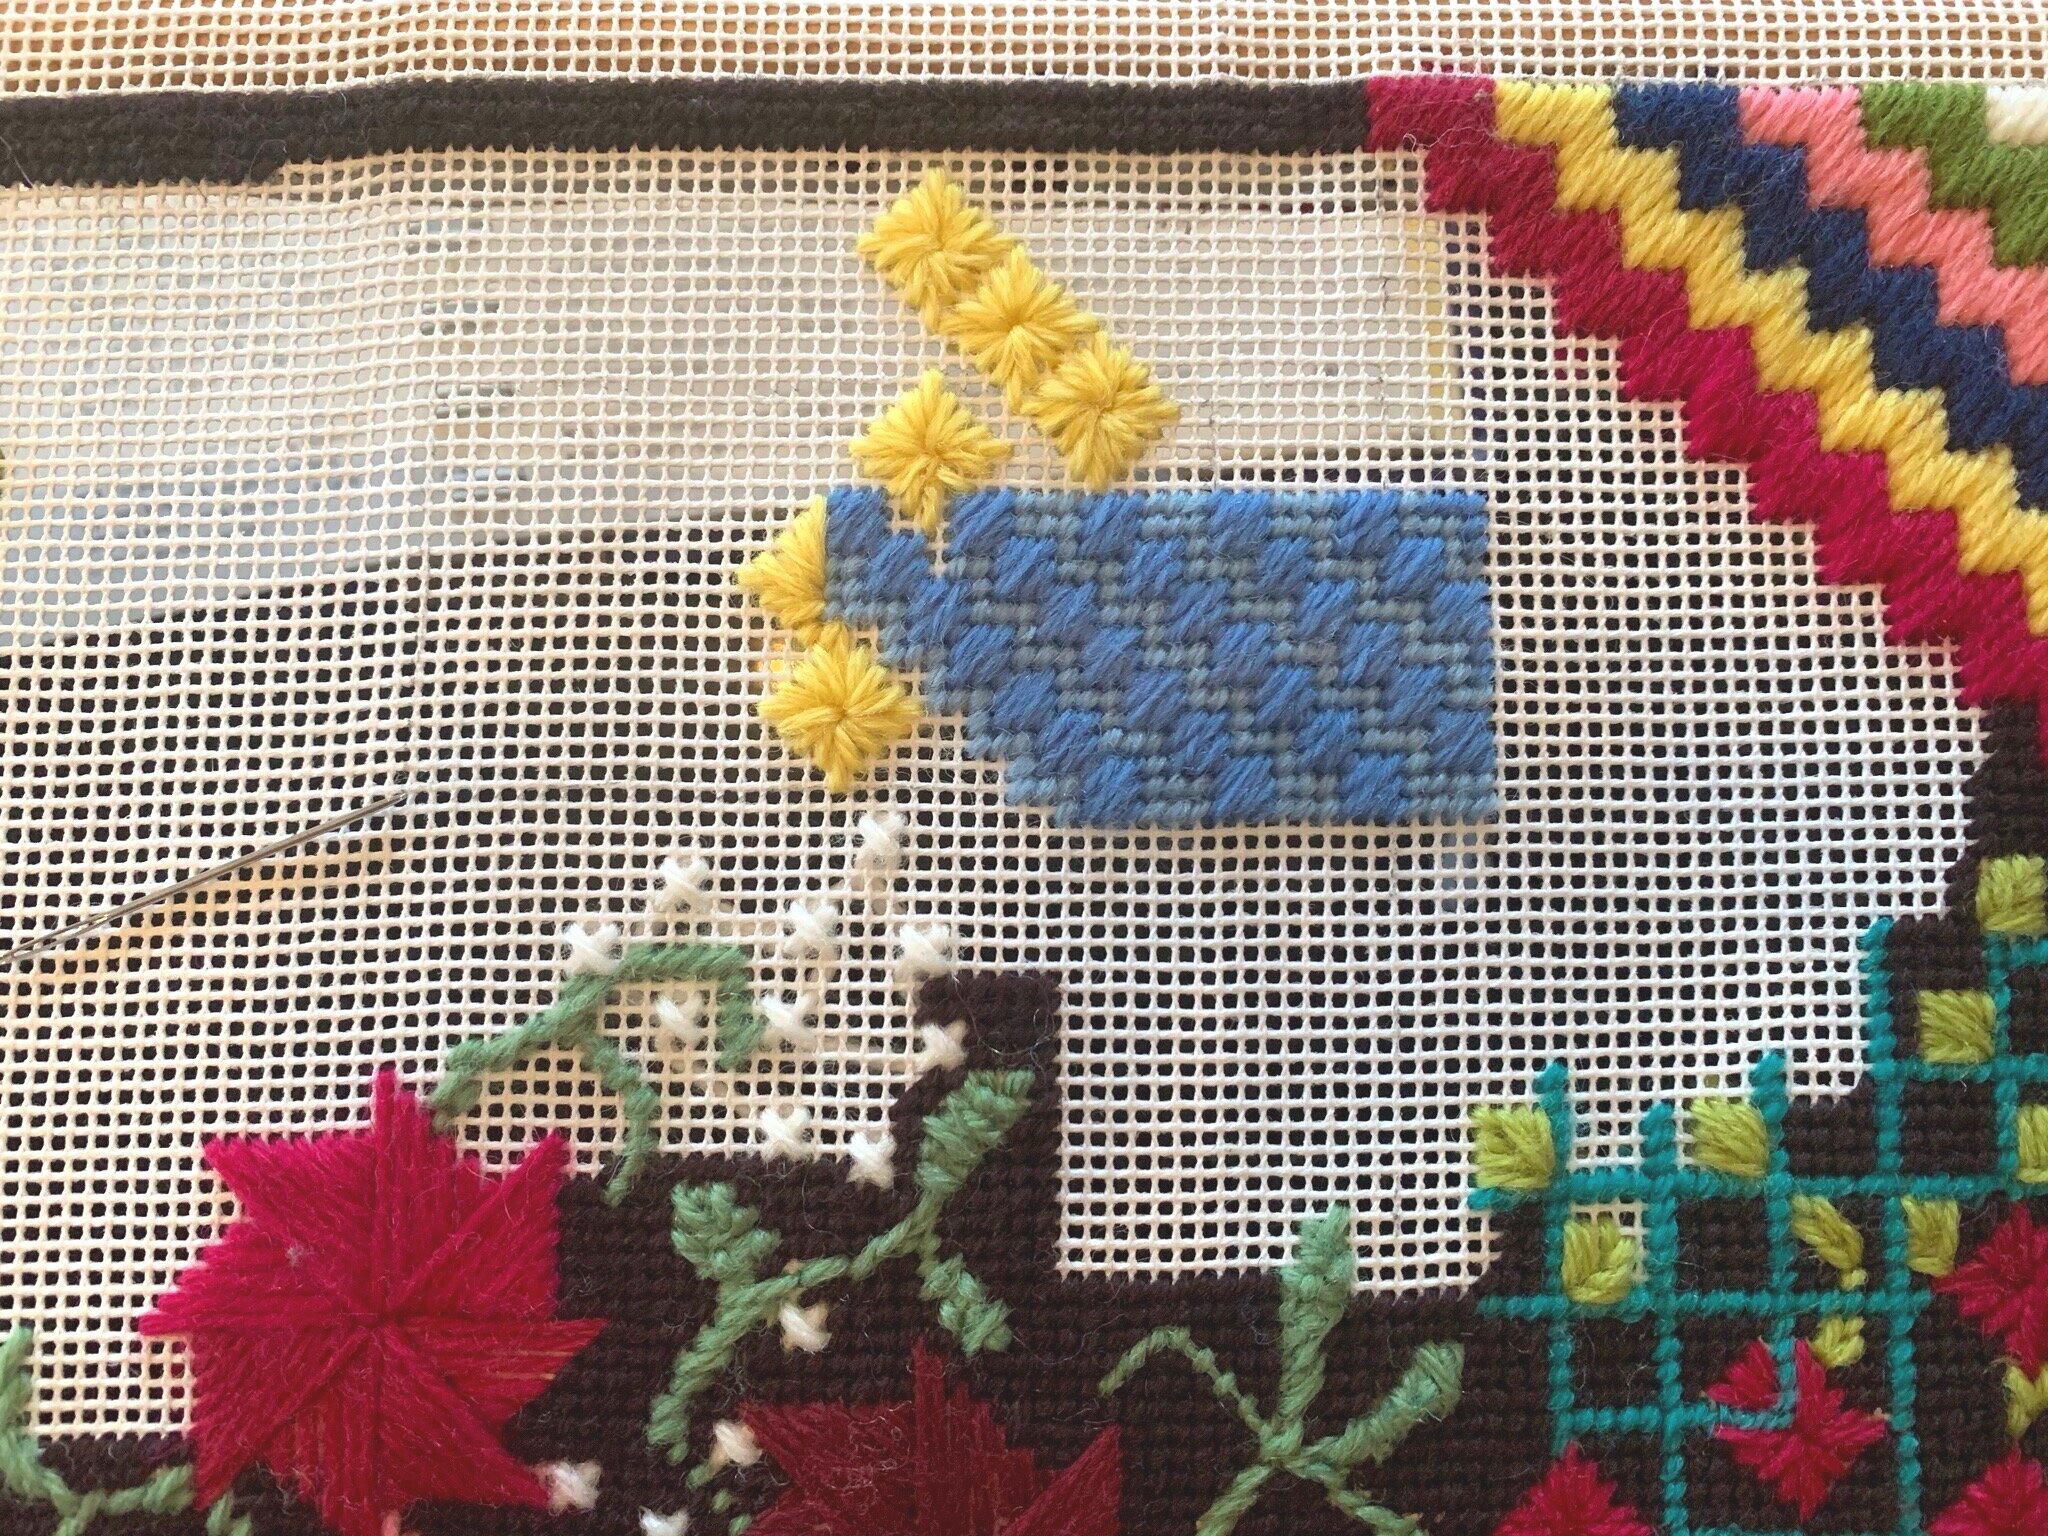
I watched Anna Maria Horner’s fantastic class on CreativeBug.com again and this was my starting point. I wanted to try out all the stitches that she demonstrated and found some of her tips about starting up really helpful. I used a wooden frame to work on this time because I knew the canvas could stretch out of shape easily and found it more manageable to see the whole picture as it developed. First of all, I marked the size and decided to use the Byzantine stitch in random bright colours to frame the piece. This stitch is very quick to work and looks a bit ‘‘Kaffe Fassett’ I think. Once this was established I just started working different motifs on the canvas in a sort of floral riot.
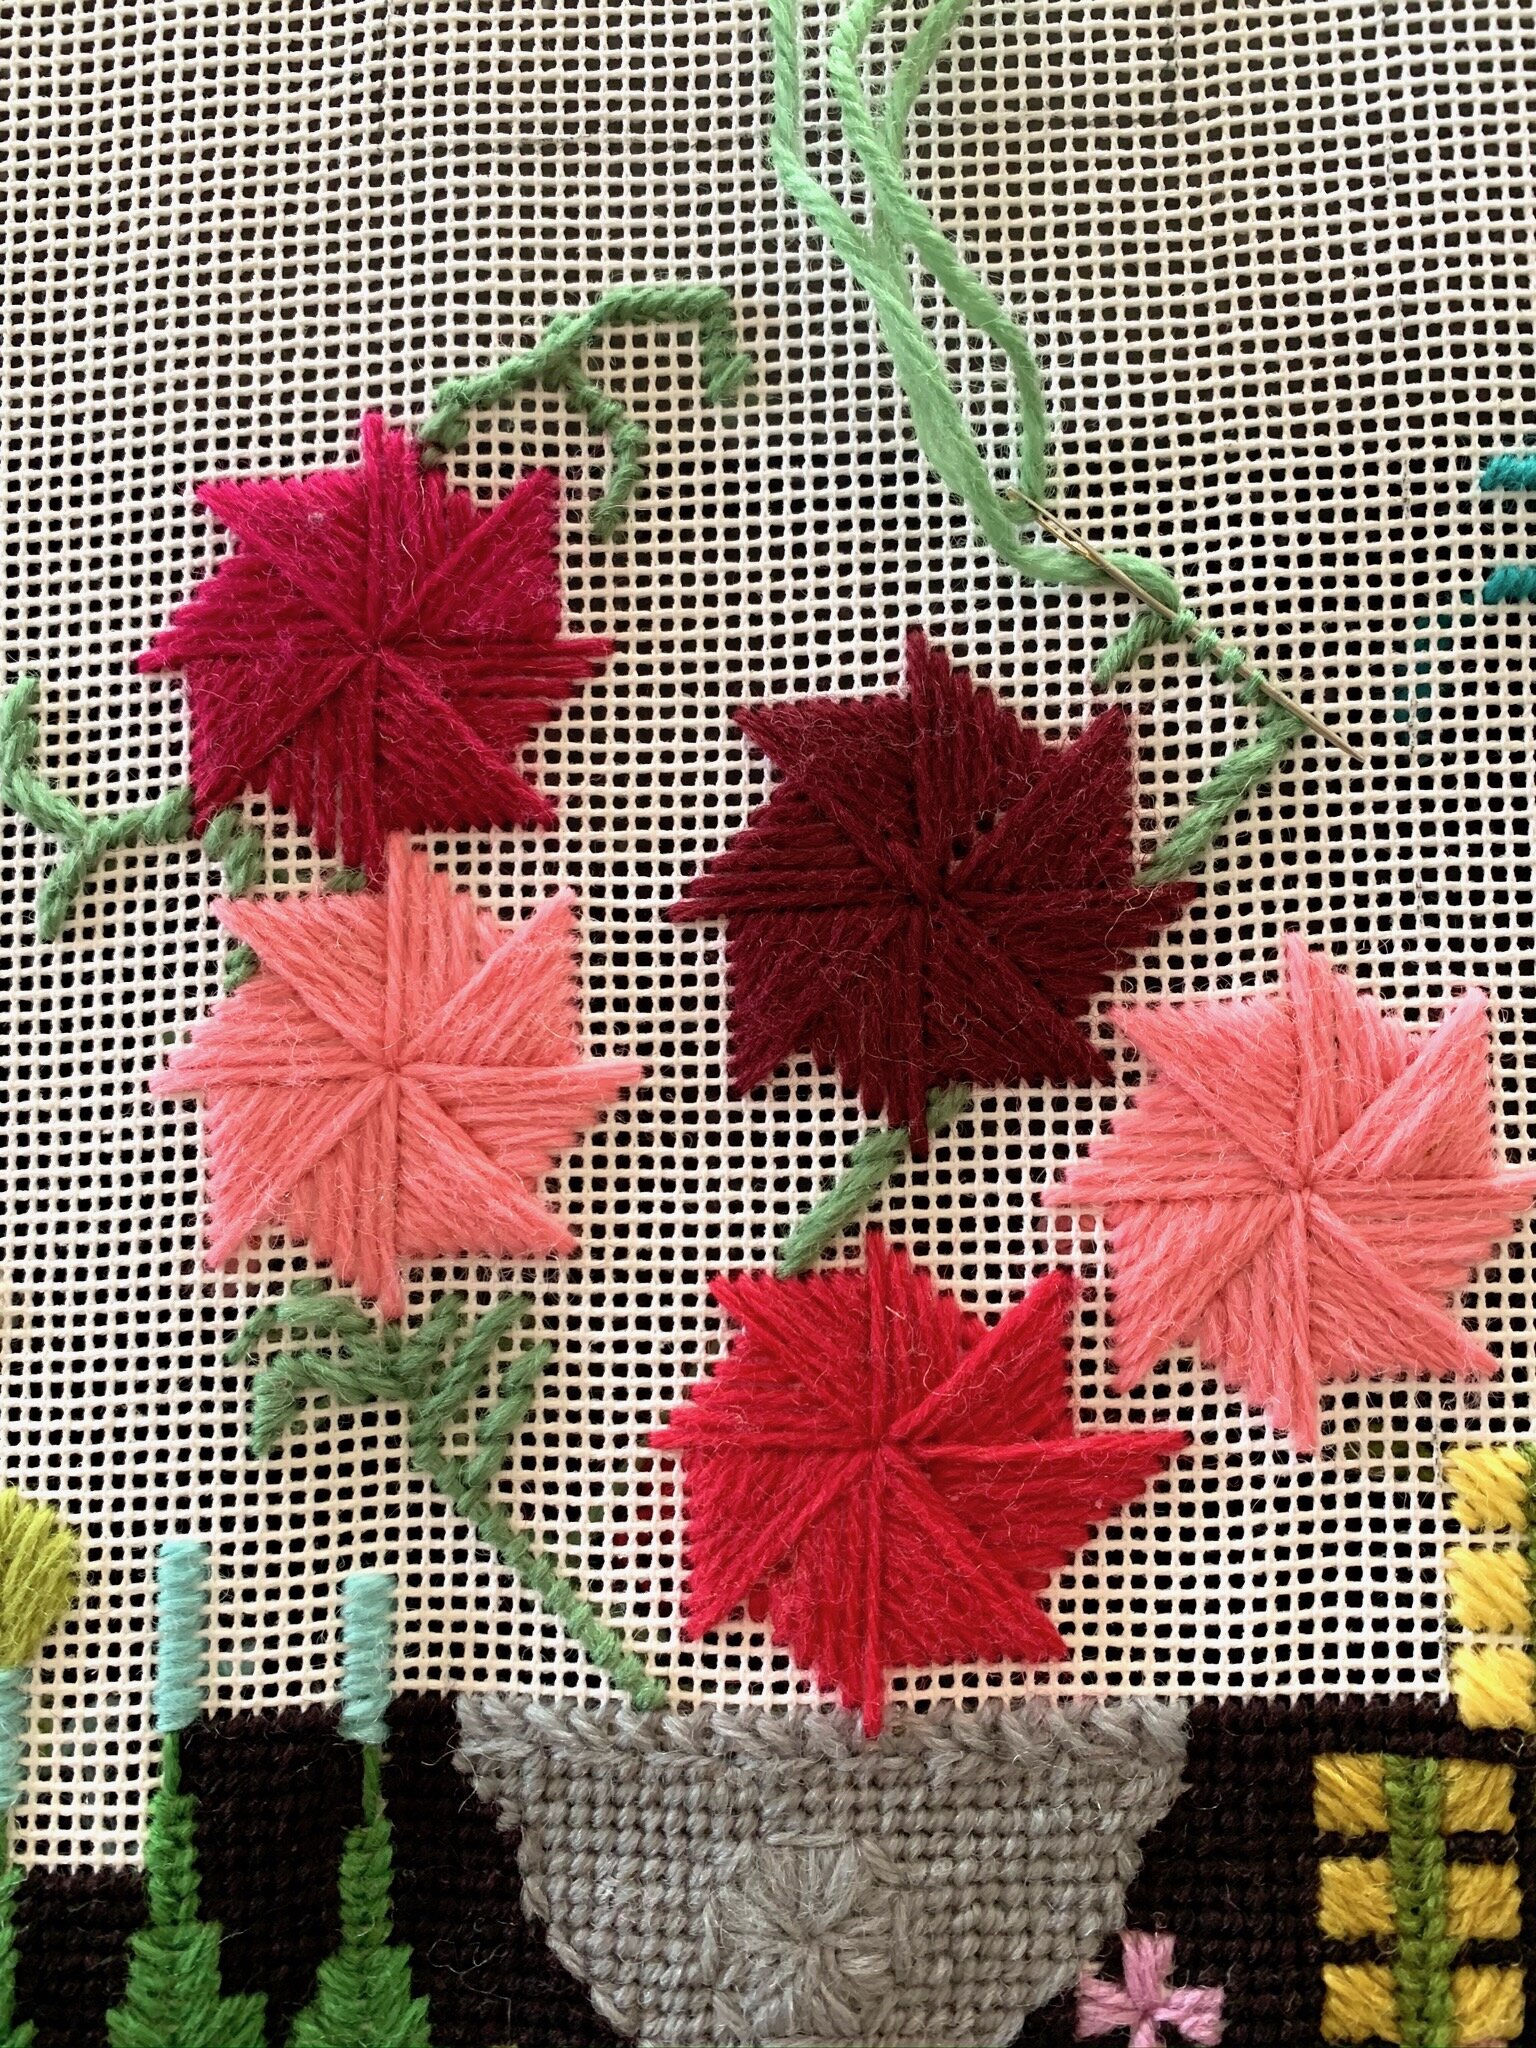
The milanese pinwheels were a great addition as they added texture and depth and work up really quickly. It started to look like a whimsical garden and I found that the ideas just flooded into my head. The great thing with something like this is just be brave and not think about linking things or having to stitch in one direction or one size of stitch - really you can do almost anything with the tapestry wool once you let the constraints of the traditional tapestry tent stitch go. In fact needlepoint is a vehicle for amazing creativity and I just kept going and going.

Some key things to note are that if you have a background filler colour like I do - it is probably wise to work it in as you go along. This is mainly because you don’t want to be left with hours of tent stitch to do at the end but also because it adds to the perspective of your design. When something is freestyle like this, it’s fun to see it evolve and the dark background shows you how it is all melting together and helps to choose colours and patterns as you go along.
I would also really recommend these flat wooden spools for keeping your coloured wools on. It just works so well for keeping everything tangle free. They are available on amazon from EasyGraphic and they come in packets of 10 for a very reasonable price.
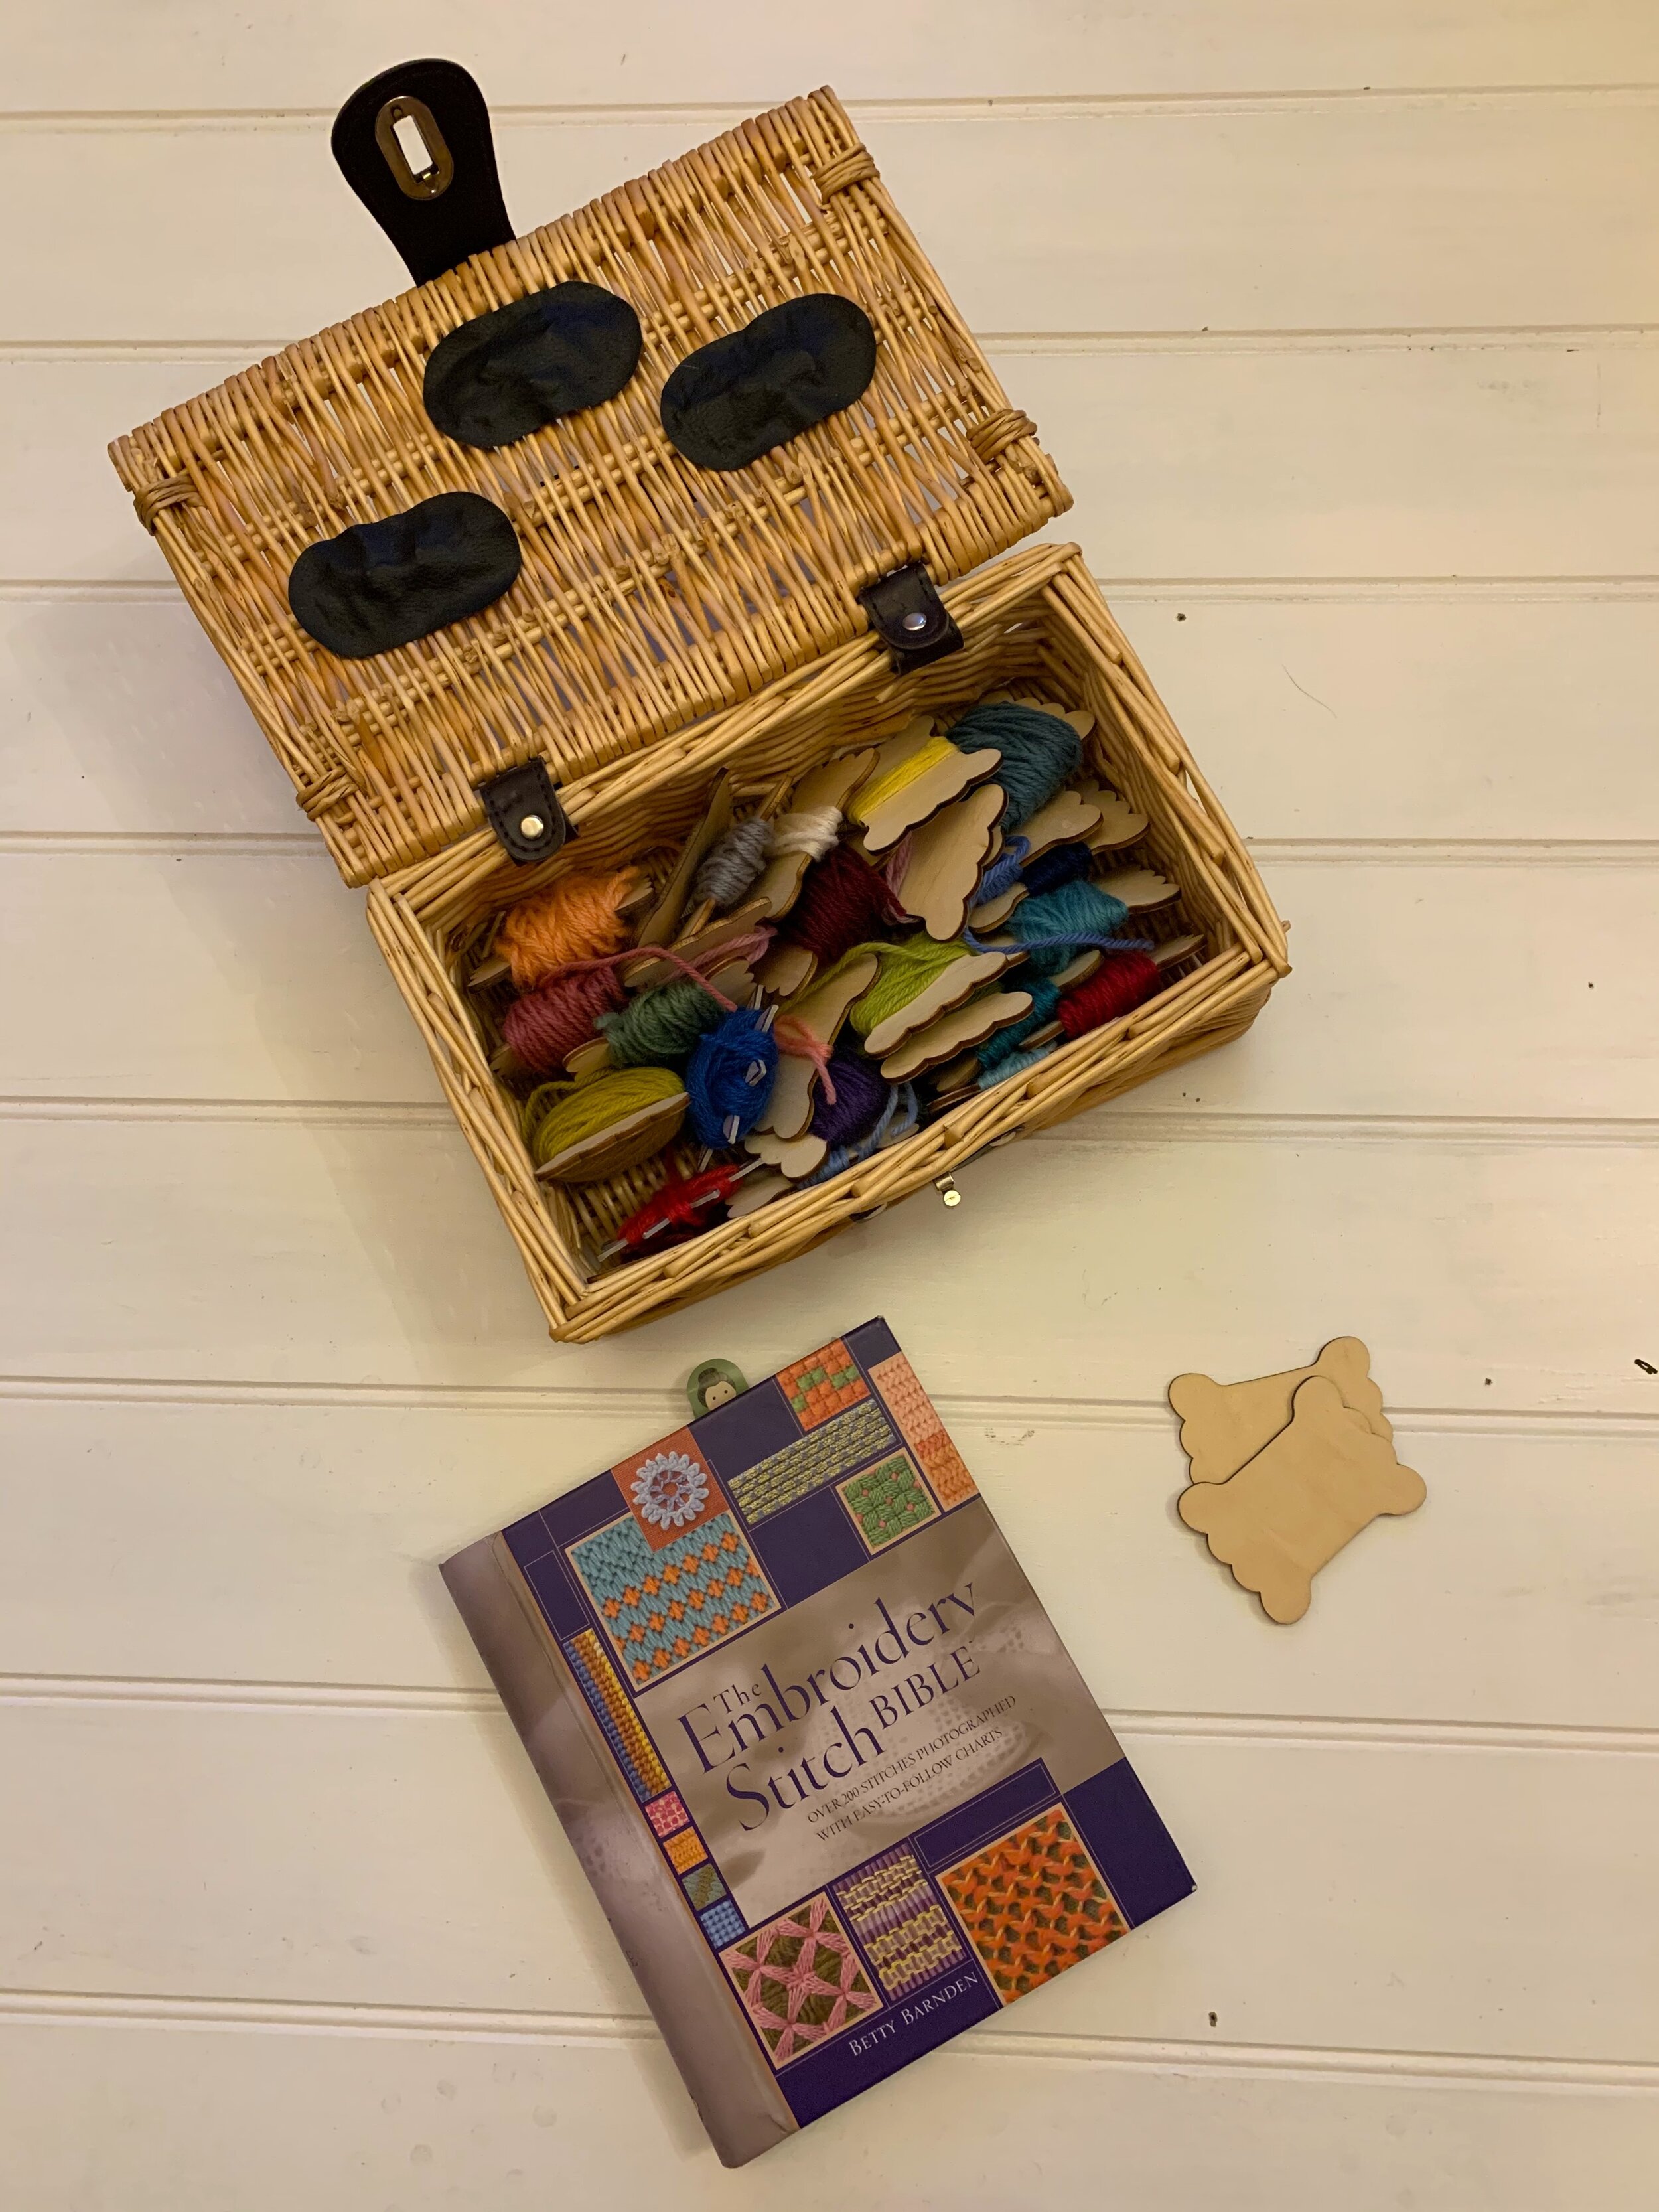
I found my Embroidery Stitch Bible invaluable as I started to get more adventurous. There is a whole section in their devoted to needlepoint stitches and they are just incredibly beautiful. I completely fell in love with these ‘architectural’ style stitches and have definitely got some ideas of how to use these in the future. The textures and patterns they make are so tactile and if you pick your colours right, the shading effects can be very exciting. I will definitely be working on these some more in the future.
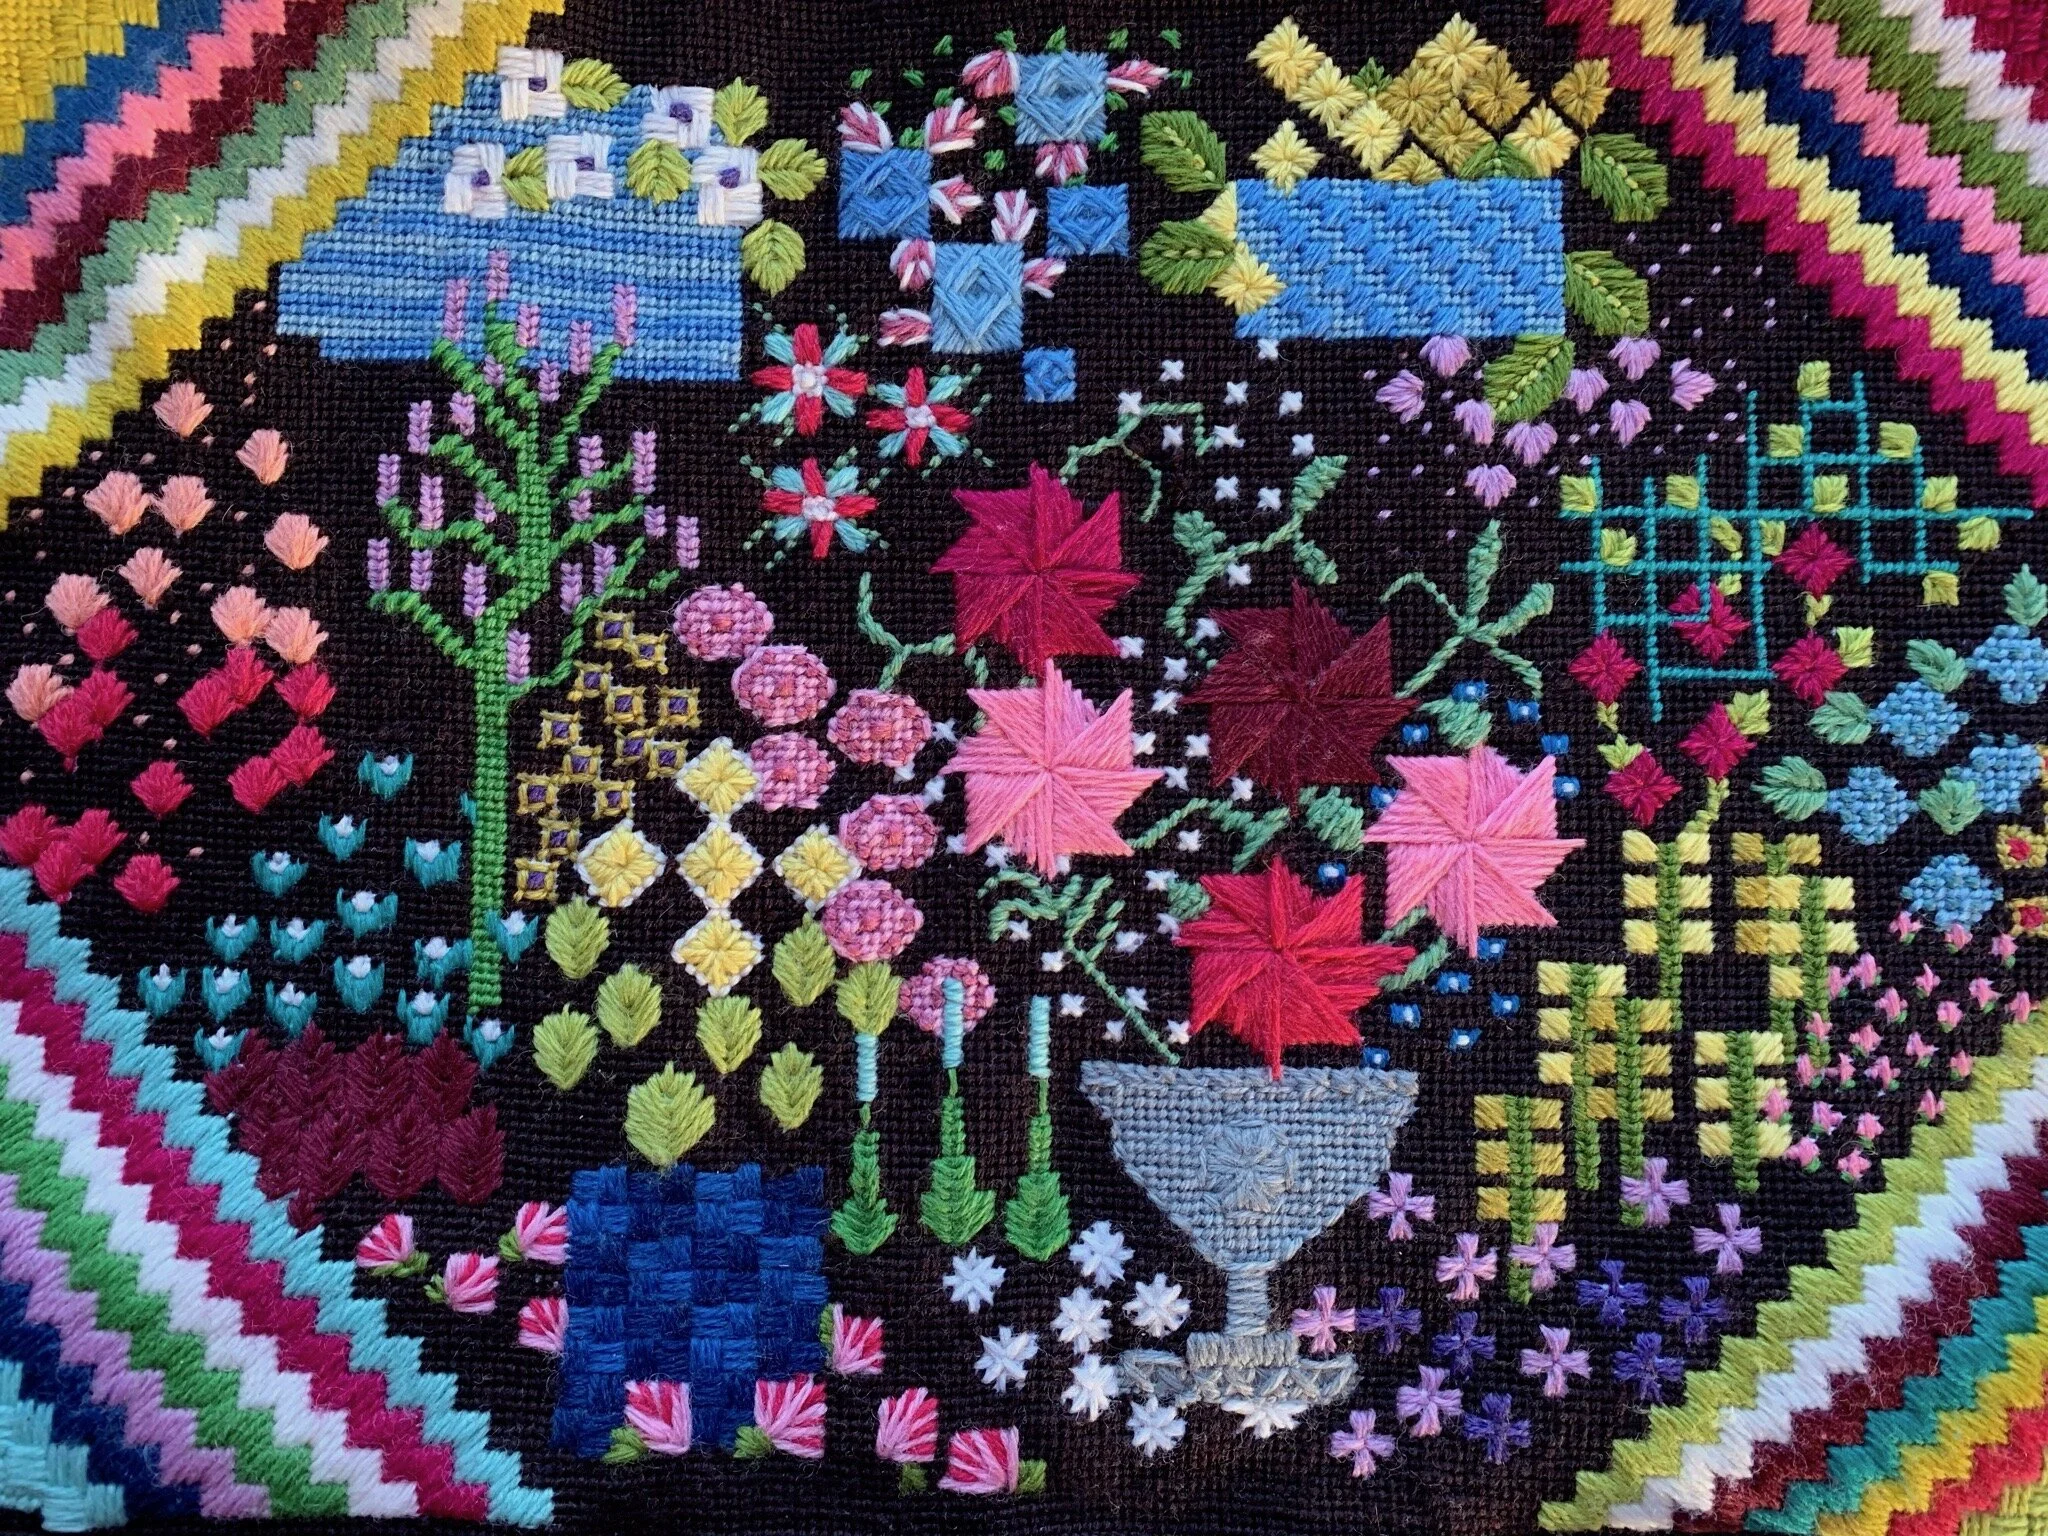
Once it was finished I had to spend a week or two adding borders around the edge and this was a bit of a drag, but I knew it was going to be worth it and when it was finally on the box - I was just blown away by the whole project. On the underneath I added a label which says that it was made during the Pandemic of 2020. Perhaps one day in a 100 years time, someone will think it needs a new cover and discover it’s story.


It has taken time, but beautiful handmade things always do. It will be forever known in this house as the lockdown box but at least that is something good to have come out of all this Coronavirus mess. My husband and son said it was bit like doing a jigsaw puzzle and I suppose it was. This however is an heirloom and the perfect box to keep my wool and knitting projects in. I am planning to master fair isle next year!
I wish you all a very Merry Christmas and hope you can share it with loved ones, depsite everything. A big thank you to everyone who has taken the time to read my ramblings, order patterns and kits and support me on social media this year. Here’s hoping next year will so much better.
Lots of love, Ruby xxx
