

Making a Waistcoat
/
Hi everybody, it’s been a while since I last posted but I have been so busy in the sewing room with all sorts of things, but have just had nothing actually finished to write about. Today though I am really proud to show my latest adventure in dressmaking.

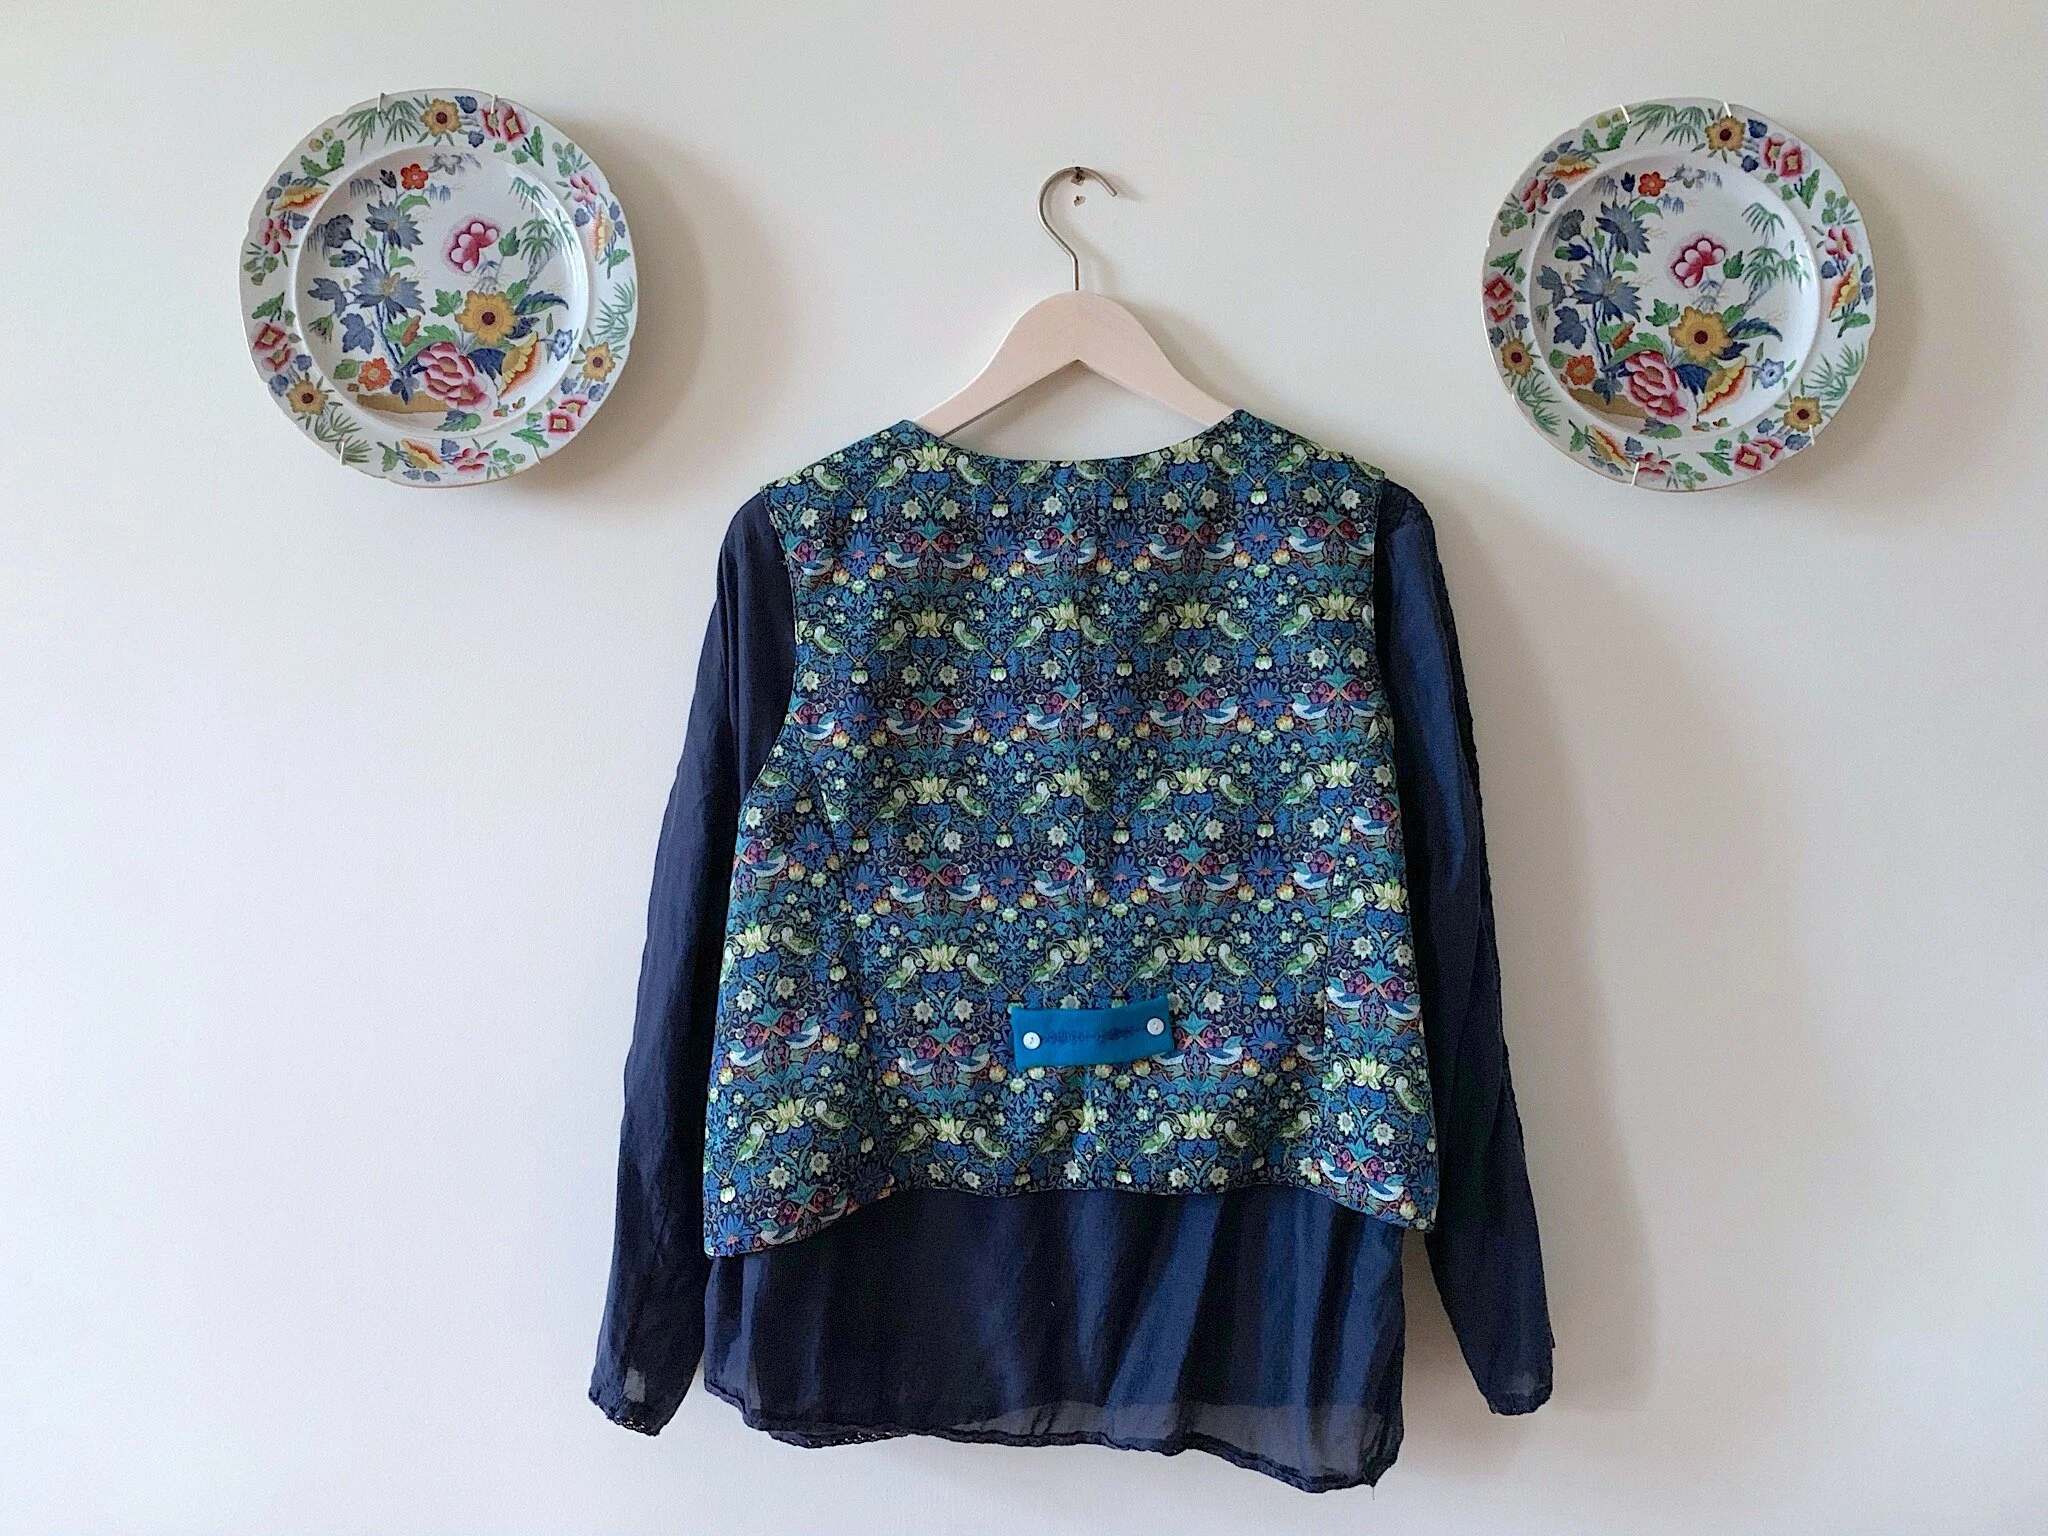
I am absolutely thrilled to see that waistcoats are making a bit of an impression on the fashion scene this autumn - not that an I am avid follower of fashion you understand - but seeing one of my favourite items given a new look in the shops is just the inspiration I needed to get going with this project. I have long been a fan of the beautiful clothes of ‘Cabbages and Roses’ but they are very high end and that vintage Laura Ashley vibe that haunts my mind always rebukes me for being lazy and not making more things myself. Having coveted the lovely linen waistcoat that had pale stripes and tiny little buttons all down the front, I determined to see what I had in my stash, that I could use to try and make one. As it happened I have some gorgeous ‘Strawberry Thief’ print fabric by Liberty (surprise … suprise) and a piece of beautiful turquoise wool fabric that is left over from a project over 5 years ago. I knew I didn’t have enough wool fabric for the whole waistcoat so was happy to use the Liberty lawn for the back of the waistcoat as well as the lining. In fact I think using a contrast for the back is actually prettier than using a solid fabric all the way around. For the pattern I used Butterick B6745 and I chose this specifically because it had a version with a round neck which I think is really pretty if you wear a lovely ruffly white shirt underneath and is also the closest I could find to the Cabbages and Roses design.

The only alteration I made to the pattern was to curve the bottom edge a little using my french curve ruler. Whenever I start cutting out a pattern I am always a little apprehensive but with such expensive fabrics I confess I was more than a little anxious, but cutting through high quality fabrics is really just a joy once you get started and you can see the garment shaping up almost immediately. It was a dream to sew. On the last series of ‘The Great British Sewing Bee’ they made waistcoats and I saw the idea of how you make and line one, so this helped enormously and let’s be honest - there are no sleeves, gathers, zips or even hems with a lined garment like this one and I omitted the pockets because they were in the side seams, which I wasn’t keen on, so all in all how complicated can it be. It wasn’t at all. It took me just an afternoon to pretty much finish the whole thing, excepting the finishing touches of course. Here is the thing… although I was happy with how it made up, I wasn’t at all sure I liked it, but then …….

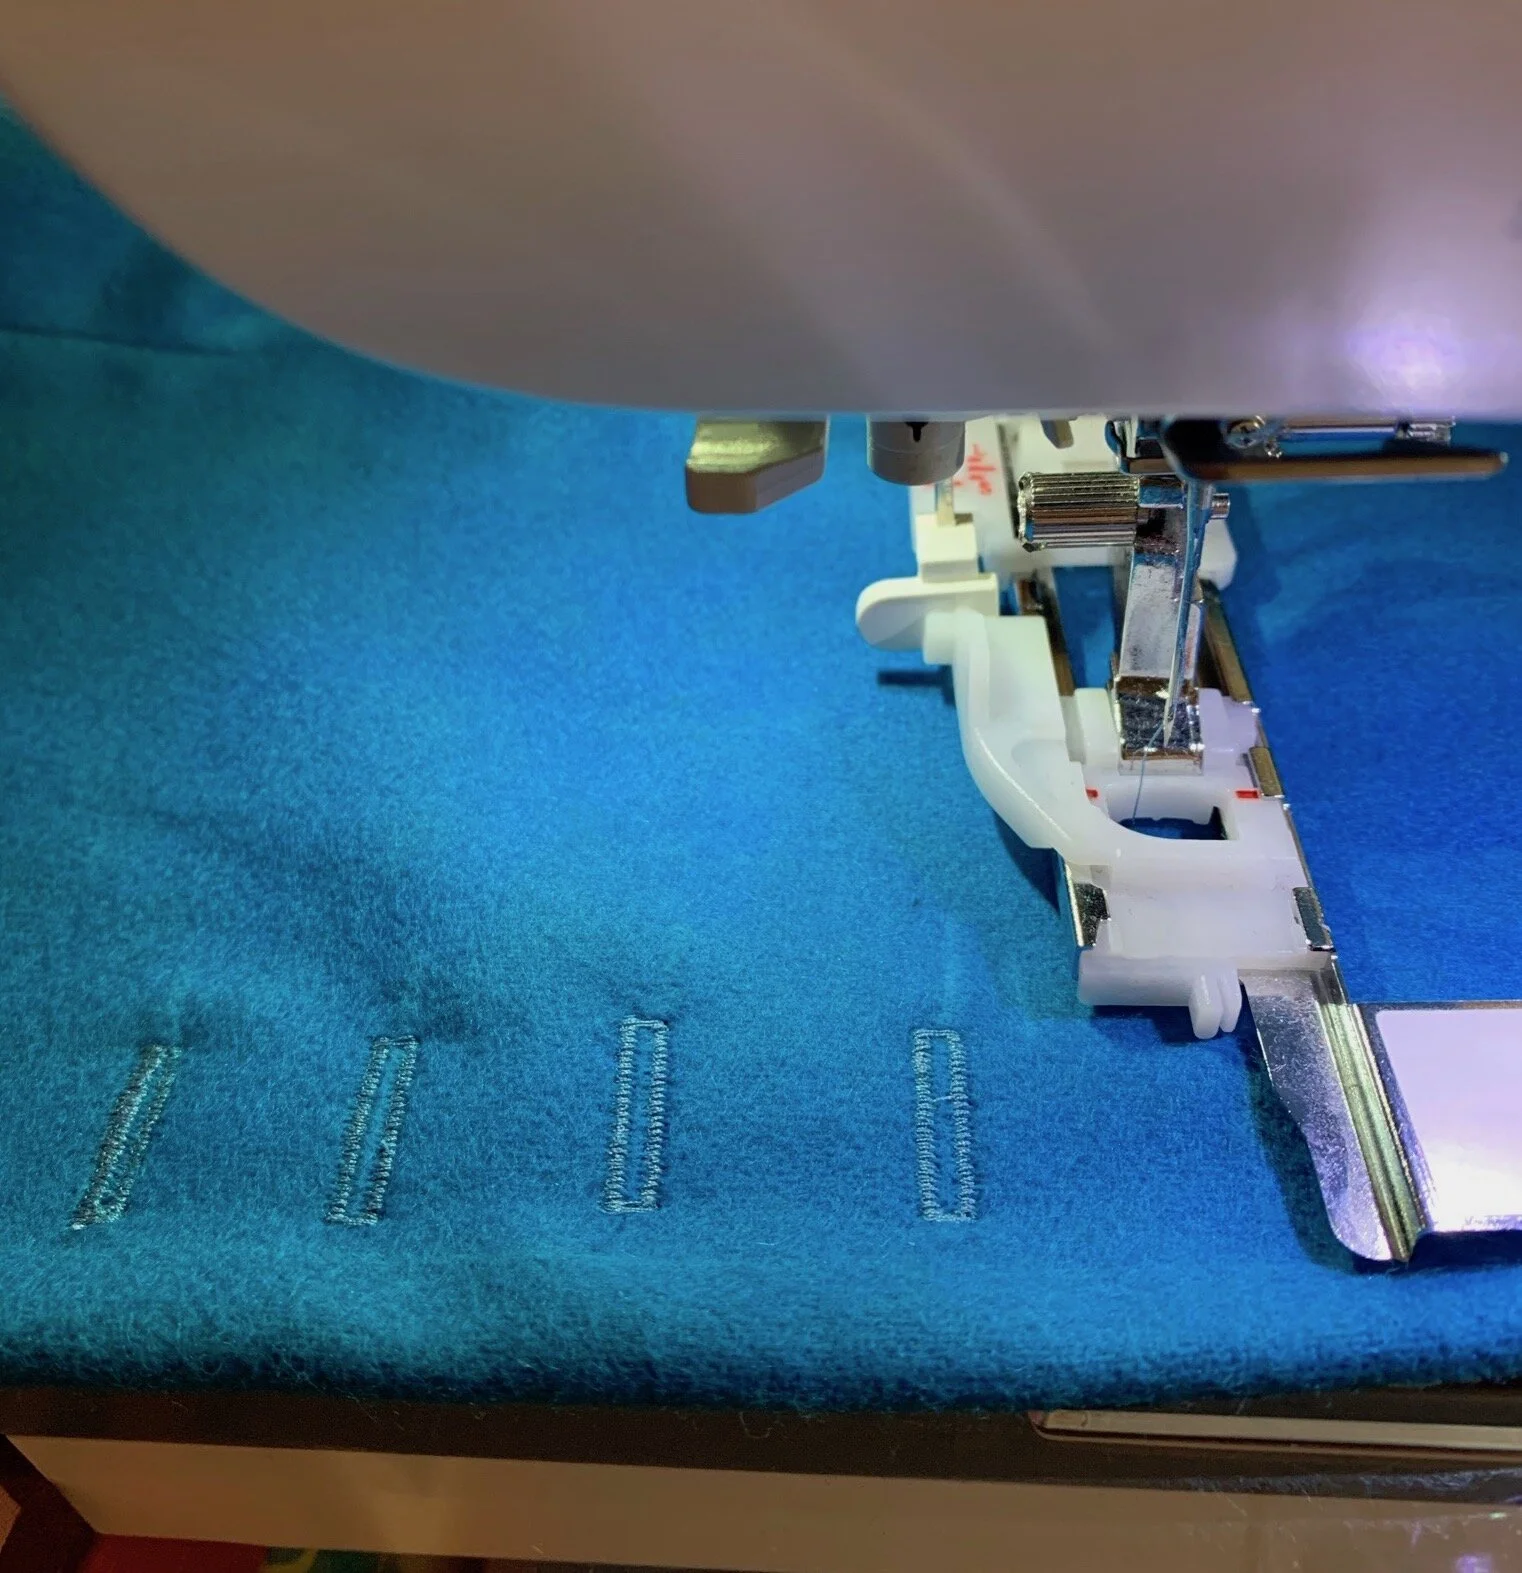
Little buttons usually clinch the deal with me anyways, but here, they were a game changer. These darling little pearl buttons were just the perfect feminine touch to transform this. The trouble is - buttons mean buttonholes! What can I say…. my machine was just the bees knees and they were a breeze, BUT it was definitely necessary to mark these carefully with a chalk pencil and a ruler.
Once these were done, I promptly hung my waistcoat over a pretty blouse and was just delighted. There was one more finishing touch though and this was a tag on the back of the waistcoat. Because I have such a heavily patterned back fabric, adding this tiny wool tag and a couple of buttons somehow seemed to break it up nicely. I used a decorative stitch on my machine to embellish it and here I would advise trying out some of the stitches you have available and thinking about the thread weight. In the end, I used a heavier quilting weight cotton in the top of my machine to add a little extra punch to the pretty stitch pattern. I am always thrilled when I can use these stitches because it seems to me something so lovely and underused generally in dressmaking.
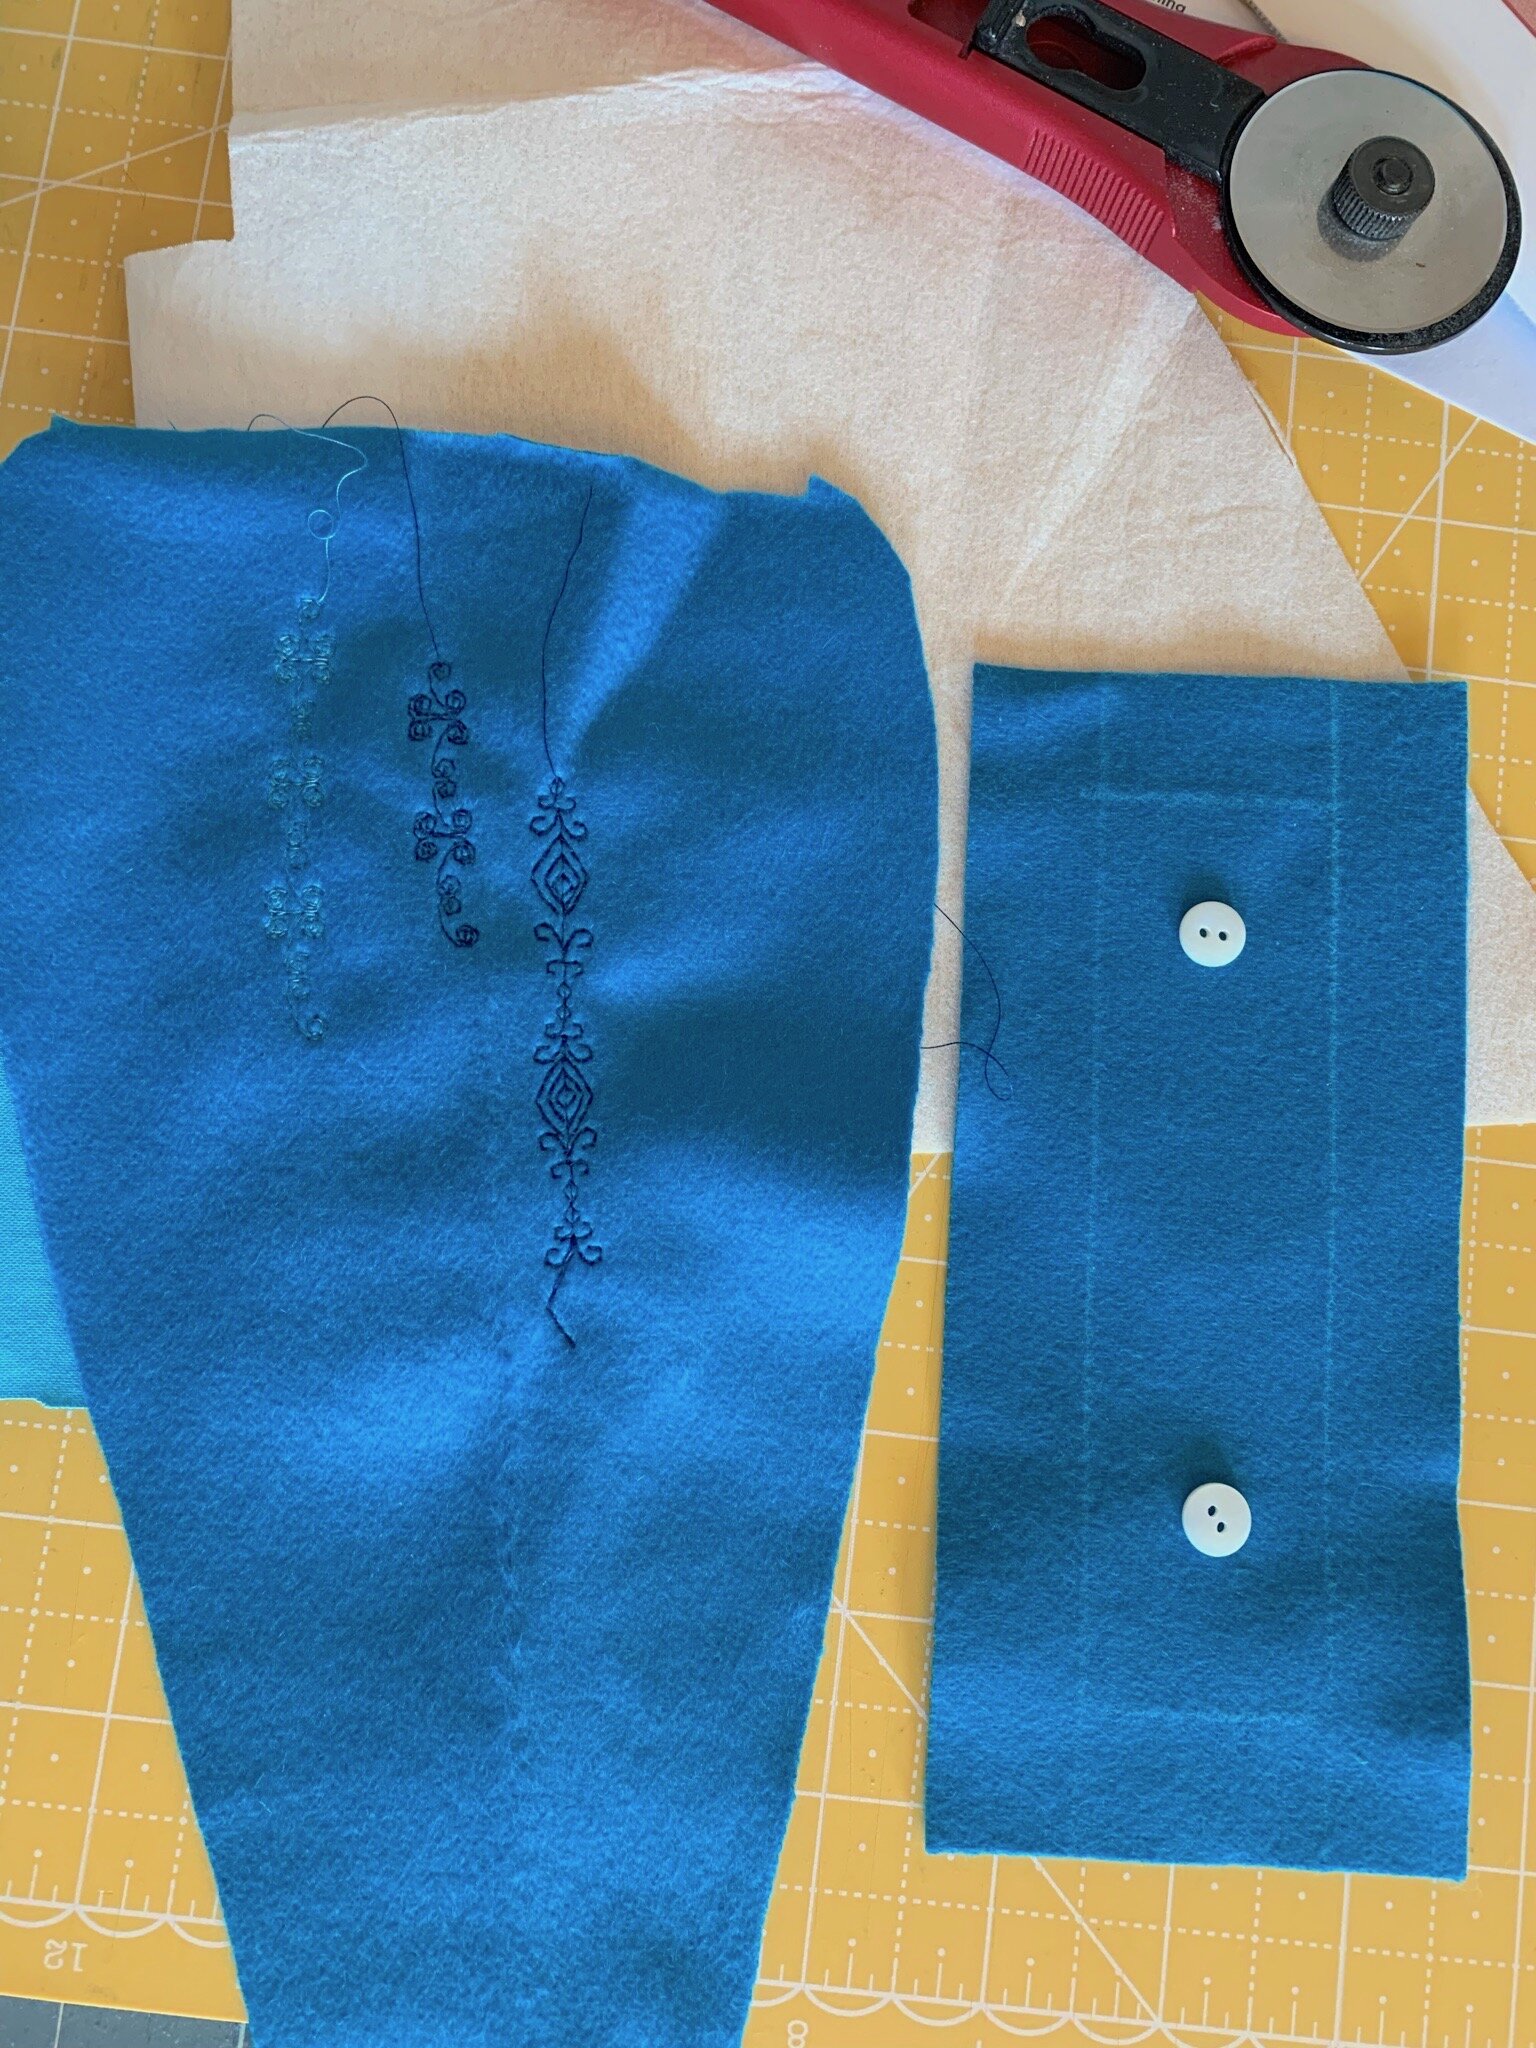
One thing to really take into account with using decorative stitches is to consider the pattern repeat. I originally cut a strip 7” x 3” for my tag with the idea that it would be 6” x 1.5” design area (including the buttons) however the embroidered stitch pattern that I decided on needed just two repeats so my tag ended up being smaller and this didn’t matter at all. Again it is worth to try out on some scrap fabric to see how it is going to work out. Once this tag was on, it was just the final touch to make it look really unique and professional.

I have to say this might just be the best thing I have made so far in my dressmaking endeavours. It seems a completely useful garment for the coming colder months and you can dress it up with a pretty blouse or down with a long sleeved Tshirt and it will always add that little something to your day.

I am so delighted with this project that I will definitely be thinking about making some linen versions next spring. Dressmaking can be such a rewarding pastime and having that creative vibe is such a good feeling as the winter months approach. In the history of costume, waistcoats have been a constant feature for both men and women since the first fabrics were woven….I am not surprised - I love them!
See you next time, Ruby xx
Useful links:
For buttons at The button shed click here
For Inspiration at Cabbages & Rose click here
For ‘William Morris Strawberry Thief’ fabric click here
