Making the Ansel Camera Bag
/
Hello and hope you are enjoying these autumn days that are upon us. Maybe it is the sight of the trees turning golden or that sort of nesting feeling that comes with the nip in the air and the promise of chillier days ahead, but my SewJo seems to have returned. Whatever it is, I have been sewing and working on projects that have been on the table for a while. First up is my new camera bag and I am really excited to share this with you. I signed up to a 12 week course in photography at our local college and realised almost immediately that I hardly knew what my camera was capable of. It is going to be fun, but I also thought it would be fun to make a carry all camera bag and it would all fall in to my long held master plan of creating a set of matching luggage. Don’t you think the idea of matching luggage is just so cool….sort of conjures up ideas of long journeys down to South of France in the 1930’s where you might stay in a villa for the summer months and sip cocktails, read novels and play cards! Anyway….enough daydreaming, but maybe you remember that I made a bag last year, which has proved so useful and is quite simply on of the best things I have ever made. My ‘triple threat briefcase’ from a pattern by Sara Lawson of Sewsweetness.com is the beginning of my travel luggage. I’ll put a link at the bottom, if you want to read my journal posting about this make.

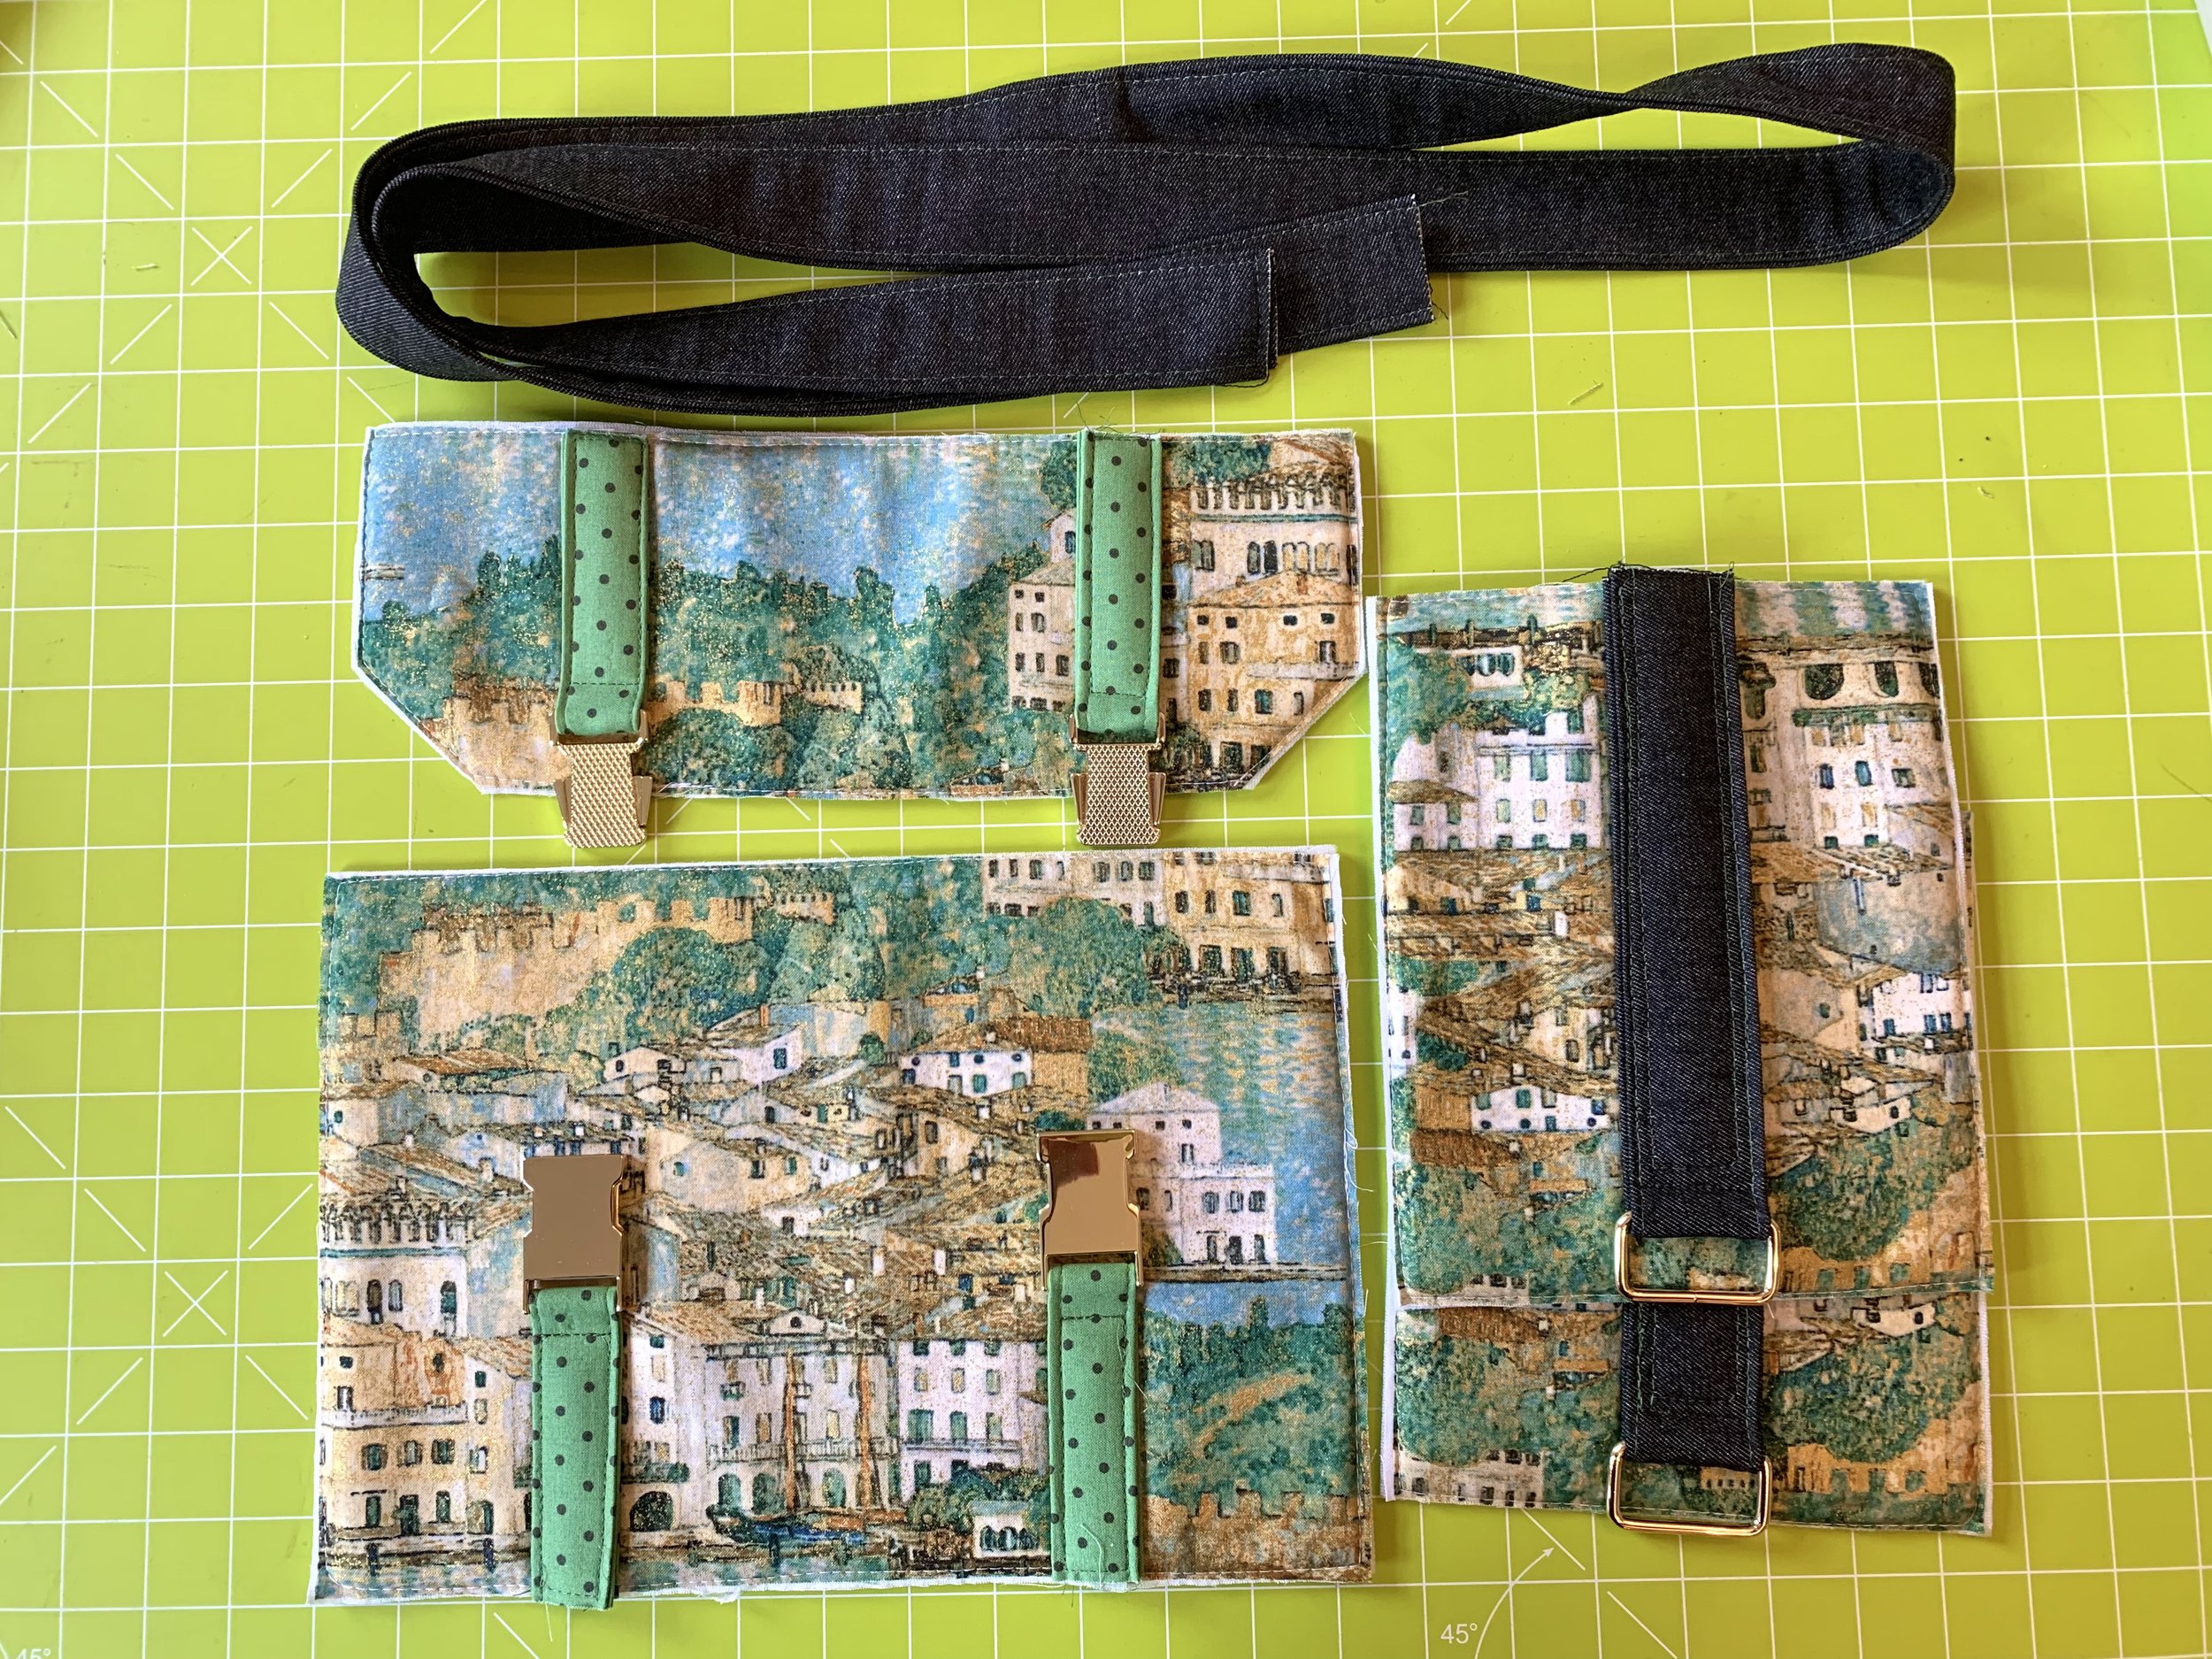
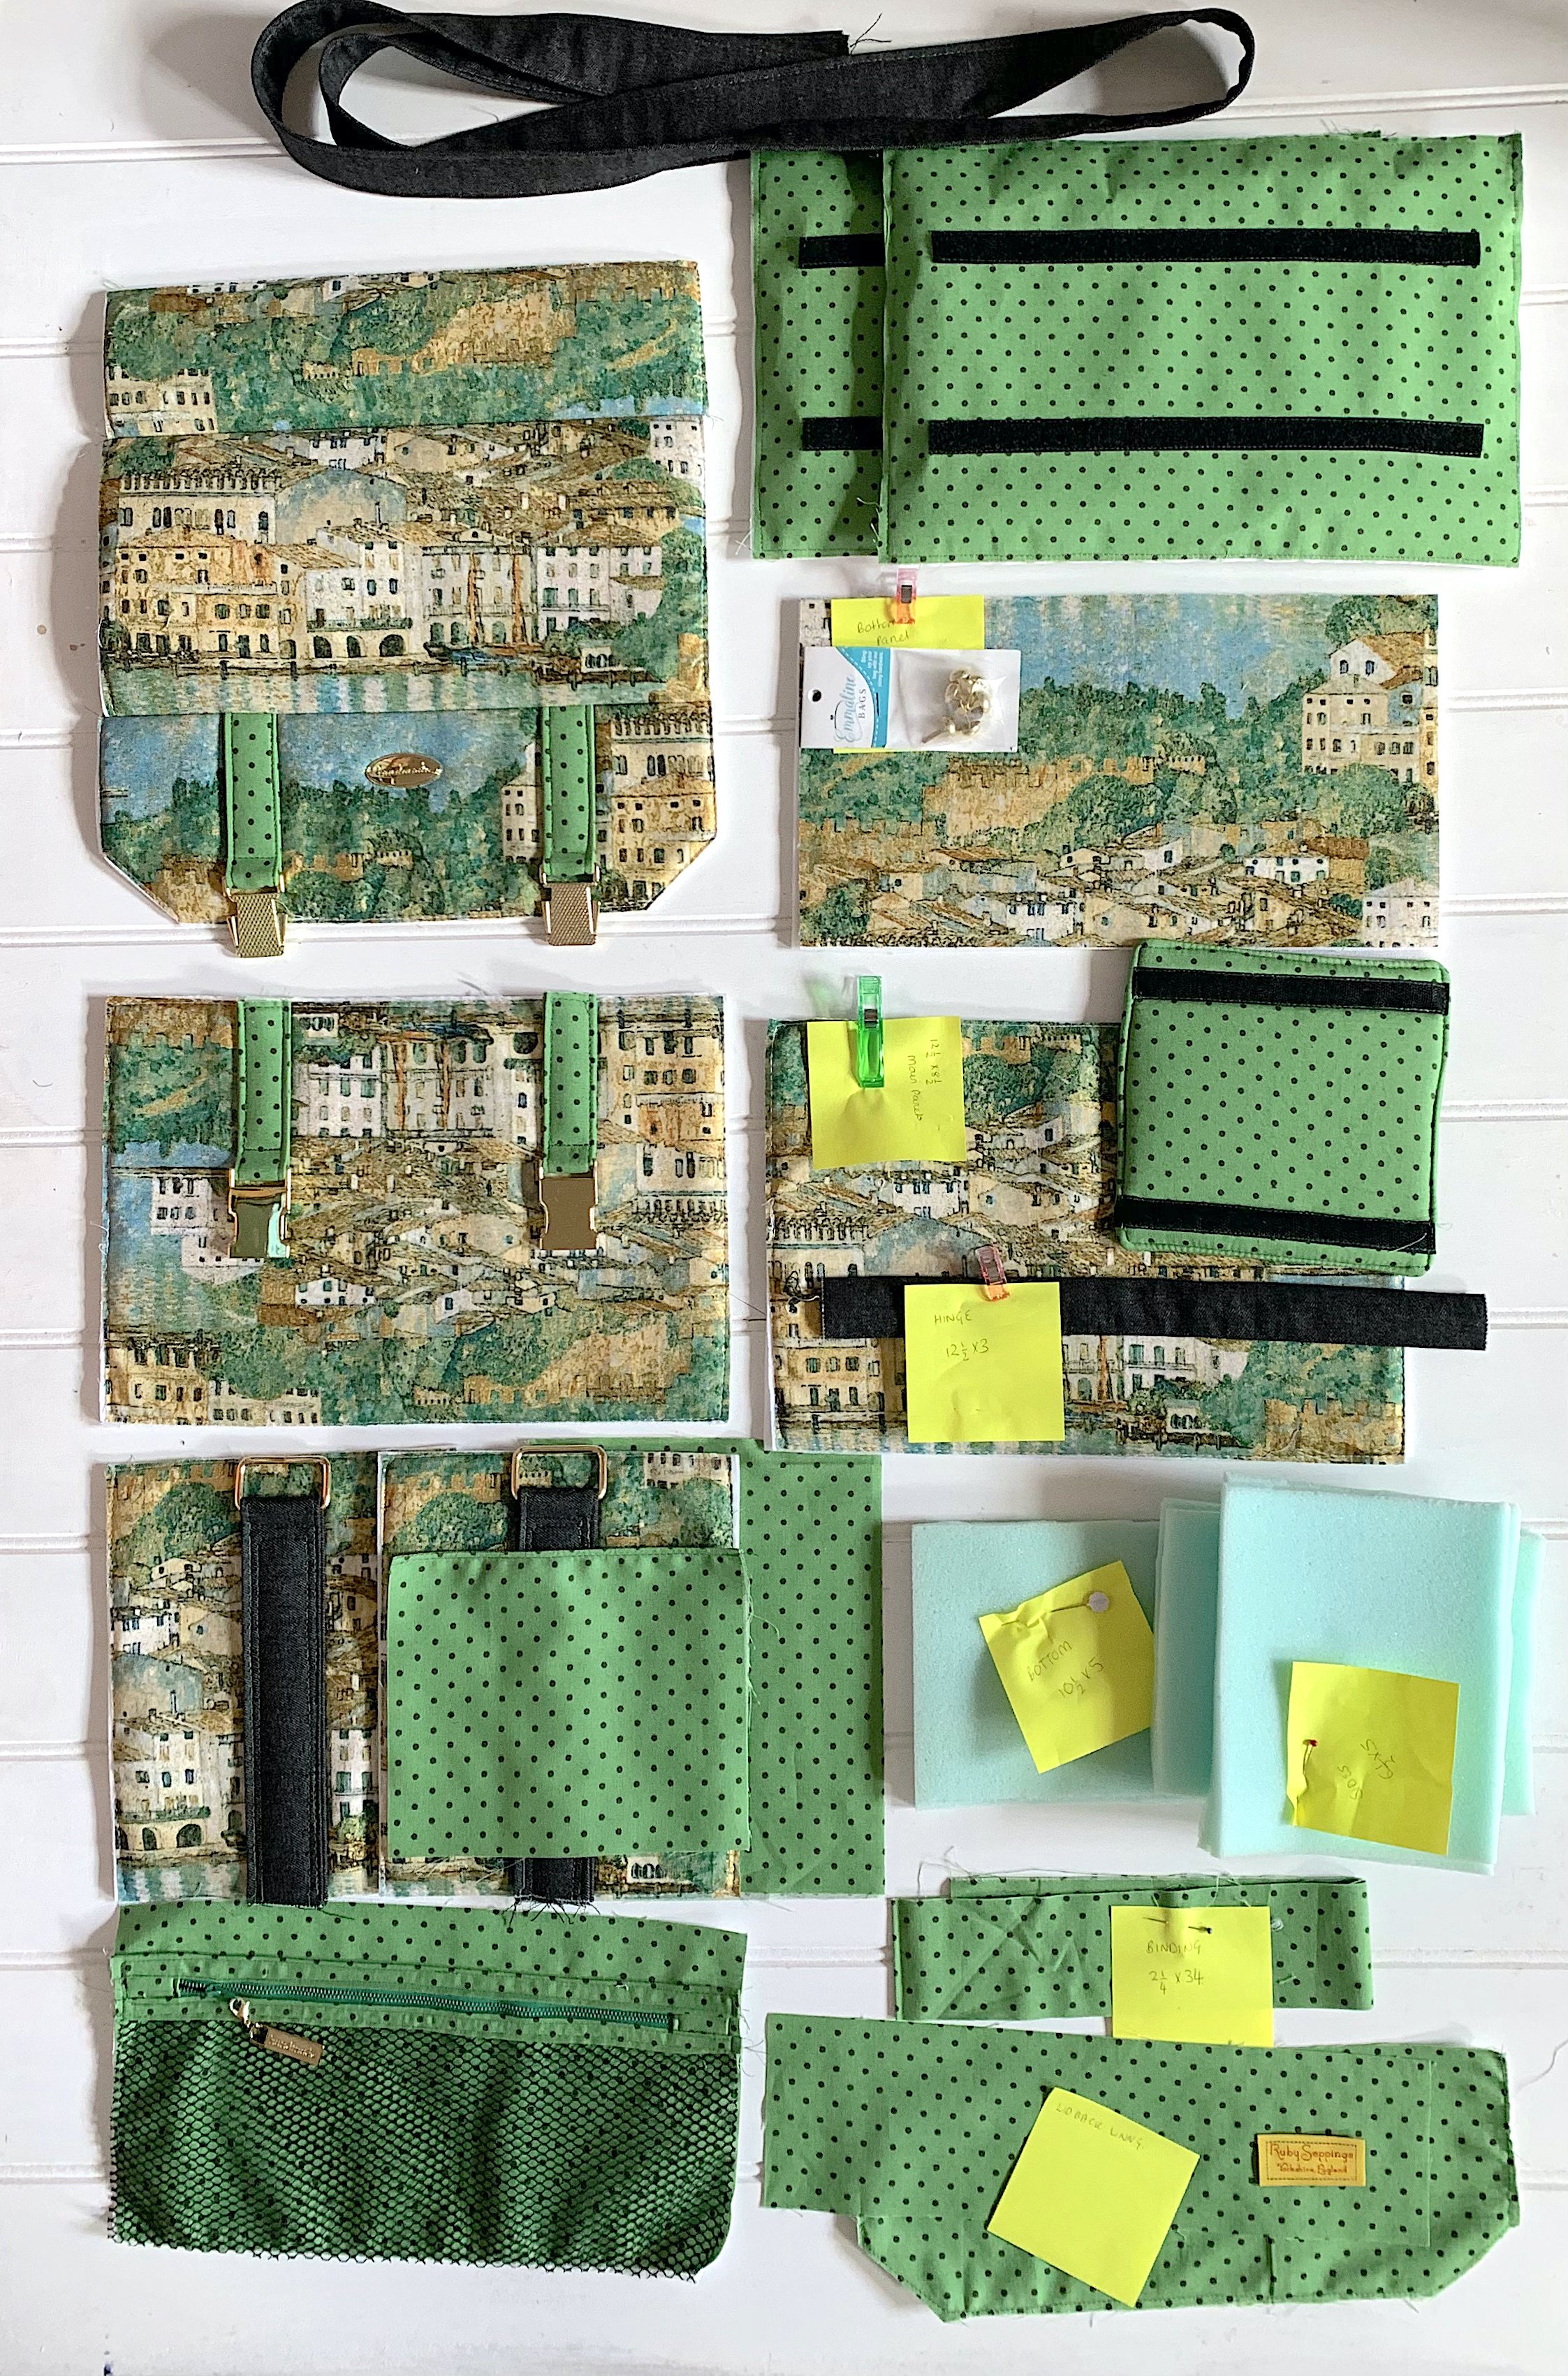
There was some of this gorgeous ‘Gustav Klimt’ fabric left over from this and some of the black denim too, so I had a starting point for my camera bag. For the pattern, I returned to my favourite bag lady at Sew Sweeetness and purchased the Ansel camera bag pattern and video. The patterns are ingenious and have lots of details and tricks and tips to learn along the way as well. I consider the video essential as they are always completely comprehensive and invaluable for each stage of construction. I began to assemble all the bits and pieces needed. Again, this is not a cheap make if you want all the proper hardware but it is so worth it because it gives the project such a professional finish. You also need interfacing, peltex and craft foam so there is quite a bit to organise before you can begin.

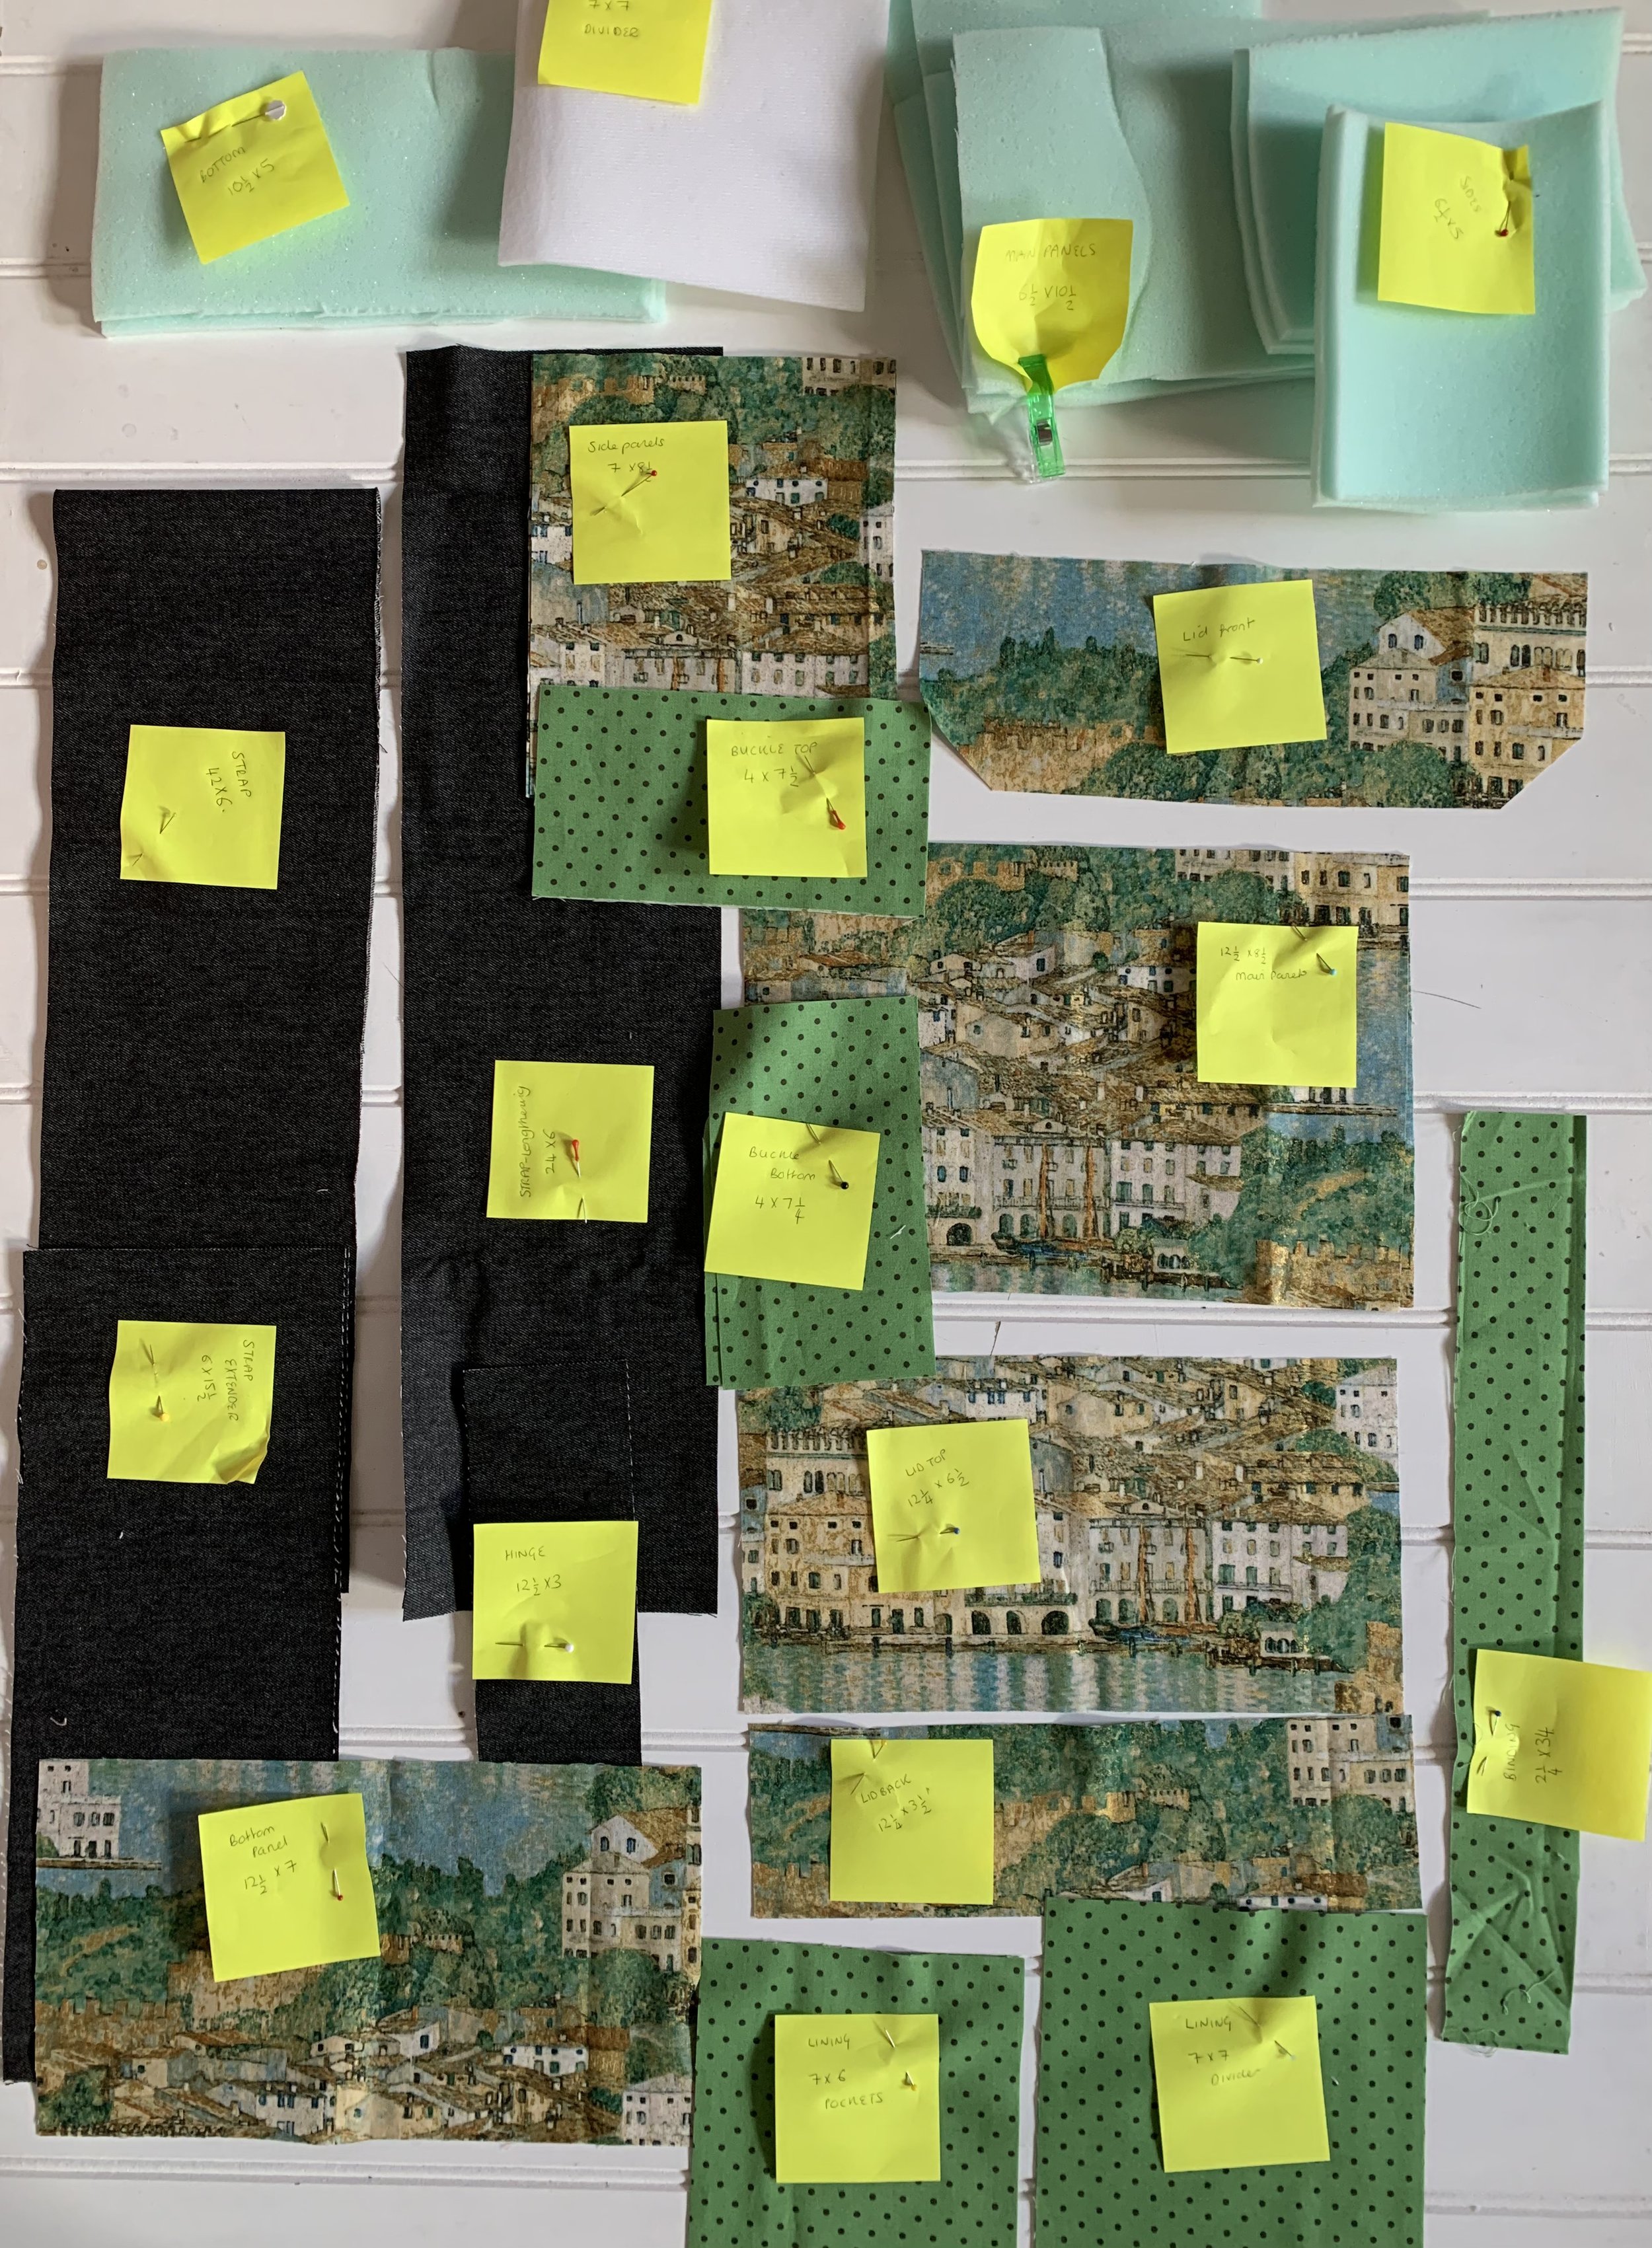
and my advice is, be organised. There are a lot of components and they need labelling and crossing off the check list, so you are sure that you are ready to go. These are not projects you can rush and it is worth to watch the video all the way through before you even begin.
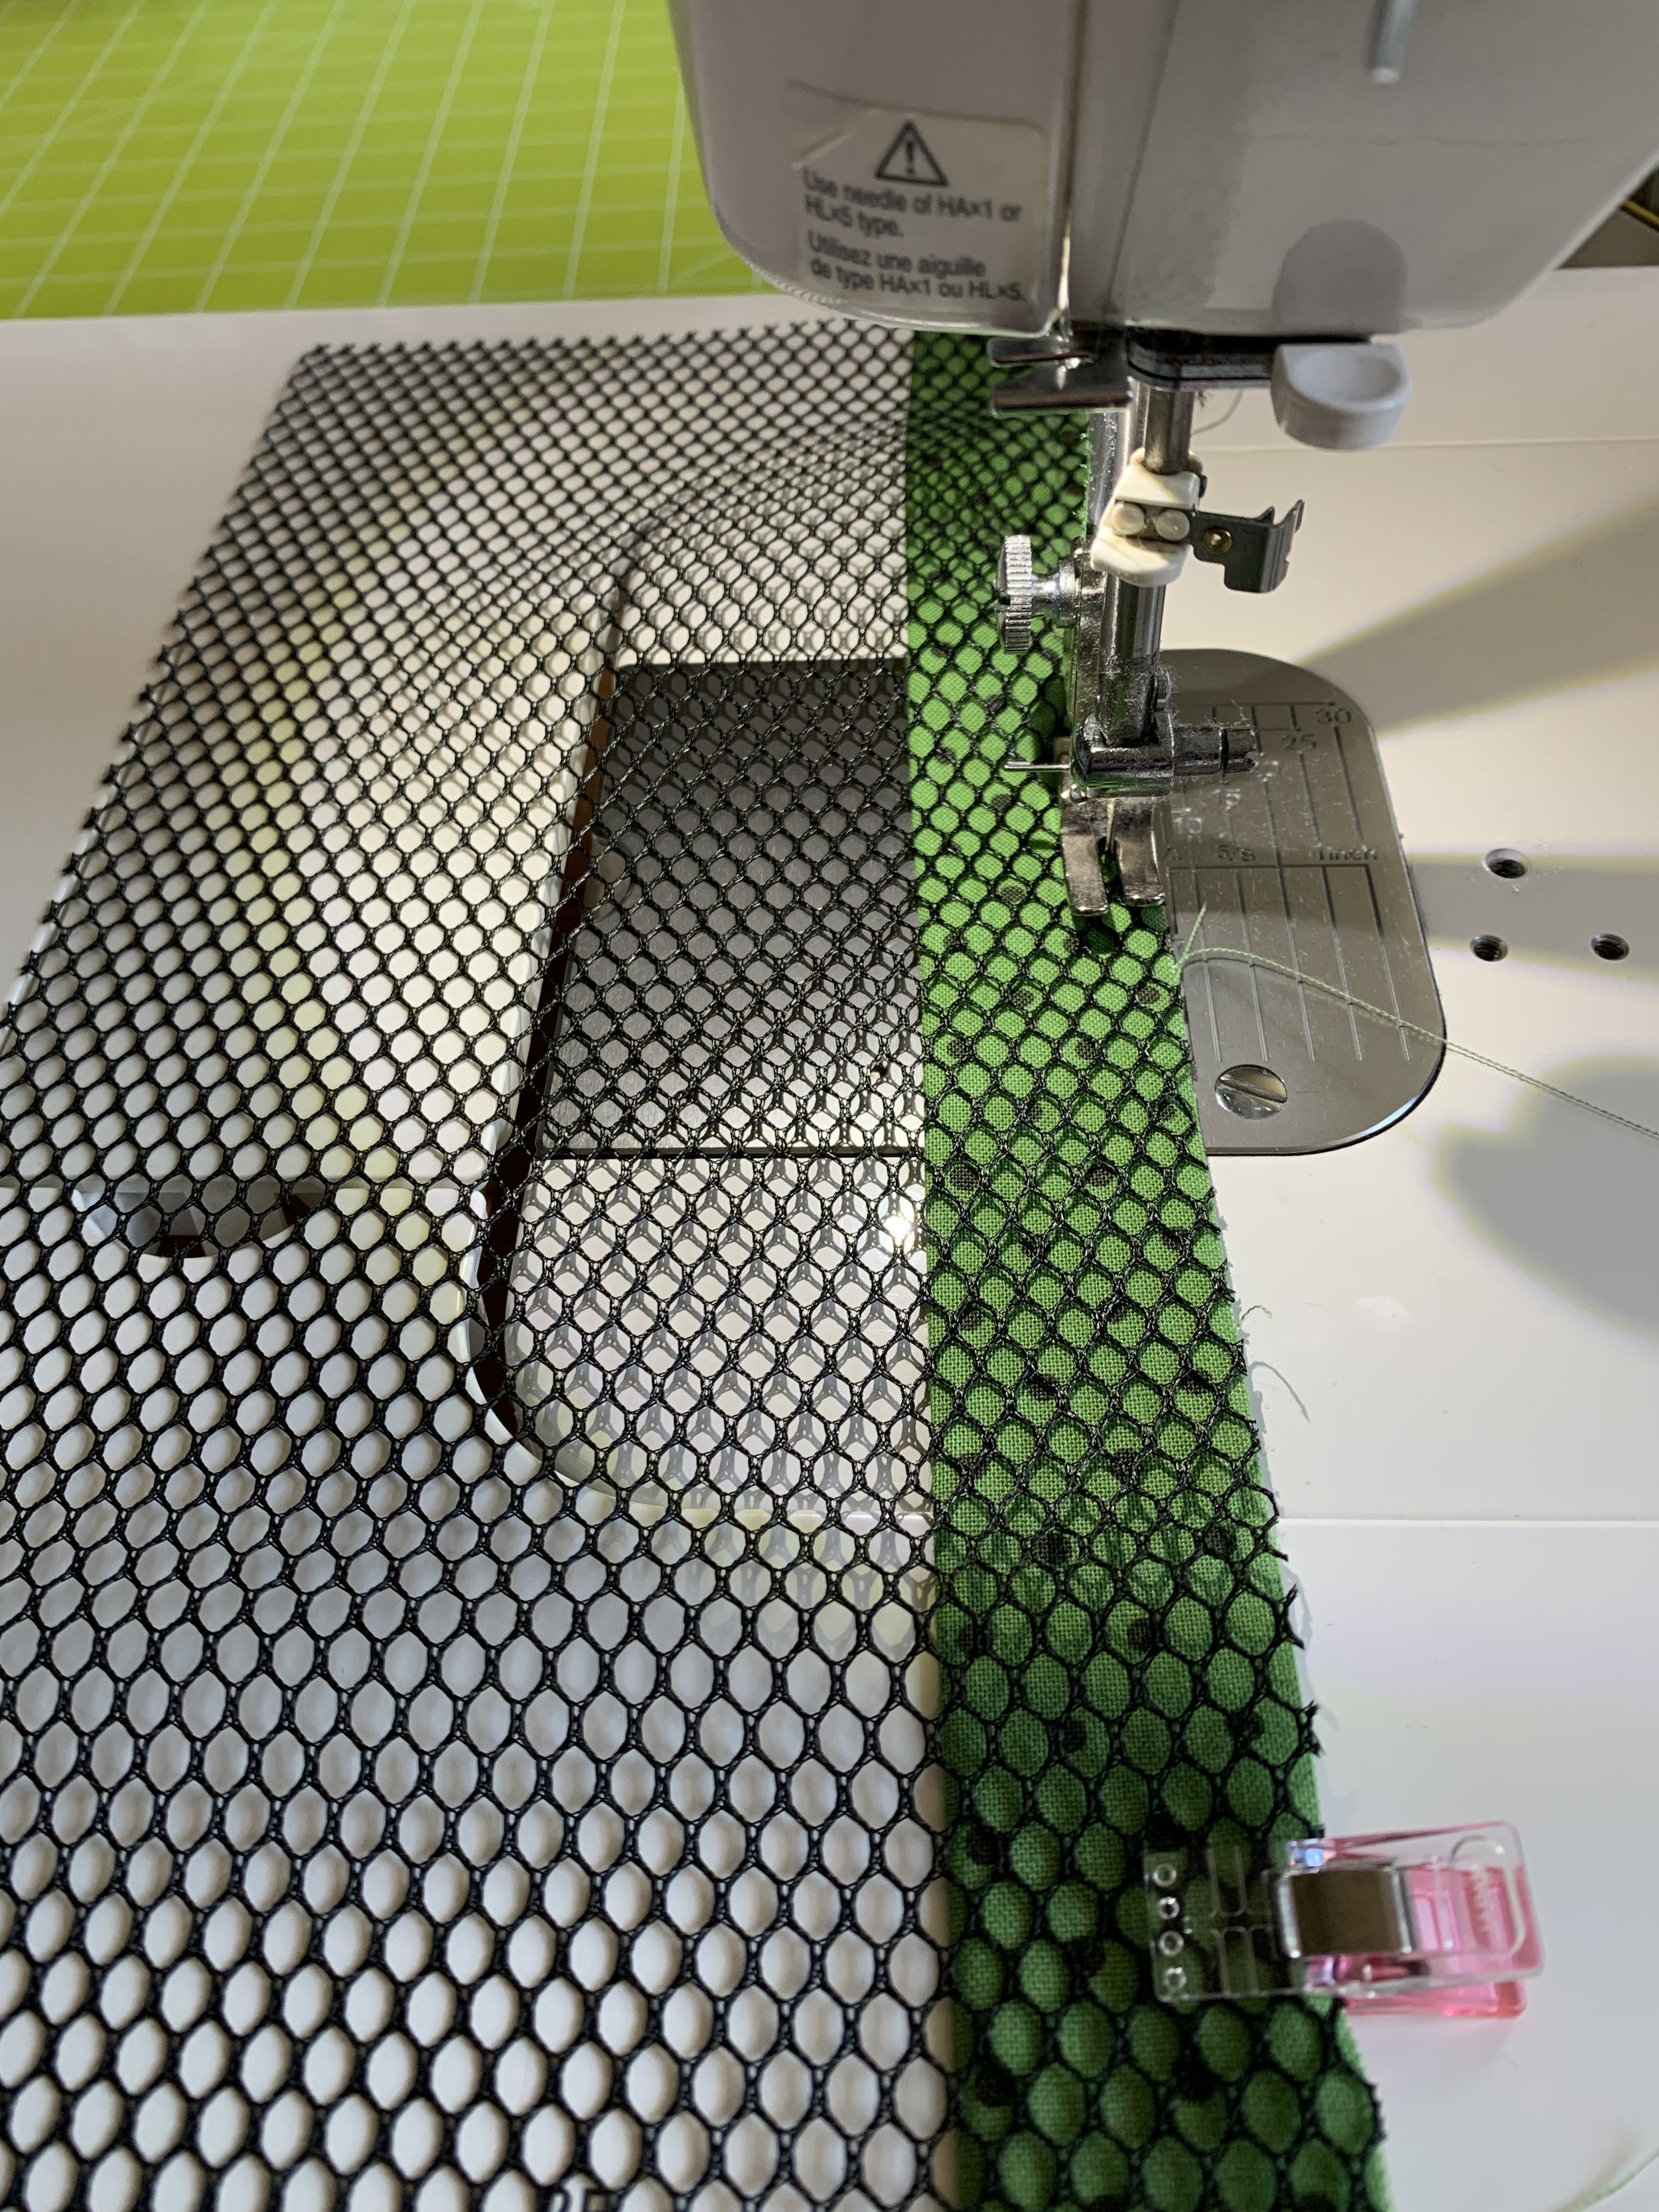
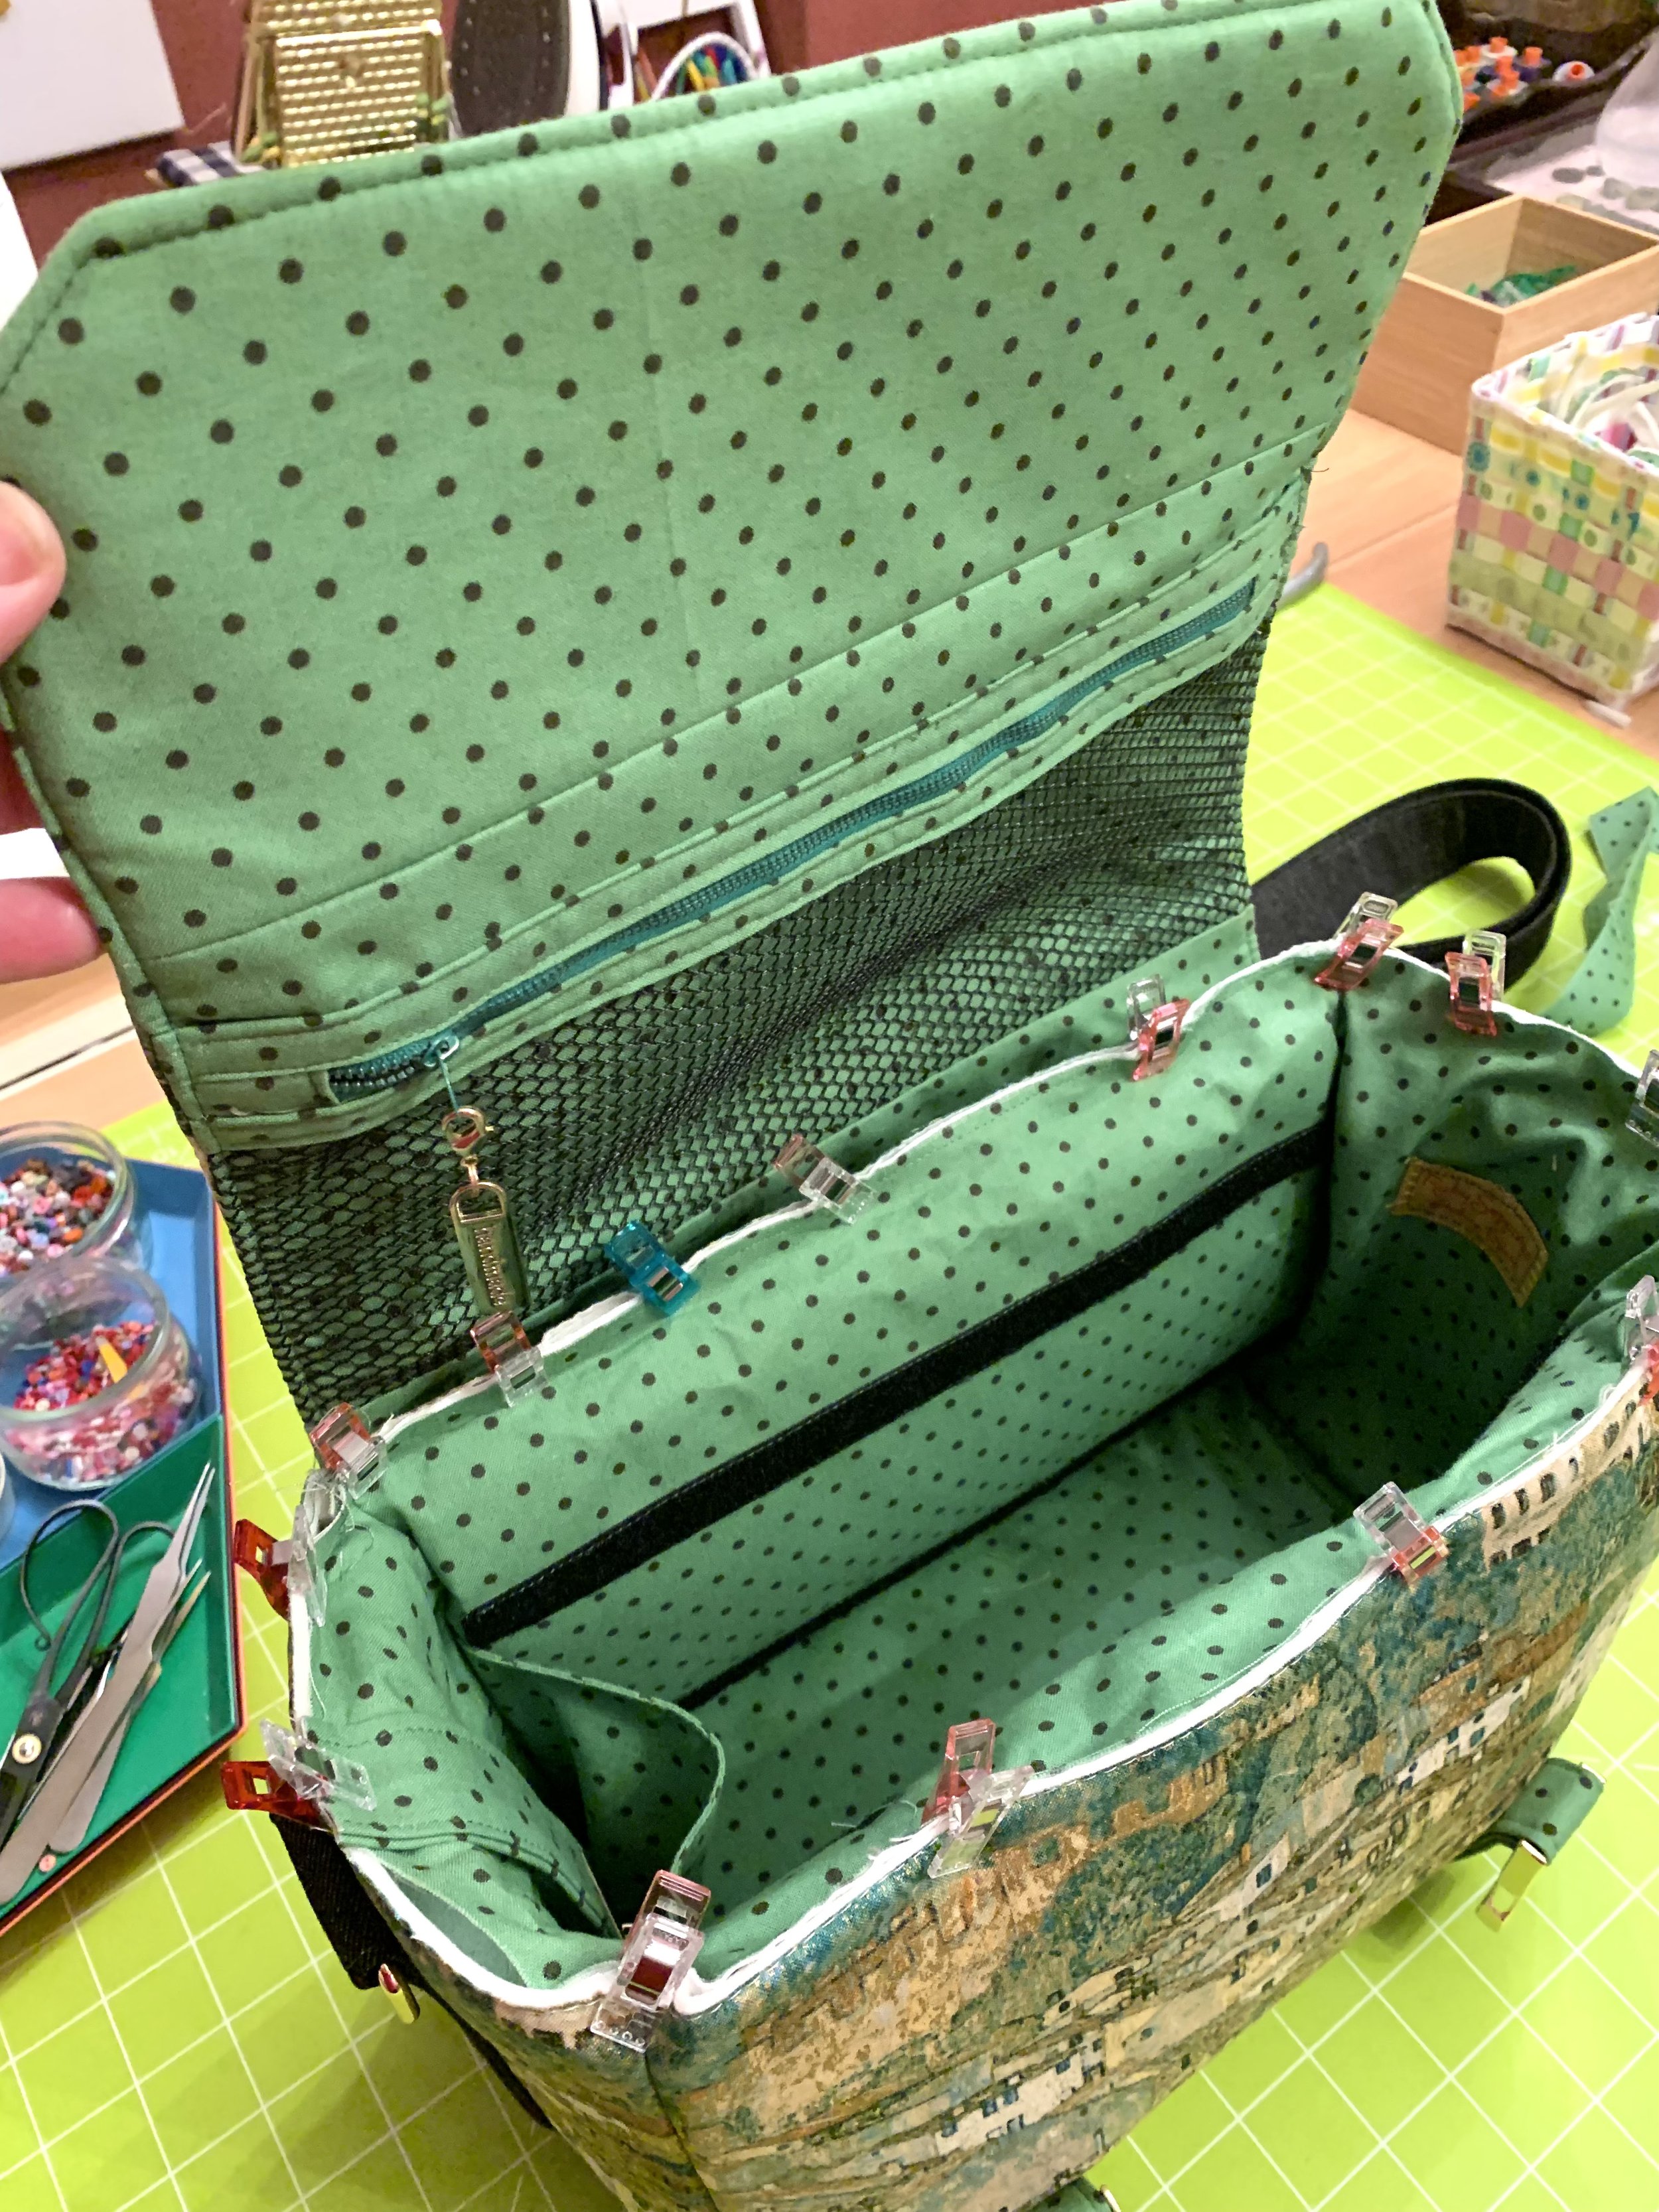
One of the first parts you make is the mesh zippered pocket for the lining. I had never worked with mesh before and even though this is optional, I was keen to make it as it seemed a very useful idea. It is a bit strange to work with, but so soft that you know it will be alright.
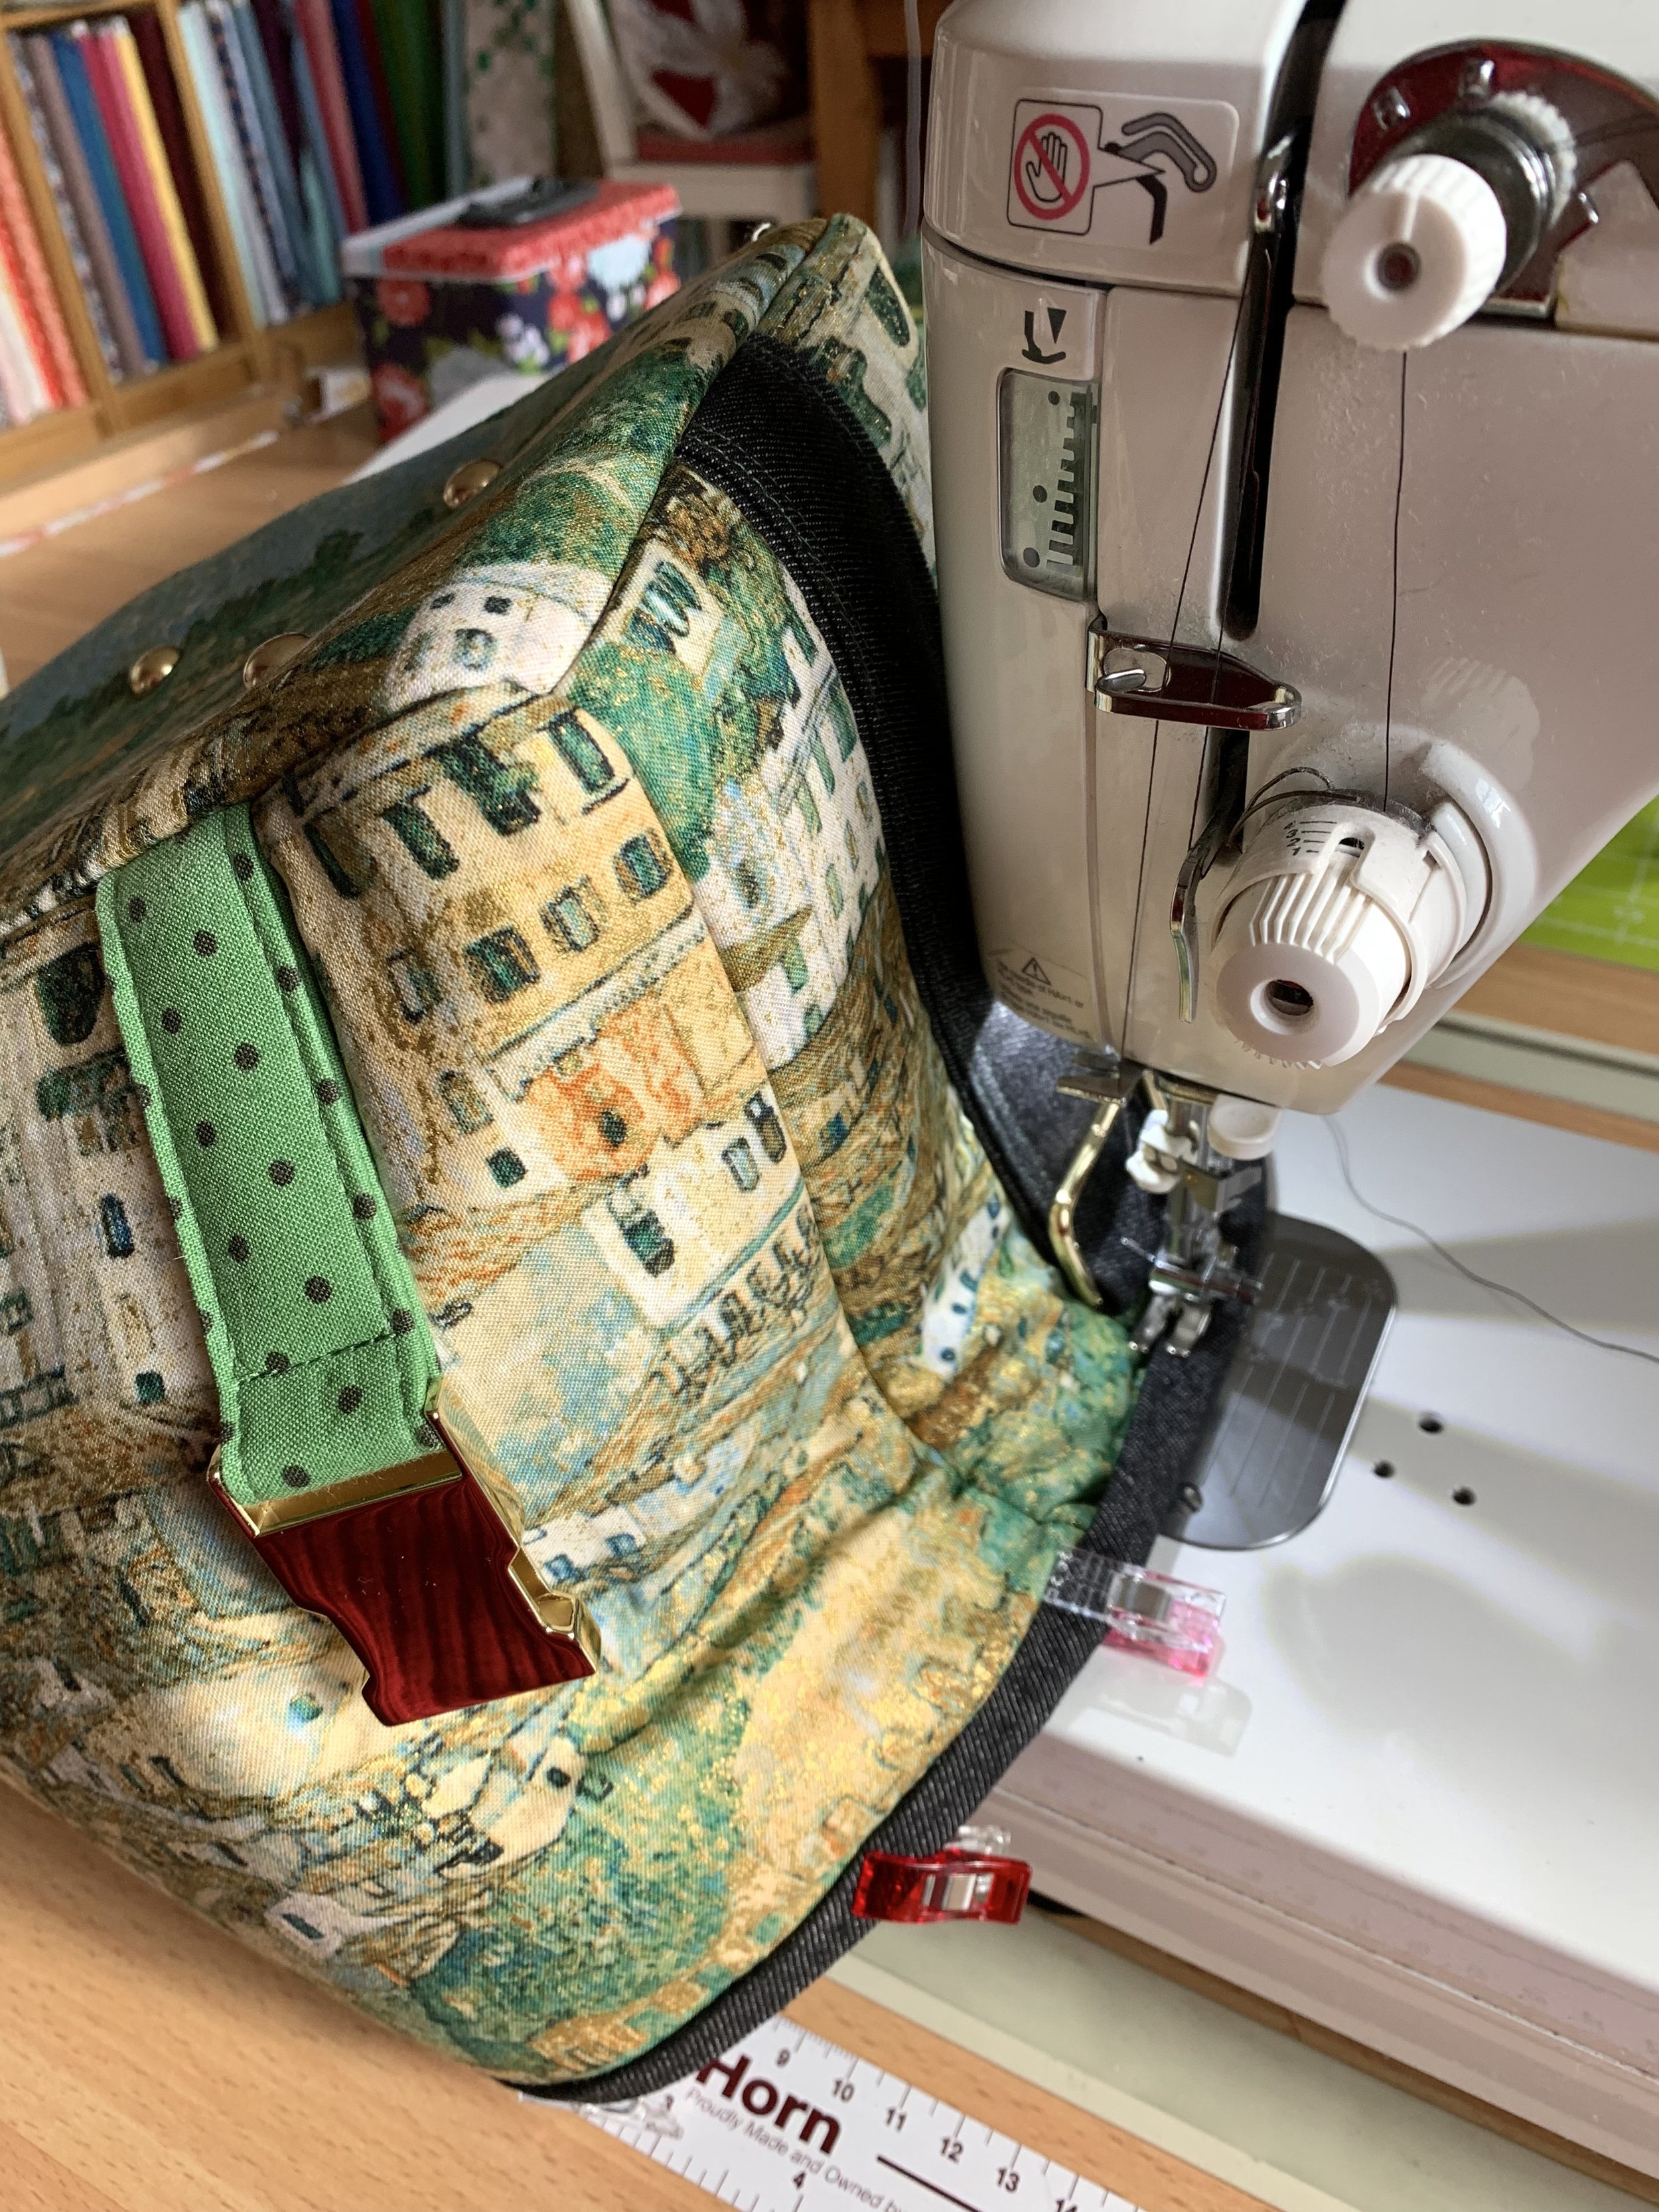
In general most parts of this project were really very straight forward. You just have to be precise and methodical and it all comes together reasonably quickly. As I used fairly heavy weight black denim for the strap and accents, I did make life a little harder than it might have been, but actually my Juki machine can handle it pretty well and I like the sturdiness of it.
As the panels started to come together, it was looking rather smart already. I just took my time over several days and made sure I followed every step on the video.

One additional thing I did do is to add some bag feet. I would’ve preferred to have black denim on the base, but didn’t have enough fabric left, so adding the feet should add some protection at least.
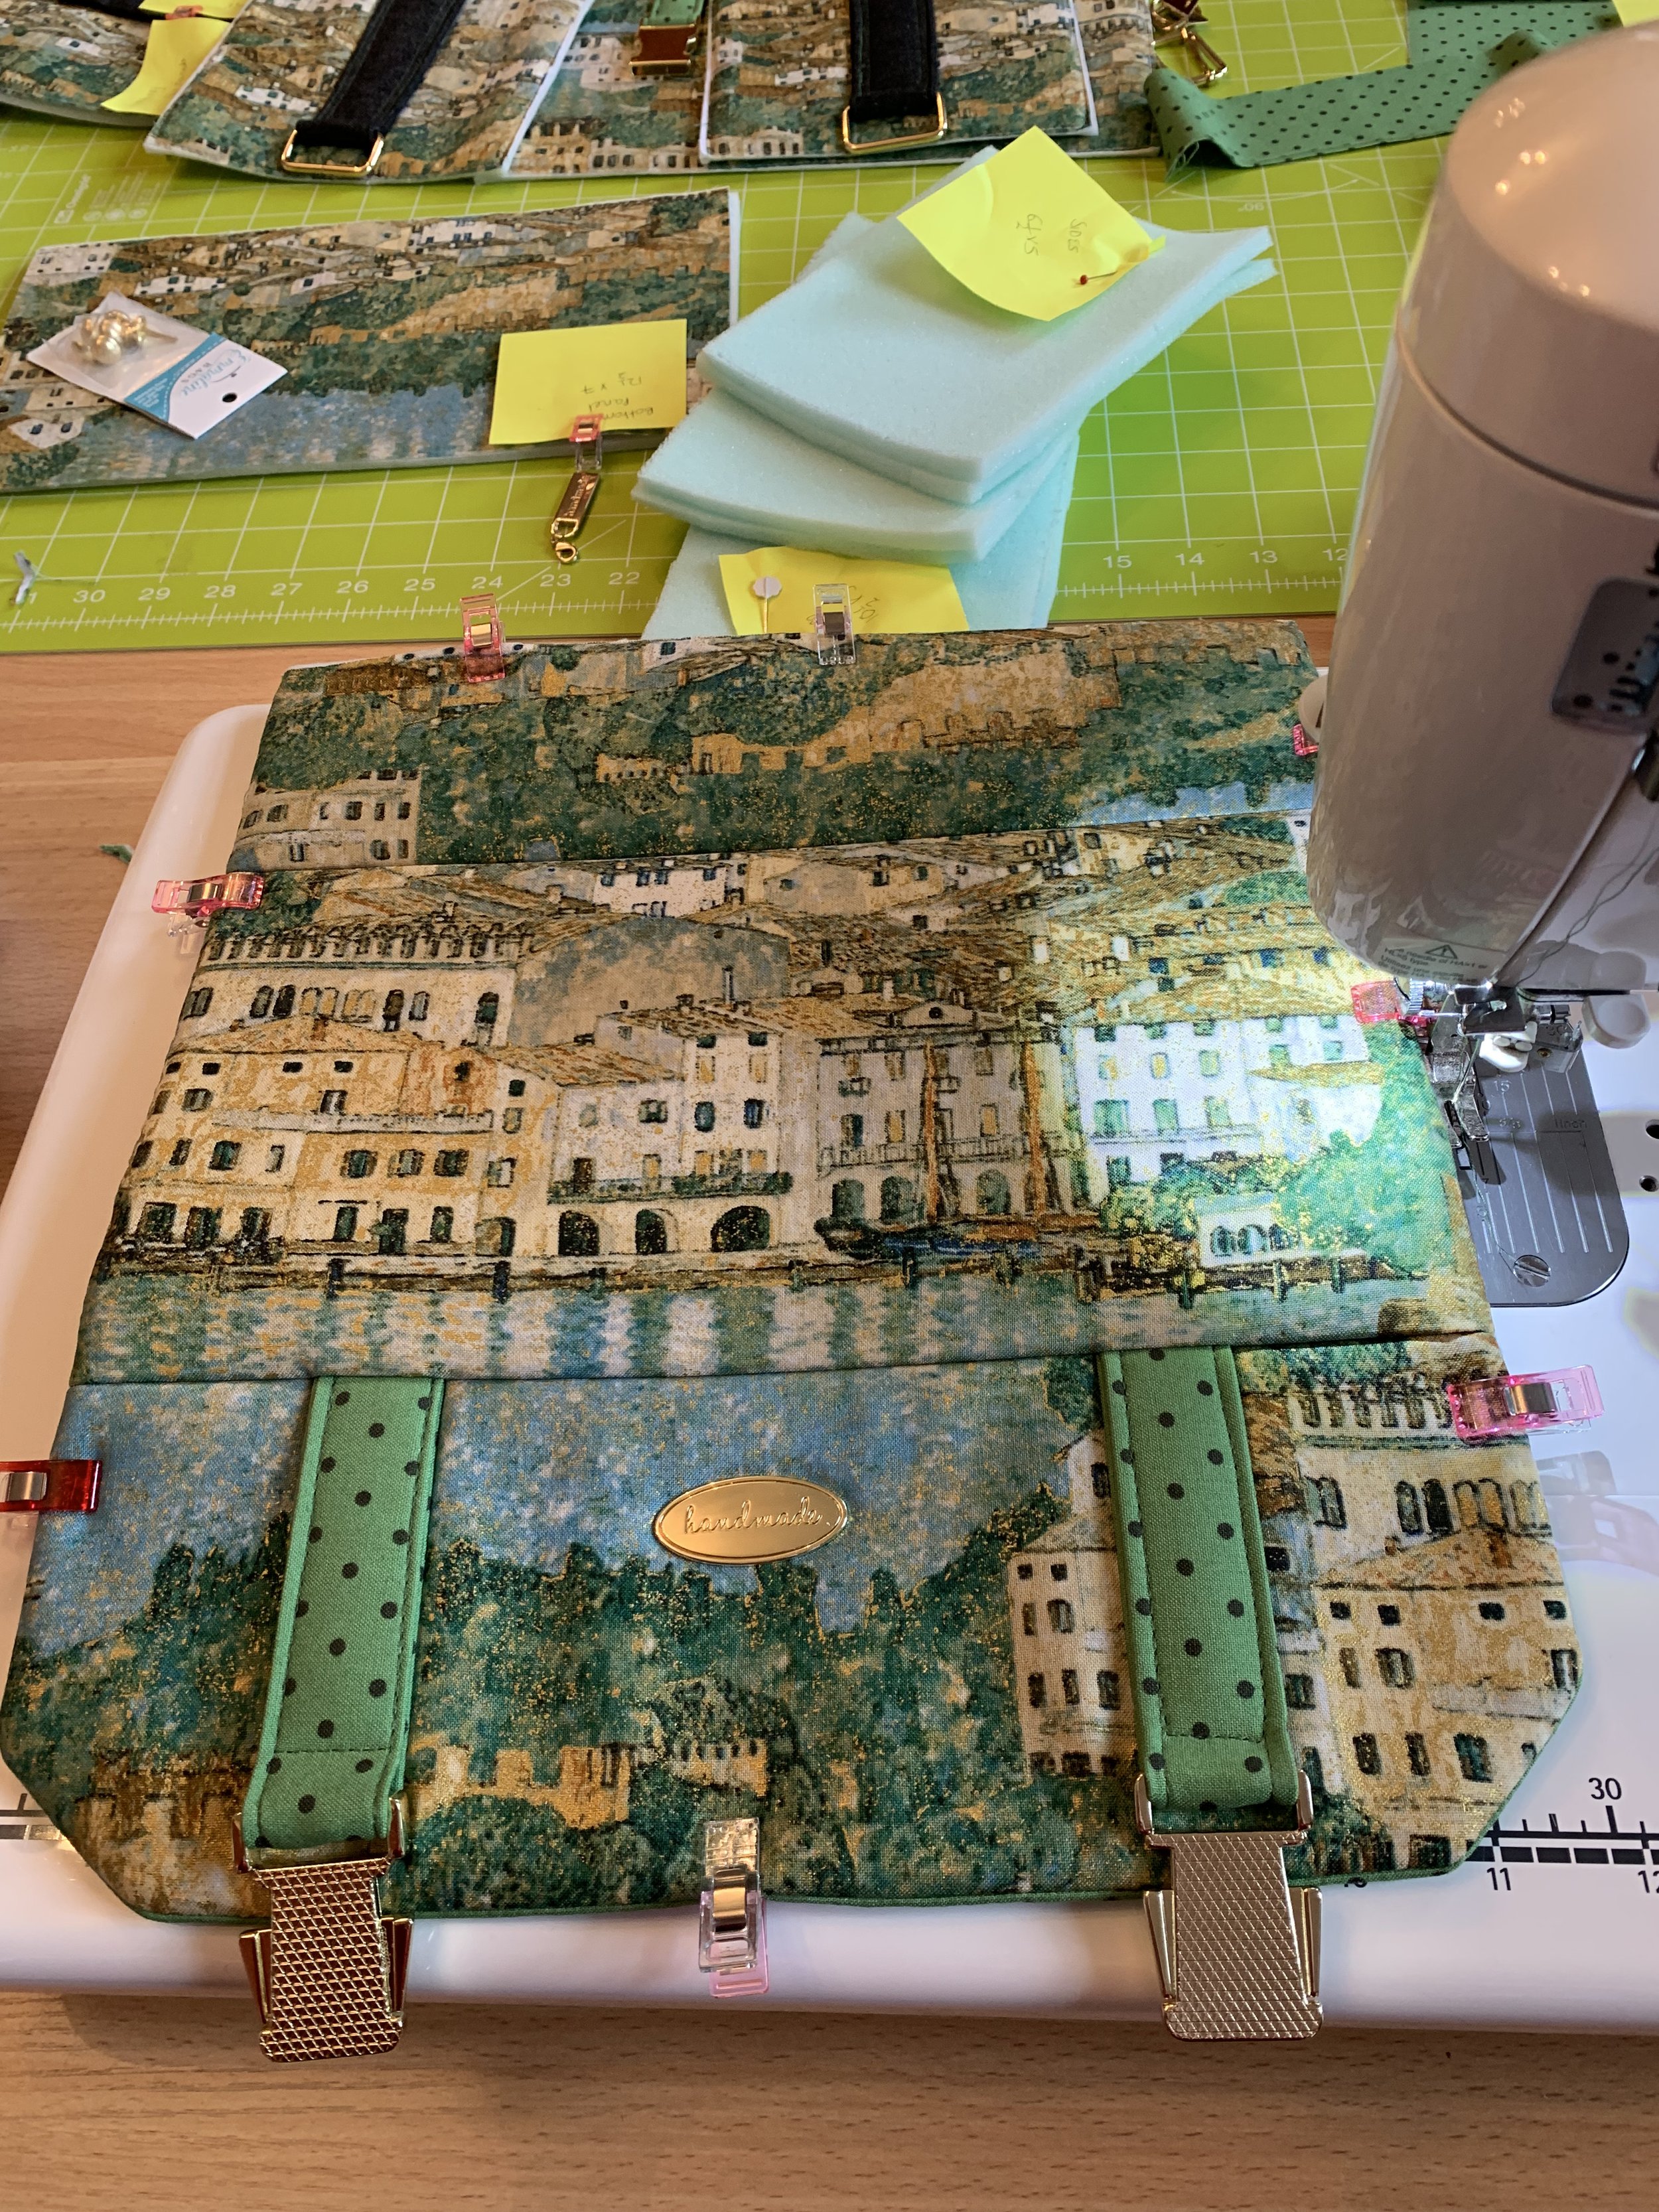
Neat top stitching is important and again I can only emphasise how you need to take time with these things. Extra’s like pretty metal bag tags also make for lovely touches on a bag project and here I kept it consistent with the briefcase make so that it all coordinates. Once you start really putting the bag together it is not always easy. My black denim binding might look nice, but it was way to bulky to stitch easily and I broke 3 needles trying to get around the edge.
‘Wonder Clips’ are an essential for bag making - genius invention!
Once I did get to this stage though, I really thought I was home and dry…but oh no…disaster lay ahead! When I tried to do up the parachute clips they didn’t fit. I quickly realised that although the look the same, came in the same packets, there is a manufacturing blip - they were marginally different and the margin was enough that they didn’t fit the buckle below but were crossed over. With all ends secured and double secured and the binding on there was panic! how could I fix this? The only solution was to unpick the bottom tabs and cut!!!
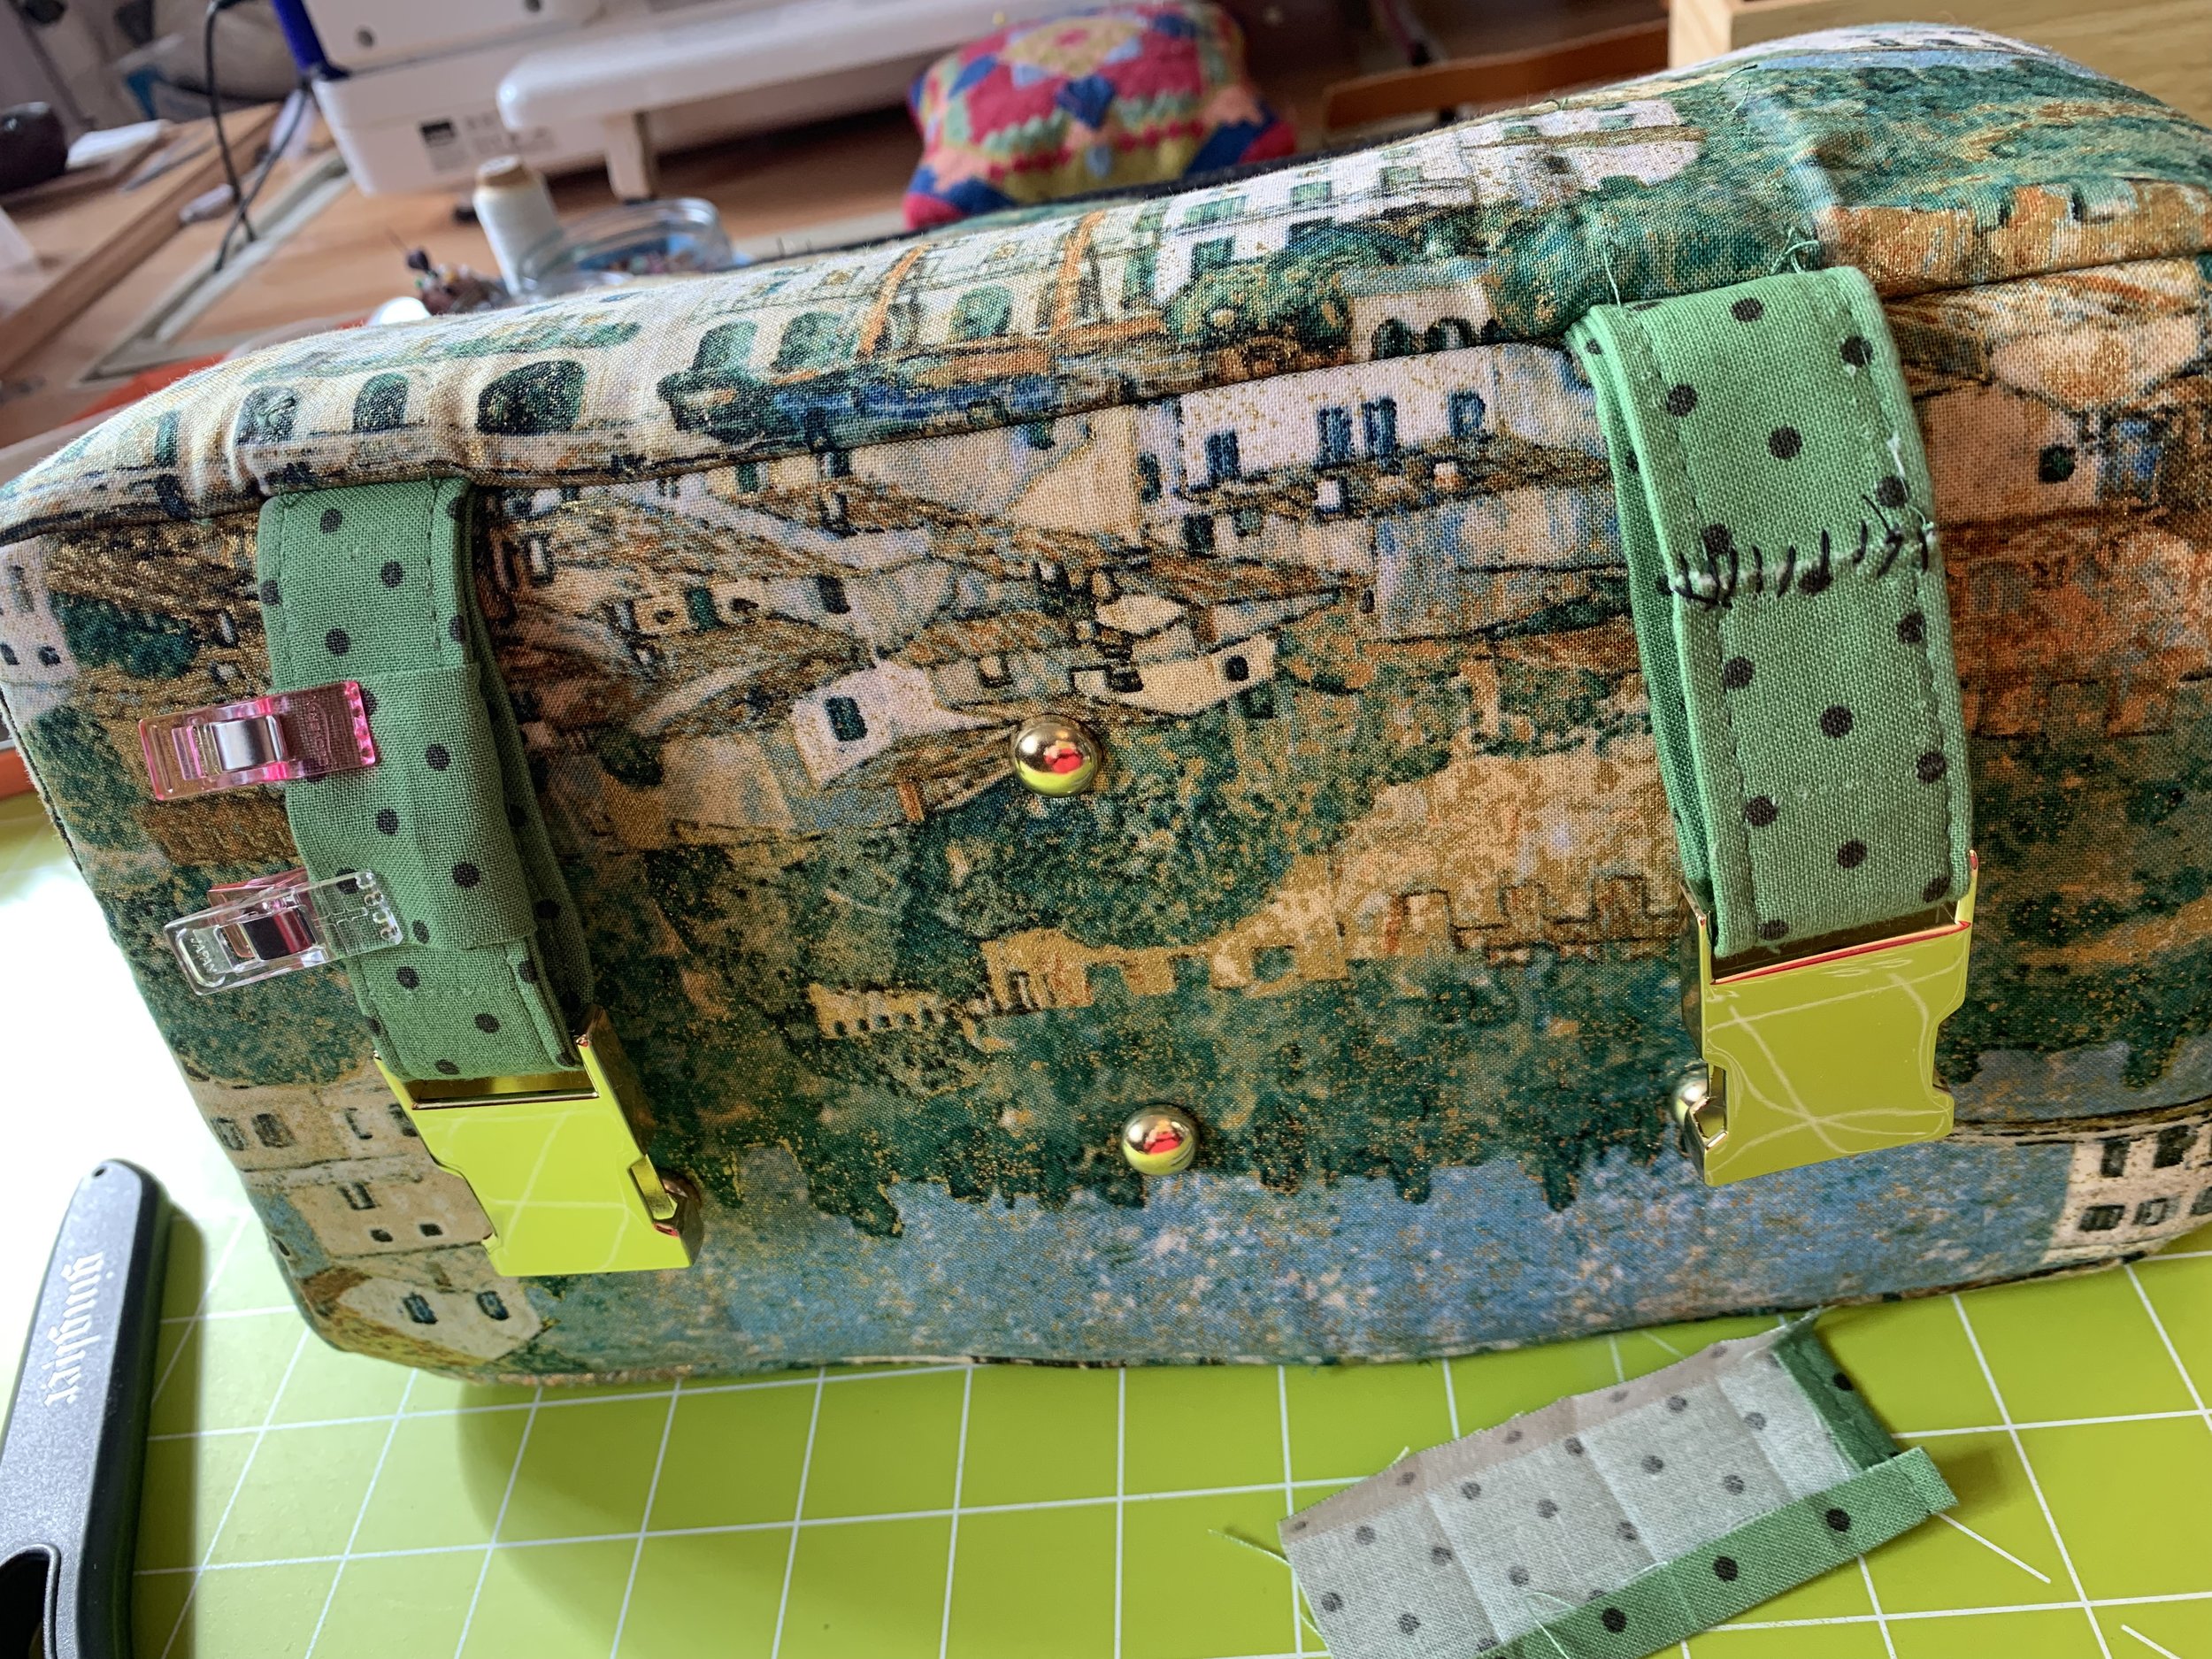
I swapped the clips over and laced together the join by hand as it had to flat, then I made a small tab to cover all the way around the back of the strap and secured it with the machine. In actual fact it doesn’t really show as much as I thought it might, but the real problem was to then secure it to the bag front as I couldn’t stitch through all the layers of foam and lining and interfacing. In the end, I just had to do it by hand as neatly as I could, but I do feel it might be a vulnerable spot. So if I ever use these clips again, for sure I will be doubly careful. Once it was all redone, I breathed a bit easier and finished up the strap. (Do you think I could get a job in ‘The Repair shop’ LOL!)
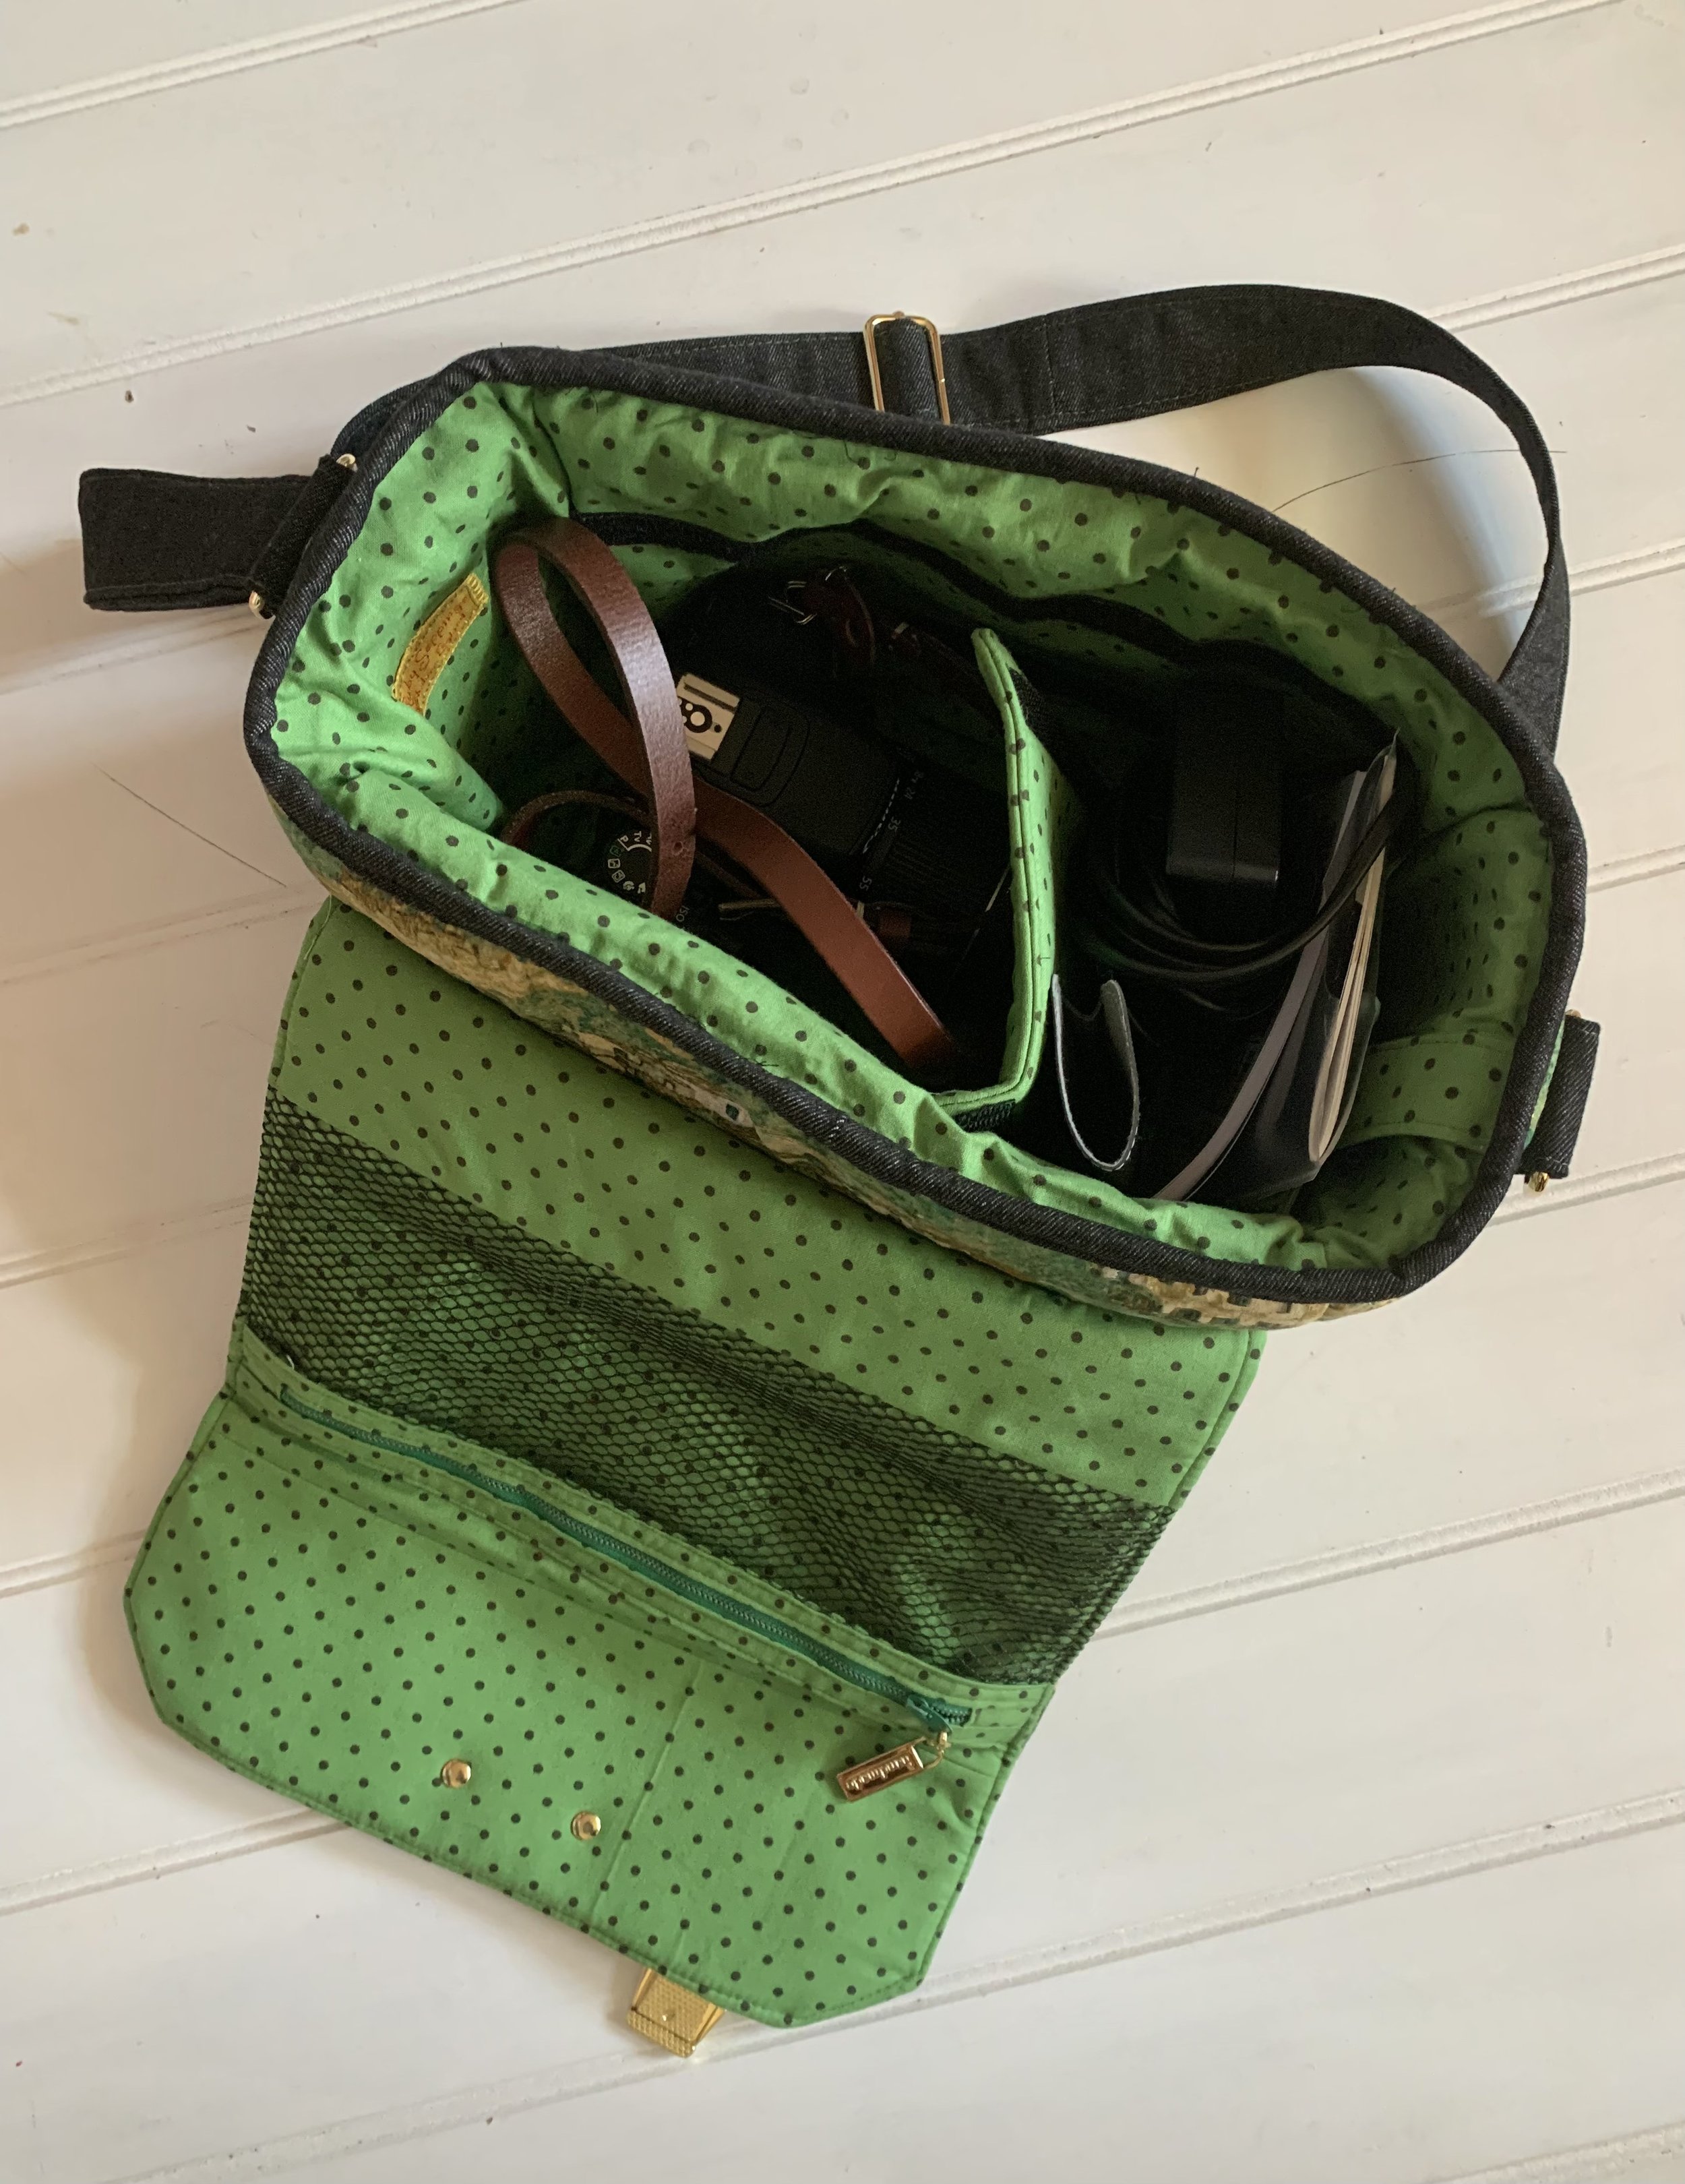
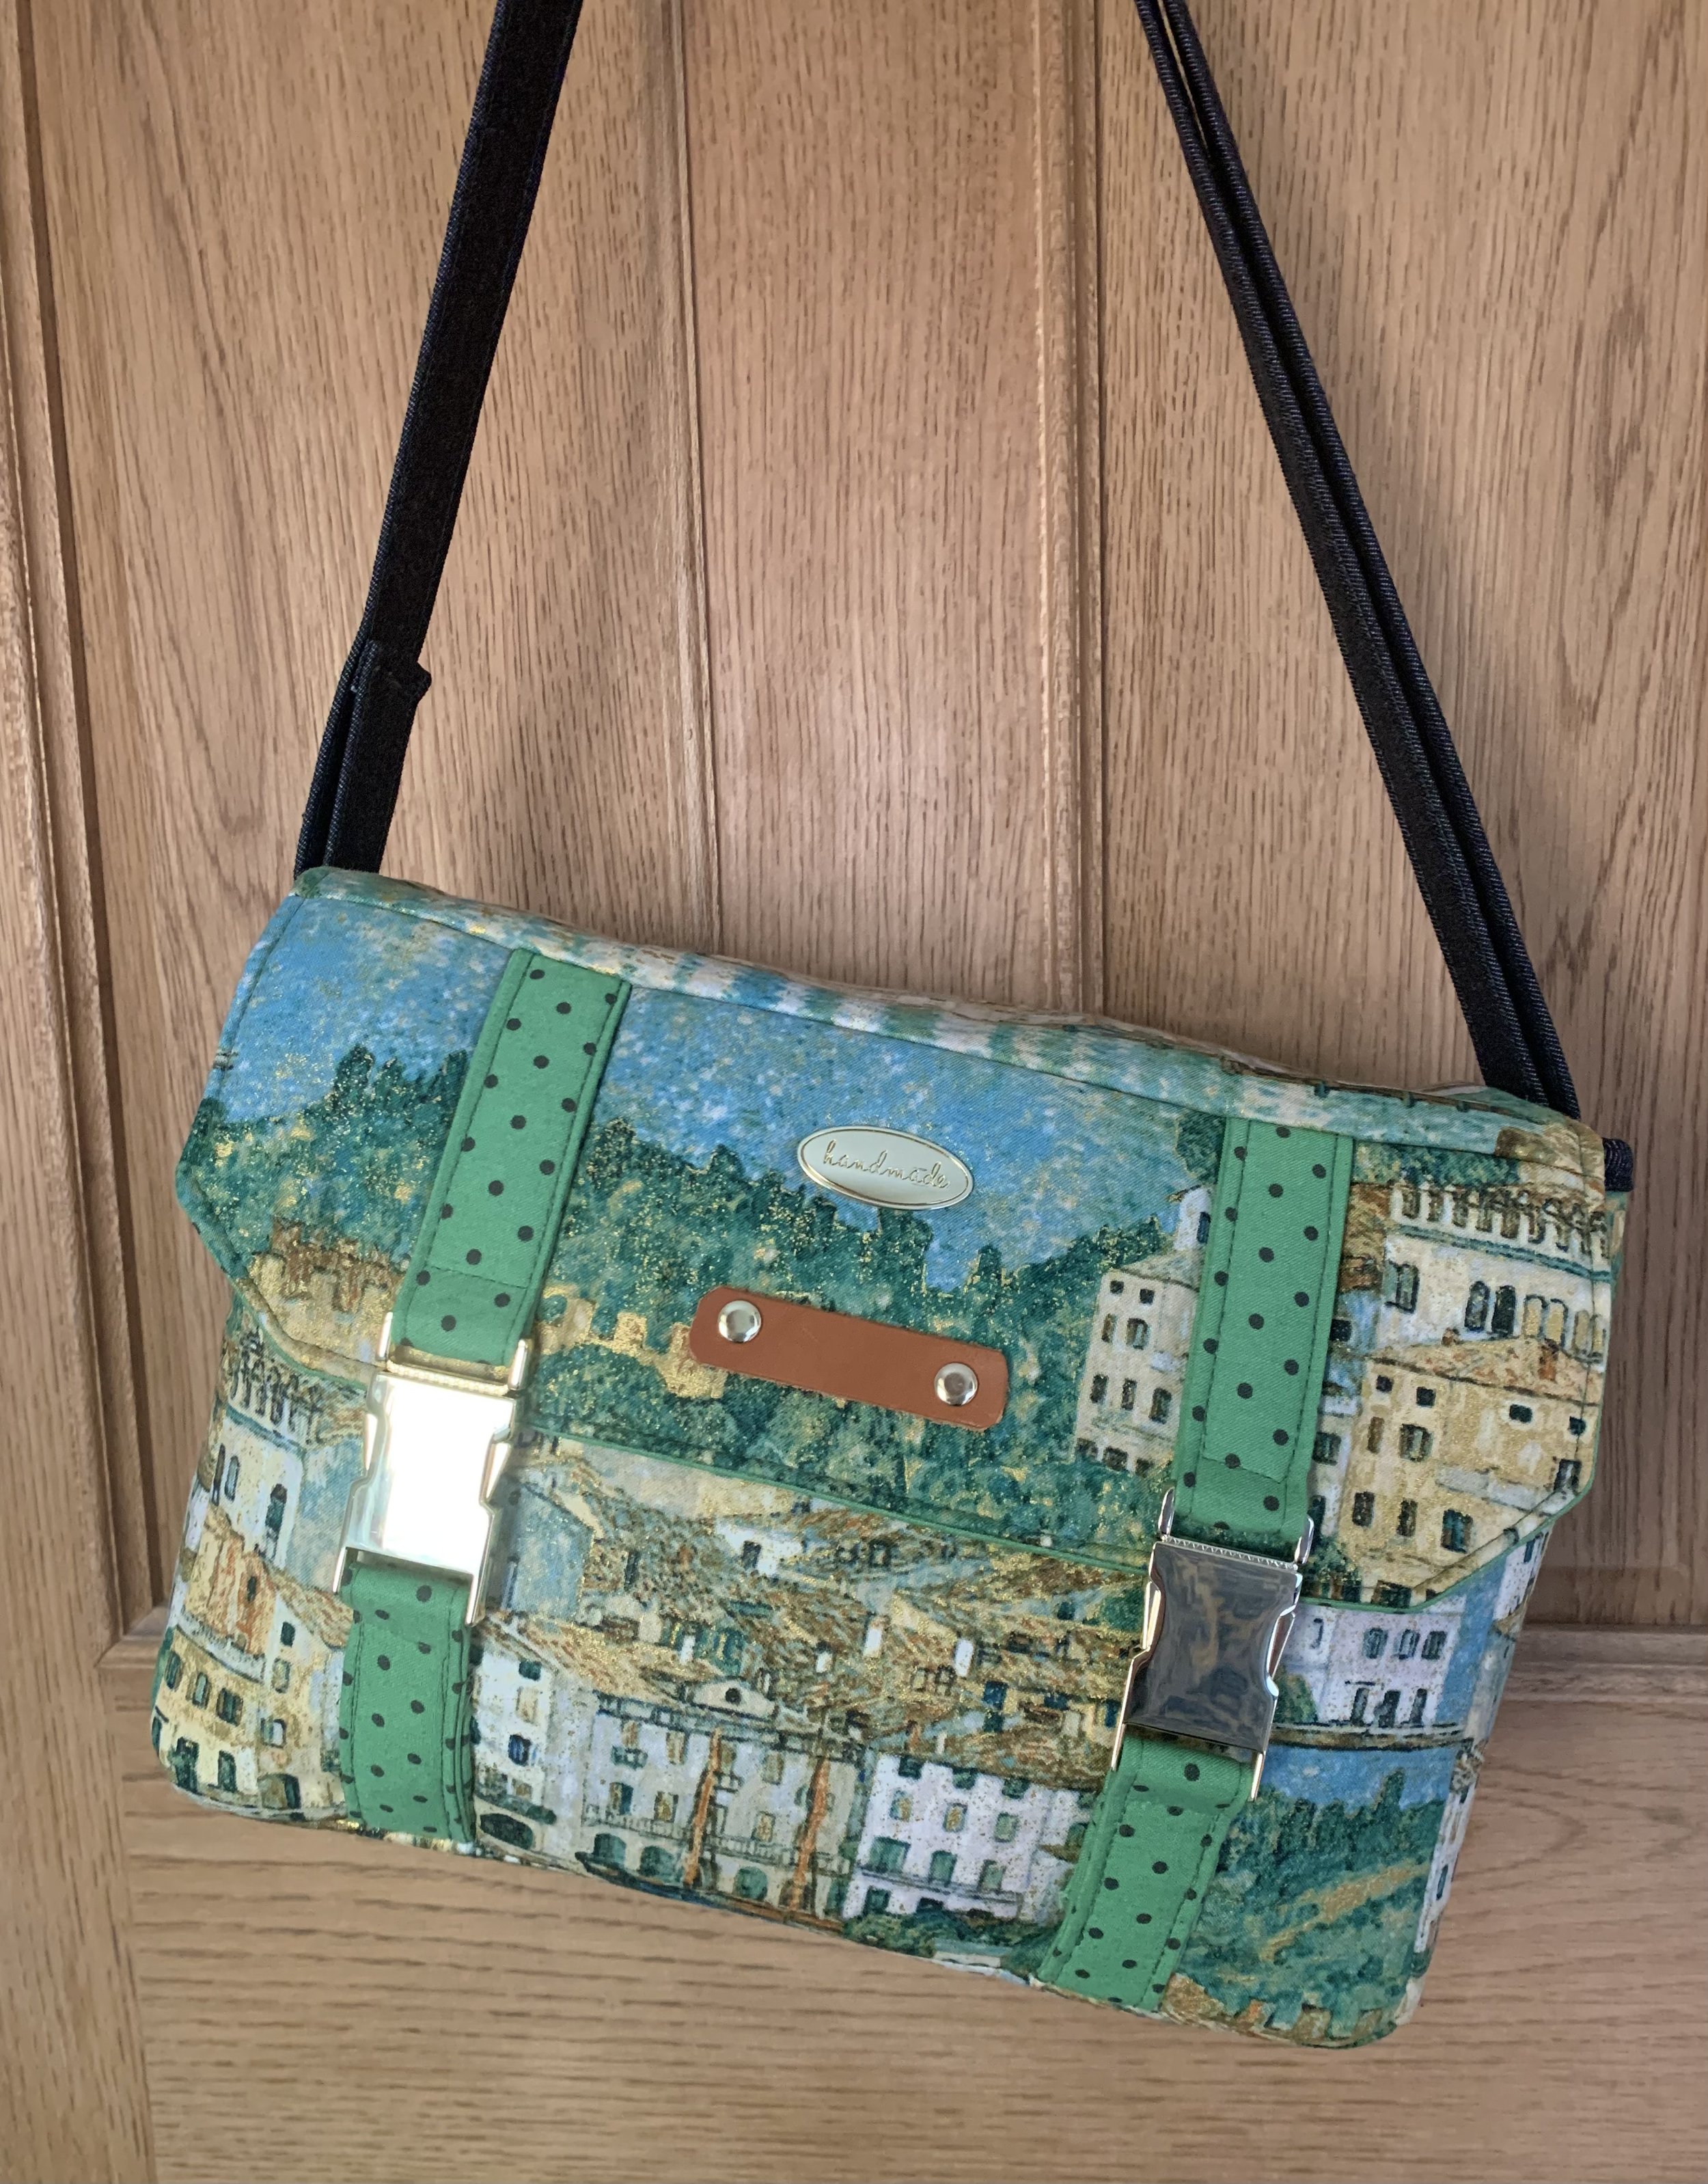
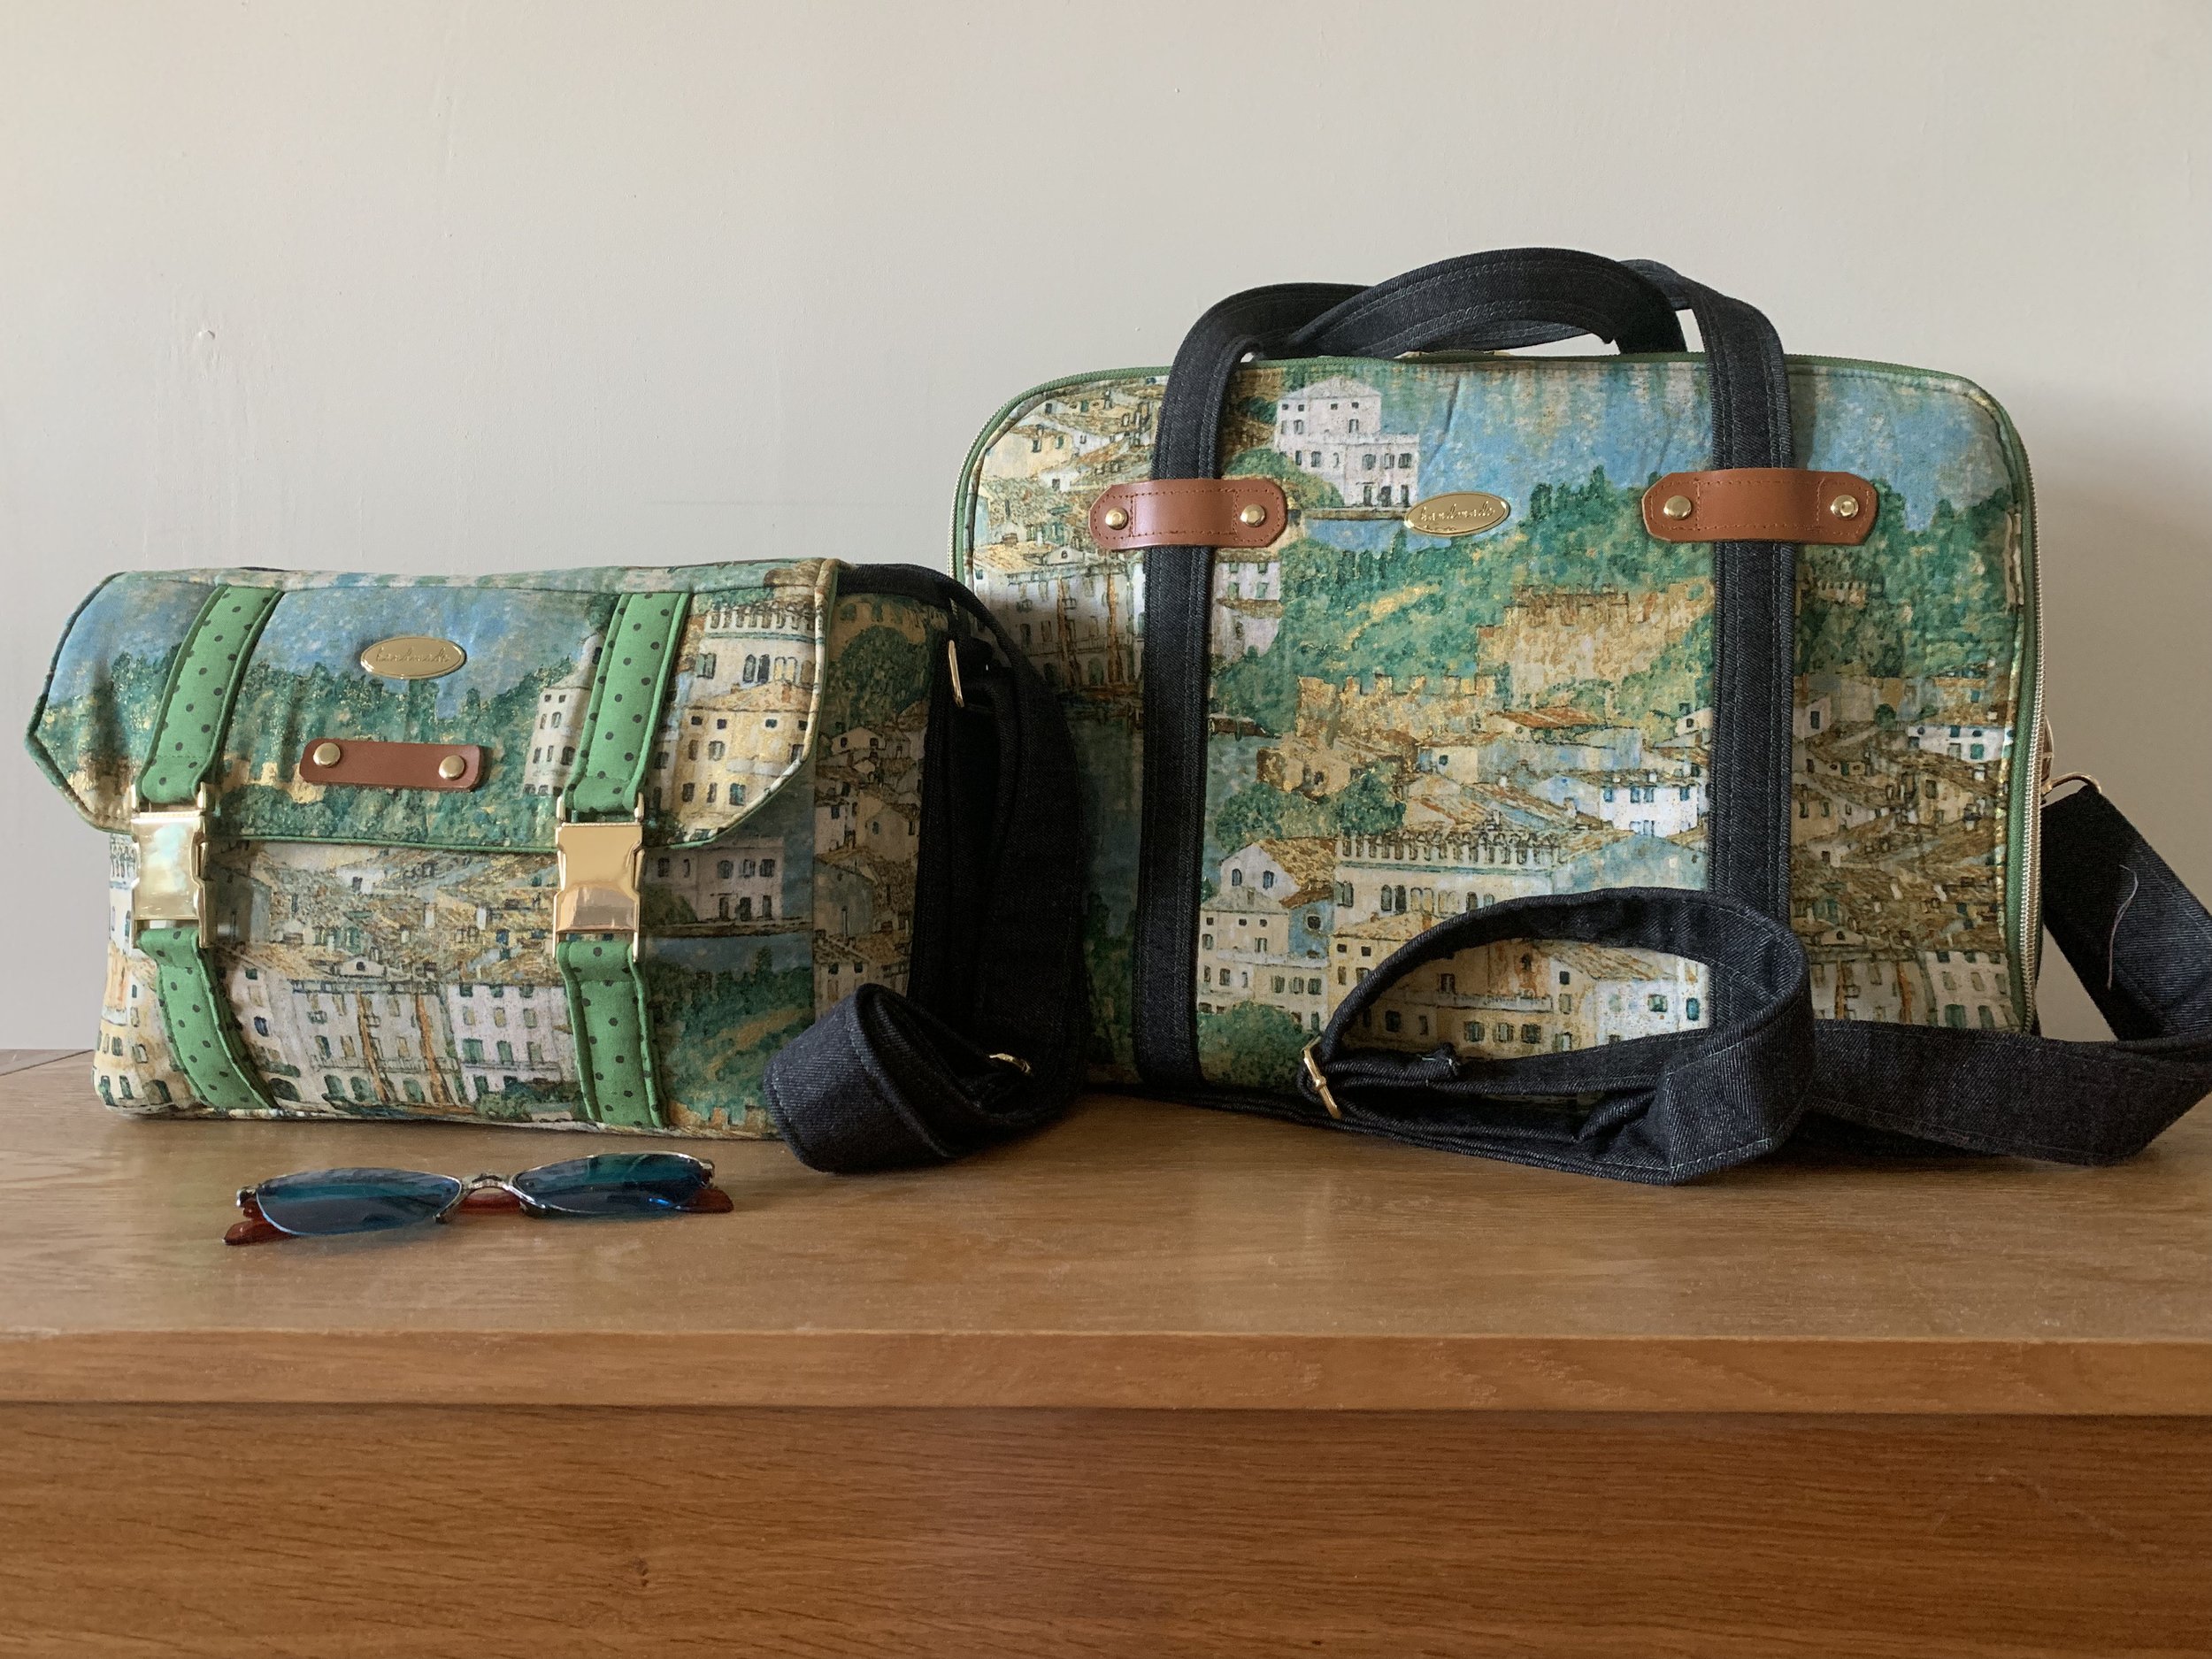
It actually looks pretty good and the inside is just perfect. I think these patterns are so cleverly thought out and there are design elements that I would never have thought about if I had tried to do this on my own. It’s a casual camera bag that can hold extra stuff too, so perfect for holidays and days out. It feels light and compact to carry and I love that I can keep everything to do with my camera altogether. These projects are always a challenge but I found this such a satisfying bag to make. I am just thrilled to bits with it and when you put the two bags together, well…. I just need that villa in the South of France now!

I am so delighted with the combination of these projects that I have another smaller project planned for the new year with another Sewsweetness pattern and the left over scraps of fabric….so look out for that after Christmas. Meanwhile, see you next time.
Ruby xx
For my posting on the ‘Triple threat briefcase’ click here
For Sew Sweetness (pattern and video) click here
For Sew Hot (hardware and supplies) click here
For my other bag making projects click here